
To secure footage before returning a rental car after an accident, start by thoroughly documenting the scene with clear photos from multiple angles, including damage, license plates, and landmarks. Collect witness contact info and record their accounts. Retrieve footage from built-in cameras or surveillance devices quickly, ensuring it’s clear and complete. Backup all files securely and verify that footage is unaltered. If you keep going, you’ll discover essential steps to protect your evidence effectively.
Key Takeaways
- Access the device promptly using vendor dashboards, apps, or by connecting directly to retrieve high-resolution footage.
- Confirm footage quality, completeness, and timestamp accuracy before returning the vehicle.
- Backup all relevant videos and images to external storage or cloud to prevent data loss.
- Document the process of securing footage, including device details and transfer methods.
- Ensure footage remains unaltered and properly stored for legal or insurance purposes.
Assess the Scene and Capture Initial Photos

When you arrive at the scene of a rental car accident, your first priority should be ensuring everyone’s safety. Check all involved parties for injuries immediately after stopping your vehicle. Assess yourself and passengers for pain, bleeding, or mobility issues first. Call emergency services if serious injuries, like fractures or spinal problems, are suspected. Avoid moving injured persons unless there’s an immediate danger. Once safe, evaluate the surroundings—move your vehicle to the side of the road if possible, away from traffic. Confirm the area’s safe before proceeding. Take clear photos of the entire scene from multiple angles, including vehicle positions, license plates, and notable damage. Record the date, time, location, and weather conditions. Collect witness contacts if available, preserving vital evidence before anything changes. Documenting the scene promptly is essential for insurance claims and legal purposes. Additionally, ensure your camera or phone settings are optimized for high-quality images, so details are captured clearly for future reference. Familiarizing yourself with home safety tips can help you stay prepared for emergencies beyond just vehicle accidents. Being aware of net worth concepts can also help you understand the value of documenting damages and potential claims. It’s also helpful to review insurance policies beforehand to know what documentation may be required for claims. Knowing how to use drone footage can further enhance your evidence collection if appropriate and permitted in the situation.
Document Vehicle Damage and Surroundings Thoroughly

After ensuring everyone’s safety and securing the scene, focus on thoroughly documenting the vehicle damage and surroundings. Use your smartphone or camera’s highest resolution to capture clear, multi-angle photos of all visible damage, including close-ups with reference objects like rulers or credit cards to show size and depth. Take wide shots to provide context. Record interior damage, such as airbags and upholstery, from multiple angles, including odometer readings. Make detailed video walkthroughs, narrating damage and noting identifiers like license plates or logos. Photograph environmental conditions—lighting, weather, road surface—that could impact damage visibility. Capture nearby objects or conditions that might explain damage sources. Immediately upload all media to cloud storage and create a detailed evidence log to preserve and organize your findings. Proper documentation is essential for insurance claims, and utilizing damage assessment apps can help streamline this process and ensure you don’t miss any critical details. Incorporating secure storage methods for your evidence can prevent data loss and maintain integrity throughout the claim process. Remember, understanding vehicle weight and its impact can also be useful if the damage relates to improper handling or transportation.
Identify and Record Relevant Landmarks and Road Conditions

To accurately document the scene, it’s essential to identify and record relevant landmarks and road conditions that can help establish location and context. Focus on details that can verify where the accident happened and what the environment was like.
Document landmarks and road conditions to verify the accident location and environment.
- Capture street signs, nearby buildings, or distinctive landmarks like bridges to pinpoint the exact location.
- Photograph any mile markers, highway exits, or nearby intersections to provide precise reference points.
- Record environmental factors such as weather conditions, lighting, and road surface state—wet, icy, or debris-covered—that might influence the accident.
- Remember that visual evidence can be crucial in supporting your claim and clarifying the circumstances of the crash. Additionally, noting traffic flow and vehicle positions at the scene can offer valuable insights for reconstruction.
These details not only help in reconstructing the scene but also strengthen your claim if you need to file an insurance or legal claim later. Be thorough and systematic in your documentation.
Gather Contact Information and Witness Statements

Gathering contact information and witness statements right after documenting landmarks and road conditions helps build a clear picture of the scene. You should request each witness’s full name, current phone number, email, and residential or mailing address for follow-up. Note their relationship to the parties or vehicles involved, such as bystander, passenger, or driver, to assess possible bias. When practical, obtain their driver’s license number and issuing state for verification. Ask for the best way and time to contact them later, and confirm their consent to be contacted. Record a brief verbal account immediately, capturing details like time, location, and observable actions. If possible, get a signed, dated statement from witnesses and note any objective observations, such as injuries or vehicle signals. Additionally, consider using additional documentation methods like photographs or videos to strengthen your case, and ensure you understand insurance claim procedures to properly report the incident. Knowing how to secure footage from nearby cameras or devices before returning the vehicle can also be crucial in establishing the facts of the accident. It is also advisable to be aware of video evidence preservation techniques to prevent footage from being overwritten or lost, especially when dealing with digital storage devices that may automatically delete older data.
Safely Retrieve and Store Footage From Surveillance Devices
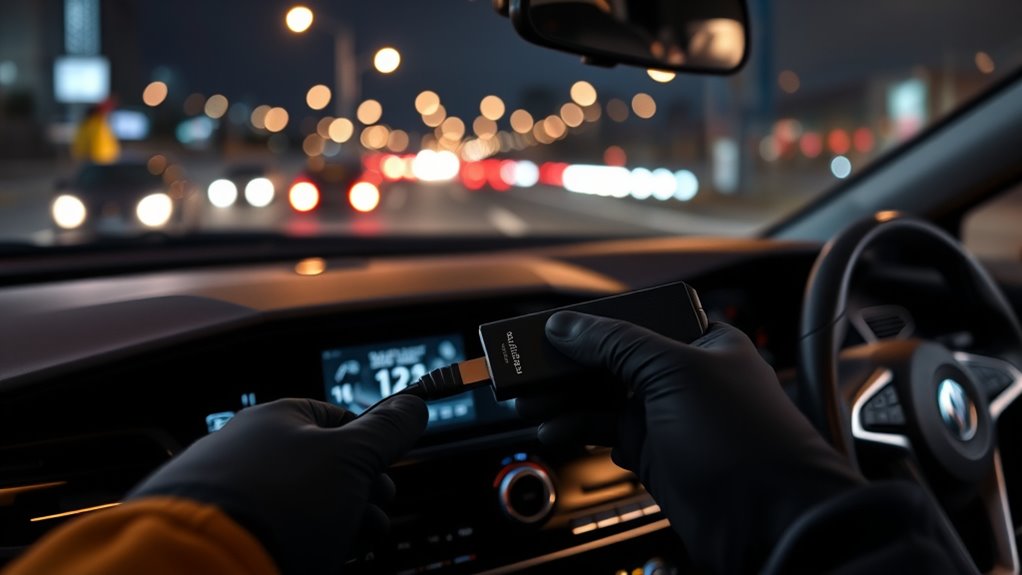
Safely retrieving footage from surveillance devices requires understanding the specific equipment and access methods involved. First, identify the type of device—whether it’s a cloud-based dashcam, local DVR, or a manufacturer app. Then, follow these steps:
- Use vendor dashboards or apps to remotely download footage, guaranteeing you select the correct date, time, and event clips.
- For local systems, connect directly to the recorder via HDMI or VGA, then export clips to USB or external drives.
- For portable dashcams or personal cameras, remove the storage medium or connect via Wi-Fi/Bluetooth to transfer files securely.
- Understanding the device’s interface and features can greatly streamline the retrieval process. Always clone original media before playback, verify retention policies, and record file details like timestamps and GPS data. This assures footage stays intact and admissible, especially when dealing with device compatibility and different storage formats. Additionally, familiarizing yourself with low light conditions and how your device performs under them can help ensure you do not miss critical footage during retrieval. Properly understanding video resolution and recording quality can also influence the clarity and usability of the footage obtained. Moreover, knowing the horsepower of electric dirt bikes can help you better explain the context if footage involves vehicle performance.
Frequently Asked Questions
Can I Access Surveillance Footage Without the Property Owner’s Permission?
You generally can’t access surveillance footage without the property owner’s permission. Laws typically keep control of recordings with the owner or operator, and you need their consent or a legal order like a warrant or subpoena. Exceptions include emergencies or court-ordered disclosures. Even then, access might be limited, and attempting to bypass restrictions could lead to legal trouble. Always pursue proper legal channels to obtain footage lawfully.
How Long Is Surveillance Footage Typically Stored Before Deletion?
Surveillance footage is typically stored for 7 to 90 days before it’s deleted, depending on the property’s policies and storage methods. Smaller businesses often keep footage for about two weeks, while larger organizations or those with stricter security needs may retain it for several months. If you need footage for an incident, act quickly and request preservation before the retention period ends, as deletion often occurs automatically afterward.
Is There a Legal Way to Request Footage From Private Security Cameras?
Did you know private businesses often recycle footage within 30 to 90 days? You can’t directly request security camera footage from private owners without legal steps. To obtain it, you’ll need a subpoena or court order through legal channels. Sometimes, law enforcement can access footage with a warrant. Remember, private owners aren’t obligated to share recordings voluntarily, so acting swiftly and consulting an attorney improves your chances of securing the footage.
What Should I Do if Surveillance Footage Is Missing or Inaccessible?
If surveillance footage is missing or inaccessible, act quickly by confirming the typical retention period and documenting your efforts to retrieve it, including timestamps. Submit a written preservation request to the custodian via certified mail, requesting immediate export of the footage. Notify your insurer and legal counsel promptly. If needed, file a subpoena or court order to compel production, and consider gathering alternative evidence like nearby cameras, witness videos, or vehicle data to support your case.
Are There Specific Procedures to Follow When Retrieving Footage From Police or Public Cameras?
When retrieving footage from police or public cameras, you need to act quickly. Contact law enforcement or transportation agencies with details like the date, time, and location of the incident. Submit formal requests through official channels, and involve your attorney if needed. Law enforcement handles official requests, so cooperate fully and provide all necessary information promptly to guarantee footage isn’t deleted before you secure it.
Conclusion
By boldly backing up your basics—documenting damage, diligently gathering details, and securing surveillance—you’ll safeguard your scenario and stay steps ahead. Taking these tactical steps guarantees you won’t wander without witnesses or footage when it counts most. Remember, swift snapshots and systematic storage serve as strong safeguards, simplifying your situation. Stay sharp, stay secure, and seize the scene—so your story stays solid and your settlement stays smooth.