
To safely remove the A-pillar trim with airbags, start by disconnecting the vehicle’s battery, waiting 10-15 minutes to let the SRS system discharge. Carefully pry off small trim caps and clips using plastic tools, avoiding sharp leverage. Identify airbag locations by looking for embossed markings or yellow wiring. Follow proper wiring routing during reassembly, secure all clips and fasteners, and double-check system functions. Continuing will reveal detailed steps to guarantee your safety throughout the process.
Key Takeaways
- Disconnect the vehicle battery’s negative terminal and wait 10-15 minutes for SRS capacitor discharge before starting removal.
- Carefully identify airbag zones using markings or panel gaps, and avoid drilling or cutting into deployment areas.
- Use plastic trim tools and gentle, controlled force to disengage clips, preventing damage to trim and airbag components.
- Follow manufacturer guidelines for wiring routing, keeping wires away from deployment zones and heat sources during reinstallation.
- Verify proper system function and clear fault codes after reassembling to ensure safety and correct airbag operation.

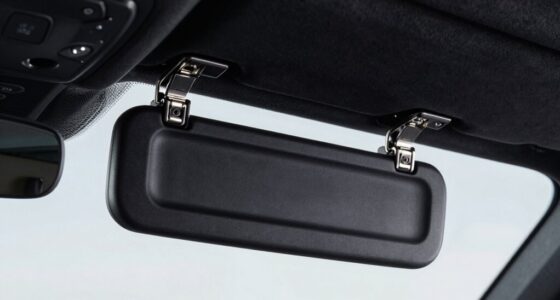
omuachip 7 Pcs Car Trim Removal Tool Kit with Non-Scratch Plastic Pry Tool and Fastener Clip Pliers, Car Trim Removal Tool, for Auto Interior Car Panel Detachment, Dashboard, Door Clips & Upholstery
1.PROFESSIONAL Trim Removal Tool Kit:1 pcs trim clip removal pliers, 2 pcs fastener removal tool and 4 pcs…
As an affiliate, we earn on qualifying purchases.
As an affiliate, we earn on qualifying purchases.
Understanding the Role of A‑Pillar Trims and Airbags
Understanding the role of A-pillar trims and airbags is essential for appreciating vehicle safety and design. The A-pillar connects the windshield corners to the roof, providing critical support against collapse during crashes. It maintains cabin integrity in frontal, offset, pole, and rollover collisions by absorbing impact energy with high-tensile steel, helping keep occupants safe. It also links to the front header, side rail, and B-pillar, contributing to overall frame stability. A-pillars prevent roof deformation in rollovers, which cause 35% of passenger fatalities, despite representing only 2% of crashes. They manage energy transfer during impacts and carry large loads to minimize deformation. Additionally, A-pillars house side curtain airbags, protecting heads during side impacts, with trim designs optimized for impact conditions and compatibility with airbag deployment. Modern manufacturing techniques and materials have enhanced the strength and safety features of A-pillar components, ensuring better protection without significantly increasing weight. Innovations in automotive safety systems have integrated A-pillar design improvements to better coordinate with other vehicle safety features. Incorporating innovative materials in A-pillar construction also contributes to improved crash performance and occupant protection. Furthermore, ongoing research into crashworthiness continues to drive advancements in A-pillar design and safety features.

XBRN Auto Trim Removal Tool Kit,13 Pcs Car Panel Door Window Tools Kit,Auto Clip Fastener Remover Pry Tool Set Blue
5 Pack Trim Tools Kit : There are 5 pcs different kinds of trim tools, including 4 pcs…
As an affiliate, we earn on qualifying purchases.
As an affiliate, we earn on qualifying purchases.
Preparing Your Workspace and Gathering Essential Tools

Before starting any A-pillar trim removal, you need to prepare your workspace carefully. First, clear a minimum of 6 square feet around the driver and passenger doors to allow easy panel access and tool placement. Second, set up a dedicated work surface with magnetic trays or labeled containers to keep fasteners and small parts organized. Third, guarantee bright, shadow-free lighting—an LED work light with 2,000–4,000 lumens helps you identify clips, screws, and SRS labels clearly. Additionally, position the vehicle on a stable, level surface with parking brake engaged and wheels chocked to prevent movement. Good lighting is essential for accurate work and avoiding mistakes. Proper illumination reduces the risk of damaging delicate components or missing critical safety labels. Good ventilation is also crucial; open doors or use a fan when working with adhesives or cleaners to avoid inhalation risks. Proper ventilation helps maintain a safe working environment and prevents the buildup of harmful fumes. Incorporating workspace organization techniques, such as keeping tools within reach and clearly labeling components, can further streamline the removal process. Proper preparation ensures efficiency and safety throughout the removal process. Proper workspace setup is critical for minimizing errors and ensuring a smooth removal experience.

Poraxy 19Pcs Trim Removal Tool, Car Panel Dashboard Door Audio Trim Removal Tool Kit, Auto Clip Pliers Fastener Remover Set, Plastic Pry Tool, Automotive Upholstery Removal Kit
19 Pcs Trim removal tools – Works great for car audio/radio system installing or removing, door panel, moldings,…
As an affiliate, we earn on qualifying purchases.
As an affiliate, we earn on qualifying purchases.
Safely Disconnecting the Vehicle’s Battery and SRS System
To safely disconnect the vehicle’s battery and disable the SRS system, start by turning off the ignition and removing the key to eliminate electrical power. Then, disconnect the negative (battery ground) terminal first to reduce short-circuit risk. Wait the OEM-specified 10–15 minutes for SRS capacitors to discharge before touching airbag components. Keep all remote fobs at least 15 feet away to prevent reactivation signals. Use insulated tools and secure removed cables away from metal contact. Follow the table below to ensure proper procedures:
| Step | Action |
|---|---|
| 1 | Turn off ignition and remove key |
| 2 | Disconnect negative terminal first |
| 3 | Wait 10–15 minutes for capacitor bleed-down |
| 4 | Keep remote fobs away from vehicle |
Always document the process for safety and troubleshooting. Additionally, understanding the importance of discharging capacitors can help prevent accidental airbag deployment during maintenance. Properly managing electrical hazards is crucial for safe handling during this process. Being aware of proper safety procedures is essential for avoiding electrical hazards during this process.

CrocSee 25ft – 1/2 inch Flame Retardant Split Wire Loom Tubing with Installation Tool – Flexible Wire Covers Cord Protectors – Black
Inner Diameter: 1/2 Inch | Length: 25 Feet | Material: Thick & flame retardant POLYPROPYLENE (PP), raw material…
As an affiliate, we earn on qualifying purchases.
As an affiliate, we earn on qualifying purchases.
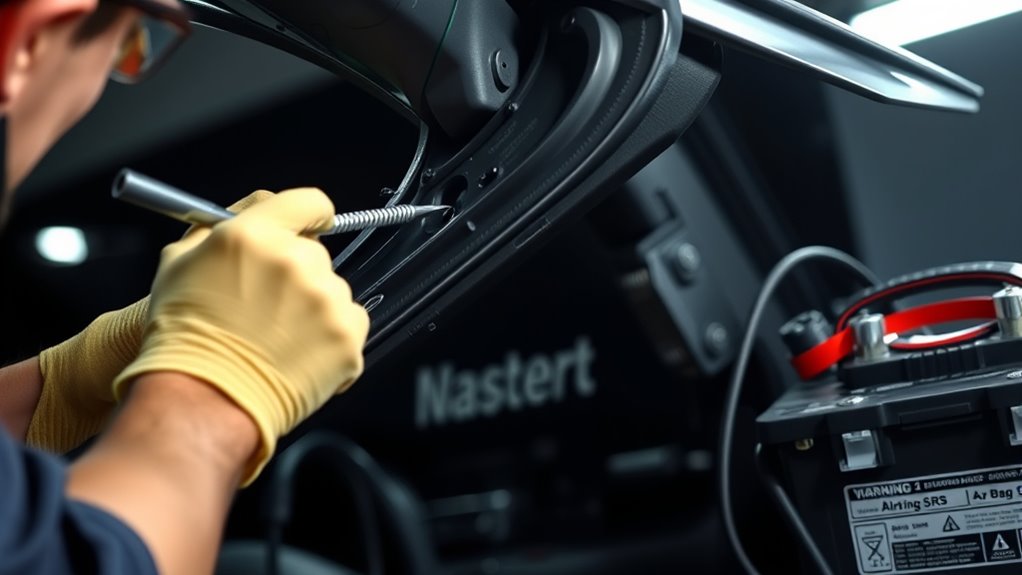
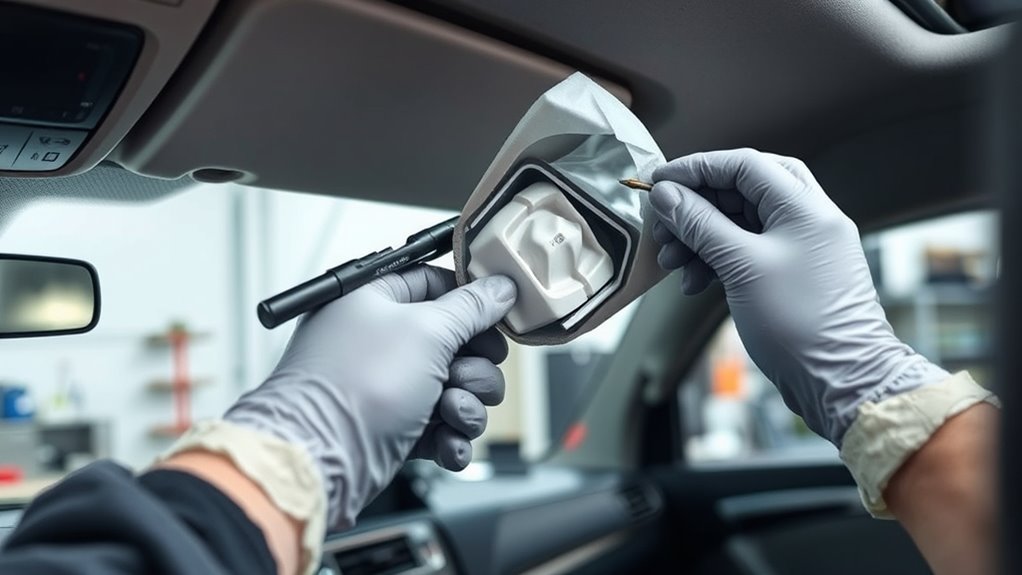
Identifying Airbag Locations and Handling Precautions

Identifying airbag locations behind the A‑pillar requires careful observation of visual and tactile cues. Look for *AIRBAG*, *SRS*, or similar embossings on the trim, which often signal an airbag path. Notice seams, embossed markings, or panel gaps at the top of the A‑pillar or roof rail—these can indicate deployment zones or breakpoints. Use these key clues: 1. embossed markings on the trim or panels 2. Seams or directional grain changes at the top of the A‑pillar 3. Wiring harnesses, connectors, or clips near the A‑pillar, especially yellow-sheathed wiring. Always handle these areas with caution. Treat all yellow SRS connectors as live until confirmed de-energized, and avoid drilling or cutting into suspect trim sections to prevent accidental deployment or injury. Knowing the locations of airbags behind the A-pillar helps prevent accidental deployment during removal.
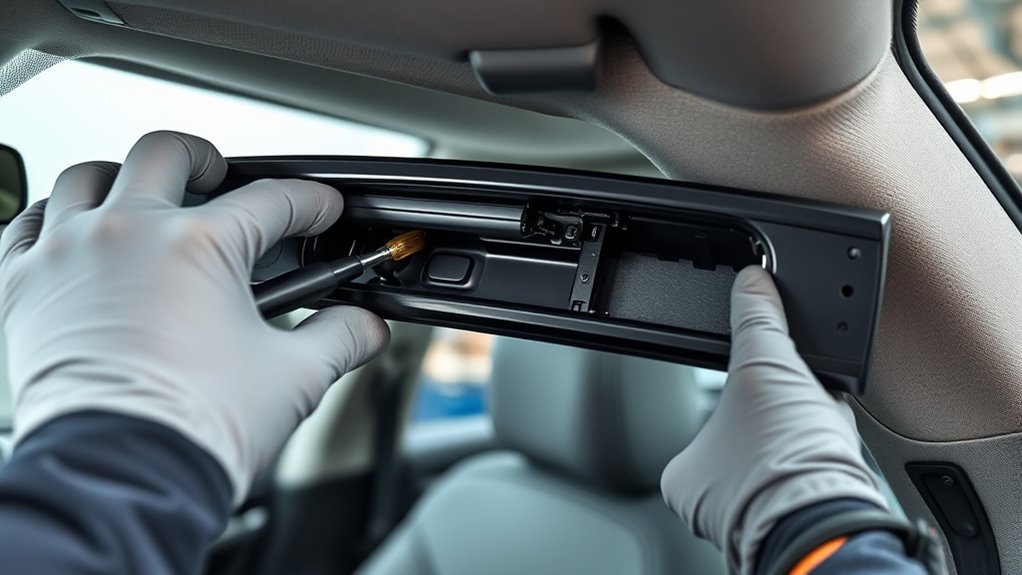
Removing the A‑Pillar Trim Step-by-Step
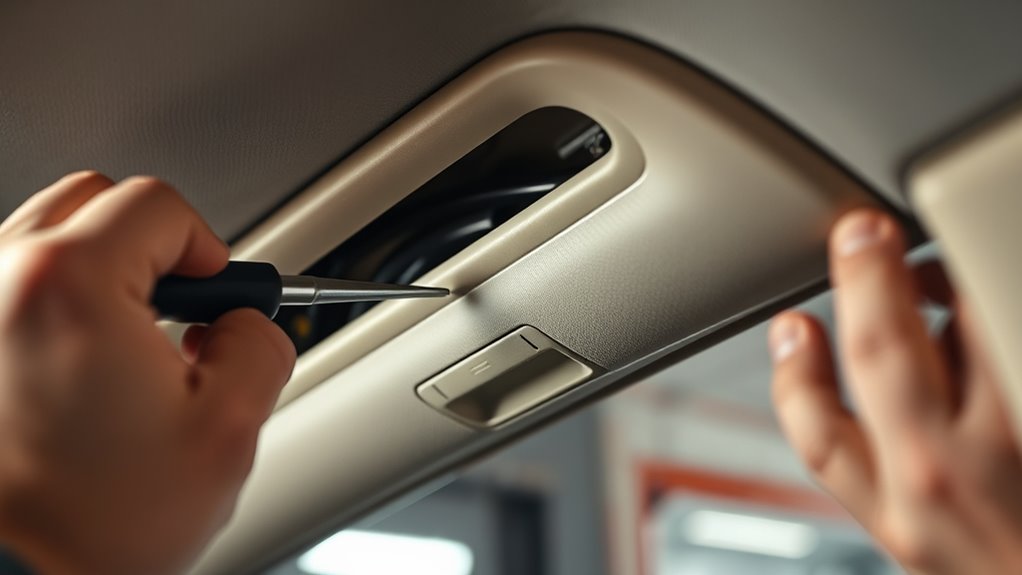
Before starting, make sure you have your safety equipment ready, including gloves and eye protection. Carefully disengage each fastener, working slowly to avoid damaging clips or wiring, and keep track of all fasteners for reinstallation. As you remove the trim, pay close attention to wiring routes to prevent pinching or disconnecting any cables accidentally. Additionally, consulting a safety checklist can help ensure you don’t overlook any important precautions during the removal process. Remember that understanding smart home technology can also assist in troubleshooting if any issues arise during reinstallation. Familiarizing yourself with field‑of‑view and imaging‑scale concepts from deep-sky imaging can also improve your awareness of spatial relationships when handling complex wiring or components. Being aware of cookie categories and their functions can help you better manage your browsing experience during online research or troubleshooting.
Prepare Safety Equipment
Preparing your safety equipment is an essential first step before removing the A-pillar trim. You need to protect yourself from potential hazards like sharp edges, debris, and accidental airbag deployment. Start by gathering:
- Safety glasses to shield your eyes from springing clips and debris.
- Cut-resistant gloves to prevent cuts from sharp sheet metal edges.
- Long-sleeve coveralls or a shop coat to avoid contact with insulation fibers or adhesives.
- Proper safety protocols to ensure all procedures are followed correctly and safely when working with vehicle components.
If power tools or hammering are involved, add hearing protection. When handling airbag components, wear insulated, non-conductive gloves and disconnect the negative battery terminal, waiting the manufacturer’s recommended time before proceeding. This helps prevent accidental airbag deployment, which can cause injury. It is also advisable to consult your vehicle’s service manual to understand specific airbag safety procedures and avoid accidental deployment. Following manufacturer guidelines can also help prevent damage to sensitive components, including the airbag system, which is crucial for vehicle safety.
Additionally, familiarize yourself with navigation and mapping techniques to carefully remove trim without damaging surrounding parts. Label the battery disconnect to prevent reactivation and keep the key away. Proper PPE minimizes risk and ensures a safer working environment.
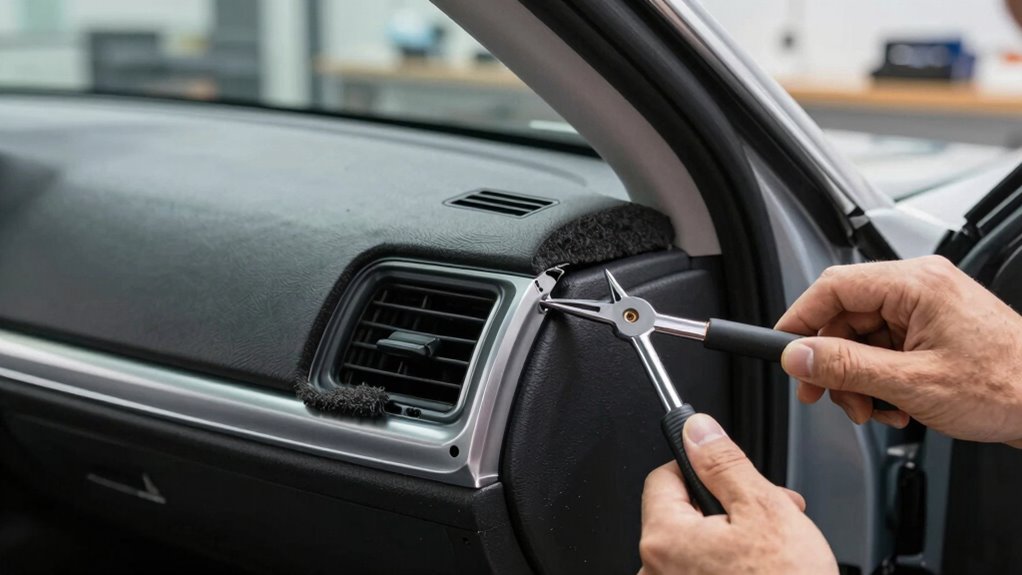
Disengage Fasteners Carefully
To disengage fasteners effectively, start by carefully examining the type of clips or bolts securing the trim. Look for plastic covers or caps hiding fasteners—many OEMs conceal Torx or plastic clips beneath these. Use a plastic trim tool or a flat-blade wrapped in tape to avoid scratching the surrounding area. Apply even, controlled force at the seam, avoiding sharp or sudden leverage that might break clip bosses. For hook-style fasteners, rotate them 90° to disengage the latch instead of pulling straight out. Remove small trim caps first to access Torx or Phillips screws, then back out fasteners fully, keeping them organized in a labeled tray. Always verify the airbag module location and stay clear of the airbag zone during removal. Proper identification of fastener types is essential to prevent damage and ensure a smooth removal process. Additionally, understanding the types of fasteners commonly used can help prevent accidental damage or misplacement during reinstallation. Recognizing the fastener removal sequence can also streamline the process and reduce the risk of damaging delicate components. Being aware of the cost of repair or replacement for damaged fasteners can motivate careful handling during removal.
Route Wiring Properly
Begin by planning your wiring route carefully to guarantee safety and reliability. Focus on these key steps:
- Follow factory wiring channels and factory clips, avoiding sharp bends or contact with moving parts.
- Keep wires on the outboard side of the airbag module, steering clear of deployment zones and inflator areas.
- Use service loops at the top and bottom of the pillar to prevent tension during door or steering wheel movement.
- Check vehicle-specific wiring diagrams to ensure your routing does not interfere with any critical systems or safety features. Proper wiring management helps prevent future issues and simplifies troubleshooting. Additionally, using corrosion-resistant connectors can enhance longevity and maintain electrical integrity over time.
- Consider using protective conduit to shield wires from abrasion and environmental damage over time. Secure wires with non-metallic ties and adhesive-backed clamps, and install rubber grommets where wires pass through metal or plastic openings. Avoid routing through heat sources like HVAC ducting or hot engine parts. Proper planning guarantees the wiring remains safe, functional, and unobtrusive, preserving the vehicle’s integrity and safety during and after installation. Additionally, utilizing quality wire reduces the risk of electrical failures over time. Incorporating proper labeling throughout your wiring process can also assist with future diagnostics and repairs.
Routing Accessories and Wiring Safely During Panel Removal
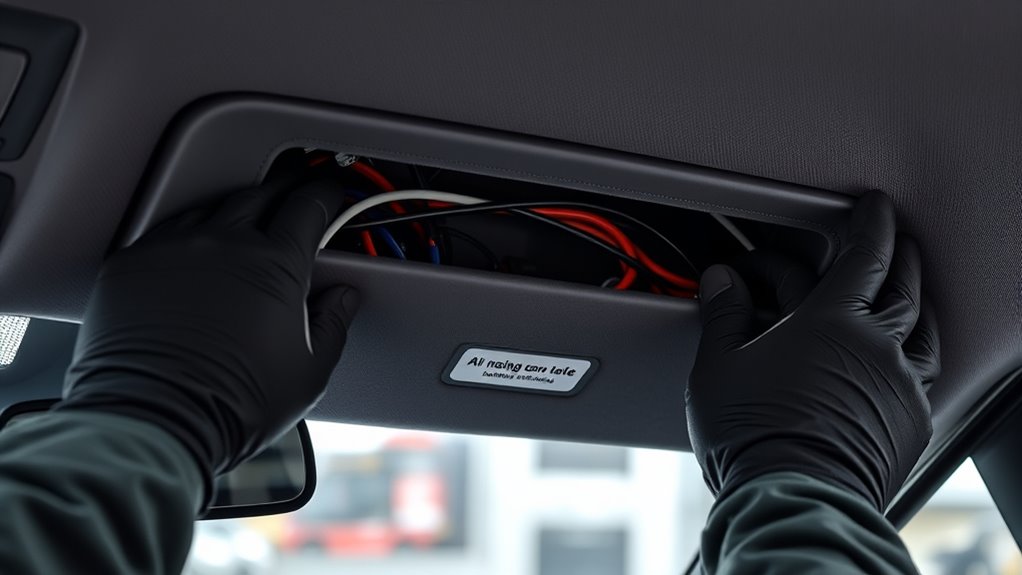
Routing Accessories and Wiring Safely During Panel Removal
When routing accessories and wiring during A-pillar trim removal, it’s essential to prioritize safety to prevent accidental airbag deployment or damage. Start by routing wires behind the airbag module to keep the wiring neat and safe. Use existing harness paths to secure wires, avoiding interference with airbag deployment areas. When fishing wires through side ceiling vents or other tight spaces, do so gently to prevent damage. Secure wires with clips or zip ties, ensuring they stay in place during reassembly. Keep wires away from heat sources and moving parts. If necessary, drop the headliner for better access and routing. Always double-check that wiring is clear of any sharp edges or stress points that could cause damage over time, maintaining a safe and factory-like appearance. Proper wiring techniques help ensure both safety and functionality during the installation process, and understanding airbag safety protocols is crucial for safe handling during panel removal.
Reassembling the Trim and Ensuring Proper Fitment

Start by securing all clips and fasteners properly to guarantee the trim stays in place. Next, carefully align the trim components to match the pillar’s contours for a seamless fit. Using the correct replacement clips can help prevent future loosening. Finally, test the airbag system to confirm everything functions correctly after reassembly.
Secure Clips and Fasteners Properly
Ensuring clips and fasteners are properly secured during reassembly is essential for a safe and professional finish. Properly engaged clips prevent rattles, gaps, and potential airbag interference. To do this effectively, focus on these key steps:
- Verify clip compatibility with trim and pillar dimensions before installation to avoid overcompression or loose fit.
- Hand‑seat clips first, then apply uniform pressure from top to bottom for full engagement.
- Check for a clear “click,” flush trim surfaces, and no gaps along the pillar edge to confirm proper fastening.
- Using a torque wrench, tighten bolts to OEM specifications to avoid deforming clips or damaging trim.
Additionally, select OEM or rated clips suited for temperature and UV exposure, inspecting each for damage before installation.
Align Trim Components Accurately
Properly aligning trim components is essential for a seamless and professional finish. Begin by positioning the lower A-pillar trim into the vehicle before securing clips and tabs. Ensure the tab on the trim aligns with the dashboard slot before fully inserting it. Make sure the bottom vent slides into its receptacle during reinstallation. Pull back the top trim slightly, then insert a trim tool to release any catches, allowing correct alignment. Line up the hook on the trim with the slot in the instrument panel to ensure proper seating. After positioning, secure the clips and tabs firmly. Wiggle the trim to seat it fully, checking for flush edges and even gaps. Adjust height and alignment as needed, using spacers or bending, to achieve a clean, tight fit.
Test Airbag System Post-Reassembly
After reassembling the trim, it’s critical to verify that the airbag system functions correctly before driving. You need to perform electrical checks, diagnostics, and mechanical assessments.
- Check continuity: Use a digital multimeter to verify each squib circuit resistance within manufacturer specs, ensuring no wiring faults.
- Scan for faults: Clear existing codes, then use a scan tool to read live data, confirming squib resistance, sensor status, and no new faults.
- Inspect fitment: Ensure trim fasteners, clips, and mounting brackets are correct, with no interference or misalignment that could affect deployment or wiring routing.
Performing these steps guarantees the system’s integrity, preventing deployment issues and ensuring occupant safety during an incident.
Final Checks and Clearing Diagnostic Trouble Codes

Have you completed the physical inspections and confirmed that all trim components, clips, and wiring connections are secure and free of damage? Make sure there are no cracks, deformations, or stress-whitened areas on the trim and clips. Check that all clips are properly seated and undamaged, and verify that fastener locations are intact. Confirm the airbag wiring harness is secure and undamaged. Additionally, ensure that the vehicle’s battery has been disconnected for at least five minutes to prevent accidental airbag deployment during reassembly. Before reinstallation, verify no deformities or cracks exist, and all clips are firmly seated. Once everything is in place, use your vehicle’s diagnostic scanner to clear any stored DTCs, following manufacturer procedures. After clearing codes, scan again to confirm no faults remain, then perform a system test to ensure airbags and related components function correctly. This step guarantees your repair is complete and safe.
When to Seek Professional Assistance and Safety Reminders
Handling A-pillar trim removal involves working near sensitive airbag components and complex wiring, which can pose serious safety risks if not done correctly. You should seek professional help if:
- You’re unsure how to disconnect airbags safely or encounter unfamiliar wiring.
- Your vehicle has advanced or model-specific safety features, like those in 2019–2026 GM trucks or Teslas.
- You notice warning signs such as cracks, rattles, or airbag warning lights during or after removal.
DIY tools like screwdrivers and makeshift prying can damage wiring or trim, increasing injury risk. If you doubt your skills or face complex components, it’s best to leave the task to certified technicians. Safety and proper reinstallation depend on expert handling of airbags and wiring.
Frequently Asked Questions
How Can I Identify if My Vehicle Has an Airbag in the A-Pillar?
You can tell if your vehicle has an A-pillar airbag by checking for specific markings labeled “Air Bag” or “SRS” on the trim, even if no actual airbag is present. Look for distinctive trim designs or seatbelt shapes indicating airbags. Use your VIN, manufacturer lookup tools, or OBD2 scanners to confirm airbag presence. Also, inspect for mounting brackets or part numbers that match airbag specifications.
What Are the Risks of Improper Airbag Handling During Trim Removal?
Handling airbags during trim removal is like walking a tightrope—you risk serious injury if you’re careless. You could cause accidental deployment, which might project sharp components or tools, injuring you or bystanders. Mishandling wiring or connectors can prevent proper deployment or trigger warning lights. Additionally, exposure to chemicals, propellant dust, or heat can cause burns, respiratory issues, or fires. Always follow safety protocols to avoid these dangerous consequences.
How Long Should I Wait After Disconnecting the Battery Before Working?
You should wait at least 15 to 30 minutes after disconnecting the battery before working on the vehicle, especially near airbags. This waiting period allows the vehicle’s ECUs and backup capacitors to discharge fully, reducing the risk of accidental airbag deployment or electrical damage. For safety, follow the manufacturer’s recommended wait time or opt for a conservative 30-minute delay if unsure, and always handle airbags carefully.
Can I Replace a Damaged Airbag Module Myself?
Think of replacing a damaged airbag module like handling a fragile glass sculpture—you can’t rush or ignore safety. Yes, you can replace it yourself, but only if you’re confident, have the right tools, and follow safety precautions precisely. You must disconnect the battery, wait at least 90 seconds, and use proper diagnostic tools. Otherwise, risks of accidental deployment or injury make professional help the safest choice.
What Are the Signs of a Faulty or Deployed Airbag in the A-Pillar?
You’ll notice a deployed or faulty A-pillar airbag if the dashboard or side curtain airbag warning light stays on, or if you see a physical tear, frayed wiring, or a deployed airbag module. You might also detect unusual noises when trying to activate the airbag system or experience warning chimes. If any of these signs show up, it’s essential to have the system inspected and repaired by a professional immediately.
Conclusion
As you carefully reassemble the A-pillar trim, imagine the smooth click of clips snapping into place, restoring the sleek silhouette of your vehicle. With each step, you’ve navigated a delicate dance around hidden airbags and sensitive wiring, like a skilled performer on a stage. When finished, you’ll see your work as a quiet guardian—protecting your vehicle’s integrity and your safety—ready to face the road ahead with confidence and peace of mind.