To fix wind noise, focus on mic placement rather than increasing volume. Position the microphone behind your sound source or shield it with clothing or barriers to block wind from hitting it directly. Use windshields like foam covers or furry wind protection for extra defense. Proper mounting and concealment also help reduce turbulence. If you want to learn more tips on timing, gear, and techniques to keep wind noise out of your recordings, keep going.
Key Takeaways
- Position microphones behind or perpendicular to the wind direction to minimize direct wind impact on the capsule.
- Conceal mics inside clothing, behind barriers, or within windshields to shield from turbulent airflow.
- Mount microphones securely and close to the sound source to reduce exposure to gusts and turbulence.
- Use appropriate wind protection gear like foam windscreens, furry covers, or blimps for effective wind noise reduction.
- Monitor real-time wind conditions and adjust mic placement accordingly to prevent wind artifacts rather than increasing volume.

Mini Body Camera with Audio and Video Recording, POV Camera with 64G Card Body Worn Cam ,Wearable Patrol Video Recording Camcorder With Night Version ,Camcorder for Security Work Records Traveling
【FHD 1080P Camera】Kaysunlink A18 body camera captures videos and photos in stunning FHD resolution. The Bodycam recorder is...
As an affiliate, we earn on qualifying purchases.
Understanding the Physics of Wind Noise
To understand wind noise, understanding how airflow interacts with a microphone is essential. When wind hits a microphone, it acts as an obstacle, causing air to stagnate and create pressure fluctuations known as the stagnation pressure mechanism. These fluctuations dominate outdoor recordings, even without actual sound waves, and tend to be stronger at lower frequencies, especially near the ground. Additionally, turbulent wind generates intrinsic pressure fluctuations, which are detected by infrasound sensors and combined with stagnation effects to produce wind noise. Microphone responses vary: pressure transducers add wind pressure directly, while pressure-gradient types respond to local differences. Turbulence distorts airflow around the mic, and the resulting pressure fluctuations interfere with audio, making wind noise a persistent challenge in outdoor recordings. Recognizing the aerodynamic interactions between wind and microphone design can inform better placement and protective measures to mitigate noise. Employing windshields and strategic positioning can significantly reduce wind-induced disturbances.

Meoilkolnm Mini Wearable Body Worn Action Camera, FHD 1080P, Thumb Size, Hands Free Recording with Premium Portable Camcorder Mount Anywhere for Security, Work, Guard, Travel, 128GB, Black
User Friendly: Simple Design with a button in the middle, you can easily start recording with pressing the...
As an affiliate, we earn on qualifying purchases.
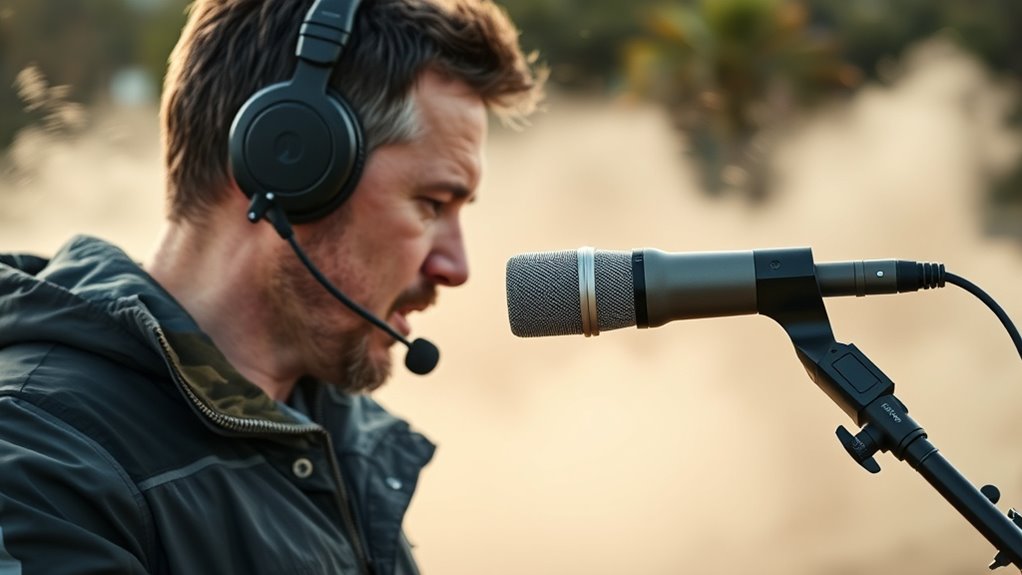
Optimal Microphone Placement Strategies

Effective microphone placement is crucial for minimizing wind noise during outdoor recordings. Position talent with their back to the wind to block gusts, and angle the mic 90 or 180 degrees off the wind axis to reduce direct impact. Point lavalier mics slightly back toward the sound source while shielding them from frontal wind, or rotate the subject to use their body as a natural barrier. Seek shelter behind trees, walls, or vehicles, and use structural cover whenever possible. Clip lavalier mics inside clothing layers or behind barriers for added protection. Optimize housing by smoothing edges, reducing size near sound ports, and placing damping materials strategically. Elevate and space mics appropriately, especially in outdoor settings, to further minimize wind interference and preserve audio clarity. Incorporating modern audio technology like windshields and digital noise reduction can also significantly improve sound quality in challenging environments. Additionally, microphone positioning techniques that consider the specific environment can make a substantial difference in capturing clear audio amidst wind. Understanding the importance of sound isolation can guide you in selecting the best placement to minimize ambient disturbances and improve overall audio quality. For outdoor recordings, selecting appropriate microphone types designed to withstand environmental challenges is essential for optimal results. Employing wind protection accessories like specialized windscreens further enhances the effectiveness of your placement strategies.

Meoilkolnm Mini Body Camera, Wearable Action Body Cam, Thumb Size Hands Free Recording Body Worn Camera, Premium Portable Camcorder Mount Anywhere for Pet Walking, Work, Travel (Black, 64GB)
User Friendly: Simple Design with a button in the middle, you can easily start recording with pressing the...
As an affiliate, we earn on qualifying purchases.
Choosing and Using Wind-Protection Gear Effectively
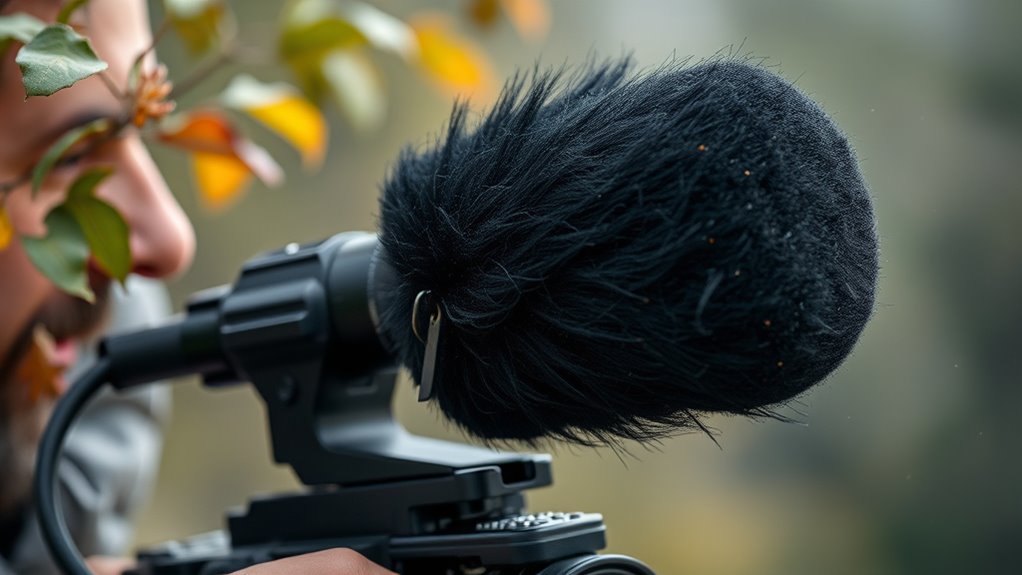
Choosing the right wind-protection gear depends on your recording environment and microphone type. For mild breezes and close-range speech, foam windscreens are inexpensive and lightweight, mainly reducing low-frequency turbulence. In moderate to strong wind, furry covers—also known as dead cats—offer around 20–30 dB noise reduction but can dampen high frequencies if waterlogged or oversized. Blimps or zeppelins provide robust protection for shotgun and long mics, shielding them from turbulent flow while maintaining clarity. Shell or basket windscreens are effective across various wind speeds, especially pressure mics. Proper sizing, fit, and layering optimize performance, ensuring your gear shields your microphone without sacrificing sound quality. Additionally, selecting appropriate windshields can help prevent wind noise from overpowering your audio recordings and proper placement plays a crucial role in minimizing unwanted noise. Using wind-protection gear correctly can significantly improve your audio quality, especially in outdoor recording situations. Understanding wind-flow dynamics is essential for optimizing your microphone placement, which can further reduce ambient noise and improve clarity.

COOAU D30S 4K Dash Cam with GPS Wi-Fi, Front and Inside Dual 2.5K 1080P, Uber Car Camera with Infrared Night Vision, Supercapacitor, 4 IR LEDs, G-Sensor, Parking Mode, Loop Recording
Ultra HD 4K, More Clear: The D30S dash cam captures crisp 4K@25fps (3840x2160p) videos with 170° angle in...
As an affiliate, we earn on qualifying purchases.
Techniques for Handling Lavalier and Handheld Mics in Windy Conditions
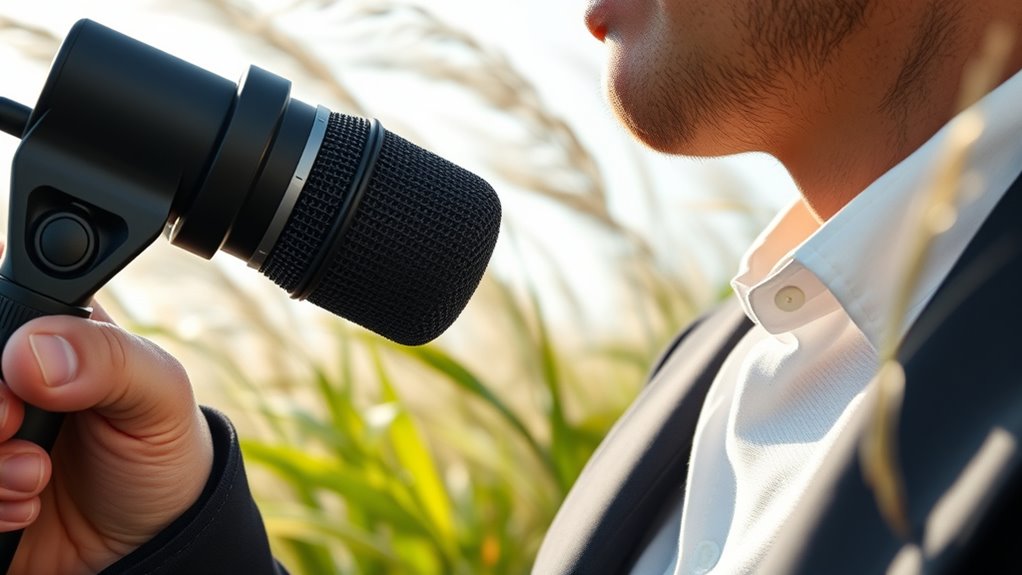
When working with lavalier or handheld microphones in windy conditions, your goal is to minimize noise while keeping the mic discreet. You can use concealment strategies like hiding mics inside clothing or behind accessories, but proper mounting techniques are equally vital to prevent gusts from rattling the gear. Don’t forget to incorporate windbreaks, such as foam covers or specialized shields, to substantially reduce wind interference. Additionally, utilizing Free Floating microphone mounts can help prevent vibrations caused by wind from reaching the mic capsule, further improving audio quality. Incorporating vintage audio techniques, like using period-appropriate accessories or mounts, can also enhance the aesthetic and functional quality of your setup. Implementing smart home automation techniques can also help monitor and adjust environmental factors that influence wind noise, creating a more controlled recording environment. Using correct microphone placement is essential for capturing clean audio and avoiding unwanted noise from gusts.
Concealment Strategies
Concealing microphones in windy conditions requires strategic placement and additional protection to minimize noise and visibility. Position your lavalier just under the tie knot to leave space for wind protection without bulking the knot. Secure the mic with sticky tape or gaffers tape wrapped around the back, and hide it inside the shirt edge for dual fabric protection. Inside clothing, the mic is shielded from gusts but may dull high frequencies, so plan for post-production EQ. For extra concealment, place the mic in the middle of a hat brim or use larger wind covers like a WindBubble or an urchin. Combining foam, porous cloth, or foam-filled windshields can further reduce wind noise, while hidden placement minimizes visibility and helps maintain audio quality even in gusty conditions. Proper microphone placement is essential for effective wind noise reduction, ensuring clear audio in challenging outdoor environments. Additionally, selecting appropriate wind protection tailored to your microphone type can significantly enhance wind noise mitigation. Incorporating specialized windshields designed for outdoor recording can also provide added benefits in harsh conditions. Using multiple layers of wind protection can further improve sound clarity by reducing unwanted noise. Always consider the environmental conditions to choose the most effective concealment and protection methods.
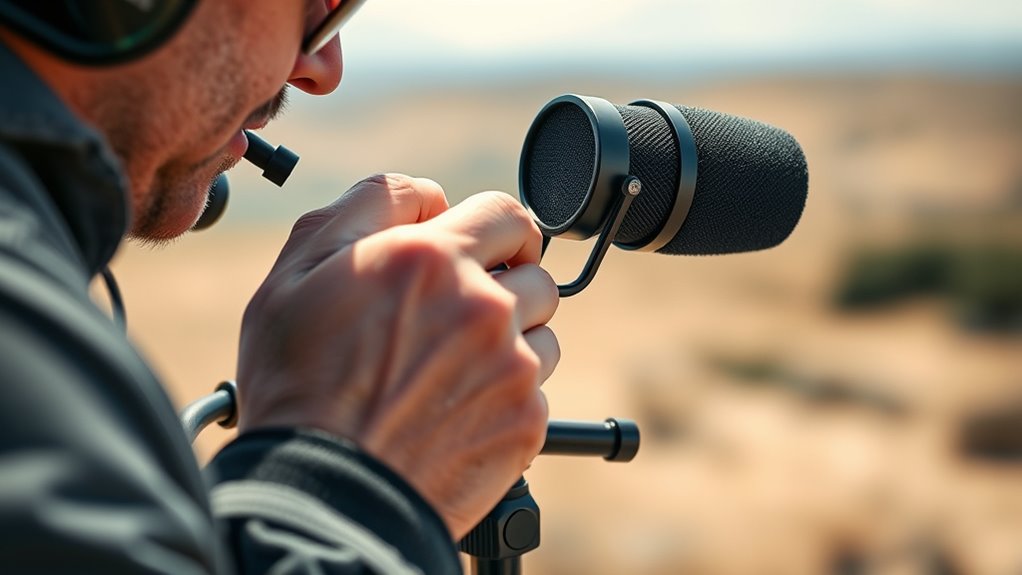
Proper Mounting Techniques
Proper mounting techniques are essential for capturing clear audio in windy conditions, whether you’re working with lavalier mics or handheld microphones. For lavalier mics, clip them inside shirt pockets instead of outside ties to reduce wind exposure. Position the mic under the talent’s shirt or hide it inside clothing to shield it from gusts, using tape or mounts to prevent noise from fabric rubbing. Rotate the talent’s body slightly, standing with their back or side to the wind, and place the mic underneath clothing to leverage their body as a natural barrier. Use specialized hardware like Abetek mounts or tie-clip attachments to secure the mic firmly. For handheld mics, consider mounting options that minimize movement and exposure, ensuring stability and wind resistance during recordings. Proper mounting techniques also involve ensuring the mic is securely attached to prevent movement noise that can be amplified by wind.
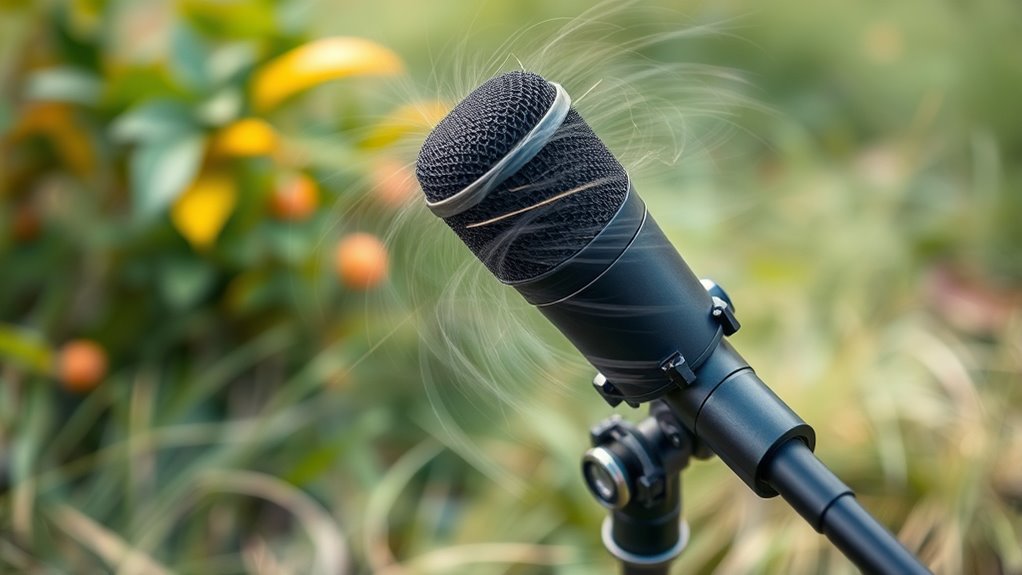
Windbreak Usage
Effective wind management starts with choosing the right windshield for your microphone and the conditions you’re recording in. Foam windscreens can block small gusts but often fail in moderate-to-strong wind, especially outdoors. Furry windshields, or deadcats, slow airflow and are ideal for heavy outdoor use, especially with lavaliers. Combining a foam insert with an external furry cover offers better reduction across a range of winds. Purpose-built wind protectors like Windjammer or Windbubble claim significant noise reduction, and improvised solutions—such as wrapping foam cores in porous cloth—can also work well if fitted snugly. For lavaliers, concealment techniques like placing capsules beneath clothing layers or inside small enclosures help reduce wind hits while maintaining sound quality. Proper windbreaks are essential for clear audio in challenging outdoor conditions. Additionally, understanding key traits of successful quality assurance engineers can help ensure your audio equipment and recording techniques meet professional standards. Recognizing effective wind mitigation strategies can further enhance audio clarity and minimize disruptions caused by outdoor elements. Employing proper equipment maintenance, such as regular cleaning and checks, ensures your microphones and accessories perform optimally in outdoor environments.
Monitoring and Diagnosing Wind Contamination in Real Time
Monitoring and diagnosing wind contamination in real time requires a combination of continuous sensor data analysis and immediate visual and audio assessment tools. You should track real-time metrics like LAeq and LCeq levels to catch broadband spikes caused by wind buffeting. Simultaneously, measure wind speed and direction at microphone height to correlate gusts with level increases. Use short-term statistics like LAFmax and LA90 to distinguish gusts from steady signals. Spectral indicators, such as low-frequency energy rise and spectral flattening, help identify wind events automatically. Additionally, employ real-time direction-of-arrival (DOA) techniques with wind vectors to separate wind noise from desired sources. Incorporating real-time sensor data analysis enhances detection accuracy and response speed. Employ live diagnostics like spectrograms and telemetry, and consider integrating automated alert systems to notify operators immediately when wind contamination reaches critical levels. Moreover, integrating adaptive filtering techniques can help dynamically suppress wind noise without compromising the desired audio quality. Implementing machine learning algorithms can further improve wind noise detection by recognizing complex patterns and adapting to changing environmental conditions.
Post-Production Methods to Reduce Wind Artifacts
Once wind artifacts are captured, you can reduce them through targeted spectral attenuation and manual artifact removal. Use spectral editors to visually isolate low-frequency wind smears and carefully attenuate them without harming voice clarity. Applying these post-production techniques helps restore audio quality while preserving natural sound. Branded audio editing tools often provide specialized functions for wind noise reduction, making the process more efficient and effective. Additionally, understanding spectral attenuation can help you better identify and eliminate unwanted sounds without sacrificing audio fidelity.
Targeted Spectral Attenuation
Targeted spectral attenuation concentrates on selectively reducing wind noise artifacts by analyzing and editing their spectral signatures. You begin by identifying wind-only sections to create a noise profile or spectral template. Then, you apply a high-pass filter—starting around 80 Hz and adjusting up to 250 Hz—to remove low-frequency wind energy without hollowing the voice. Next, use spectral editing tools to visually select and attenuate low-frequency smears and burst events, preserving speech harmonics. You may also implement narrow notch or shelving cuts at persistent wind tonal peaks, combined with transient detection to avoid over-filtering. Finally, cross-check your adjustments by soloing frequency bands to ensure speech remains natural and intelligible. This targeted approach helps isolate wind noise while maintaining audio quality. Proper spectral management can significantly improve the clarity of speech recordings affected by wind artifacts.
Manual Artifact Removal
Manual artifact removal involves directly editing wind-related sounds in the spectral domain to reduce their impact. You can use spectral view to visually isolate wind artifacts as broadband, low-frequency smears or clouds. Spectral repair tools allow you to heal, attenuate, or replace these sounds by selecting minimal time and frequency ranges, applying multiple conservative passes to preserve harmonic content. Creating a noise profile from wind-only segments helps you subtract or attenuate wind noise with spectral-denoising modules, adjusting settings to avoid affecting vocals. Interpolating replaced regions with nearby clean spectral content or copying from clean takes restores missing harmonics smoothly. Using spectrograms with adjustable resolution helps set precise boundaries for edits, balancing frequency and time resolution for effective wind artifact removal.
Frequently Asked Questions
How Does Wind Direction Influence Optimal Microphone Placement?
You should position your microphone based on wind direction to minimize noise. Place it facing away from the wind, ideally sheltered by natural or artificial barriers. If wind comes from the side, use windscreens or shields that are designed for that angle. Keep the mic close to the source, like your mouth, and avoid exposed spots. Adjust placement to guarantee the wind flows smoothly around the mic, reducing turbulence and noise.
What Are the Best Materials for DIY Wind Protection?
Imagine a fortress built to repel wind—your DIY wind protection should be just as sturdy. Use open-cell foam for absorbing lower-frequency gusts, and add a faux-fur windjammer for fierce wind conditions. Layer materials like foam, nylon stocking, and fur to create a hybrid shield that diffuses turbulence. Lightweight frames and snug fits make certain airflow moves smoothly around your mic, blocking noise without sacrificing sound quality.
Can Microphone Types Be Chosen Specifically for Windy Environments?
Yes, you can choose microphone types specifically for windy environments. Opt for omnidirectional mics with pressure‑type transducers, as they naturally resist wind noise better. Consider using lavalier or headset mics, which are often omnidirectional and closer to the mouth, reducing wind impact. Pair these with high-quality windshields or blimps for additional protection. Selecting mics with internal wind‑reducing features, like smaller sound ports or stiff diaphragms, also helps minimize wind noise effectively.
How Do Handling Techniques Minimize Wind Noise During Live Reporting?
You minimize wind noise during live reporting by stabilizing the microphone with a two-handed grip and supporting your forearm to reduce movement. Instead of increasing gain, reposition yourself or use natural body contours to block gusts. Move slowly when changing orientation, and bring the mic close to your collarbone or turn your torso slightly to act as a windbreak. Coordinate with crew to keep the mic steady and avoid sudden movements.
What Indicators Suggest Wind Noise Is Compromising Audio Quality?
If your audio suddenly sounds like a thunderstorm or a distant rumble, wind noise is probably wrecking your recordings. Look for deep, broadband “whooshes,” rapid fluctuating sounds, and a muffled speech quality that makes words nearly impossible to understand. If low-frequency energy dominates and listening tests show reduced clarity, you’re dealing with wind contamination. Elevated low-frequency noise and inconsistent microphone signals across channels are dead giveaways—fix the placement, not the volume.
Conclusion
So, next time wind messes up your audio, don’t just crank up the volume—try adjusting your mic placement instead. Ironically, the fix isn’t about making the wind quieter, but about making your mic smarter. With the right strategies, you can actually enjoy clear sound even on blustery days. Who knew that fixing wind noise is more about placement than volume? Now, go out there and let the wind be your friend, not your audio enemy.