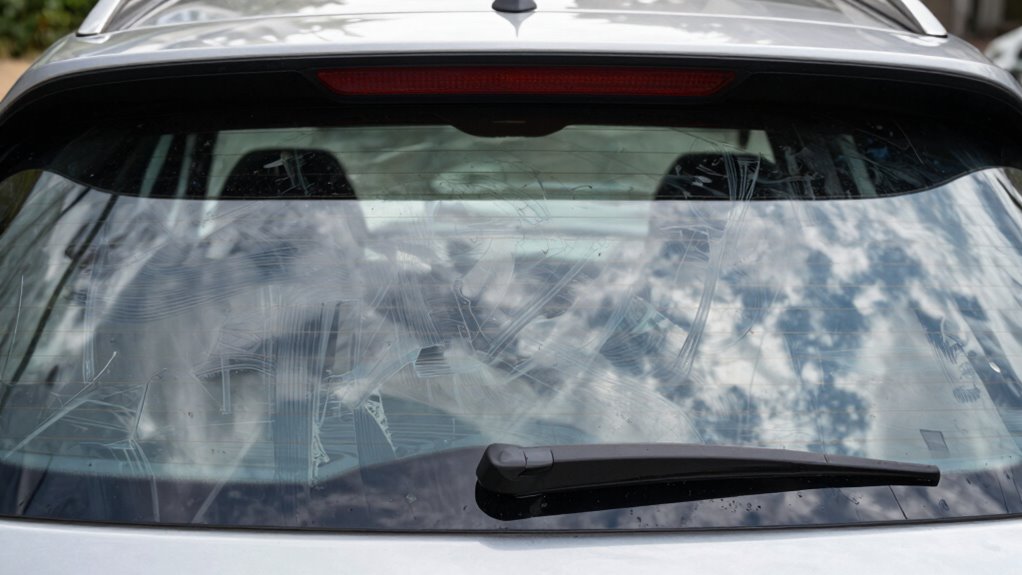

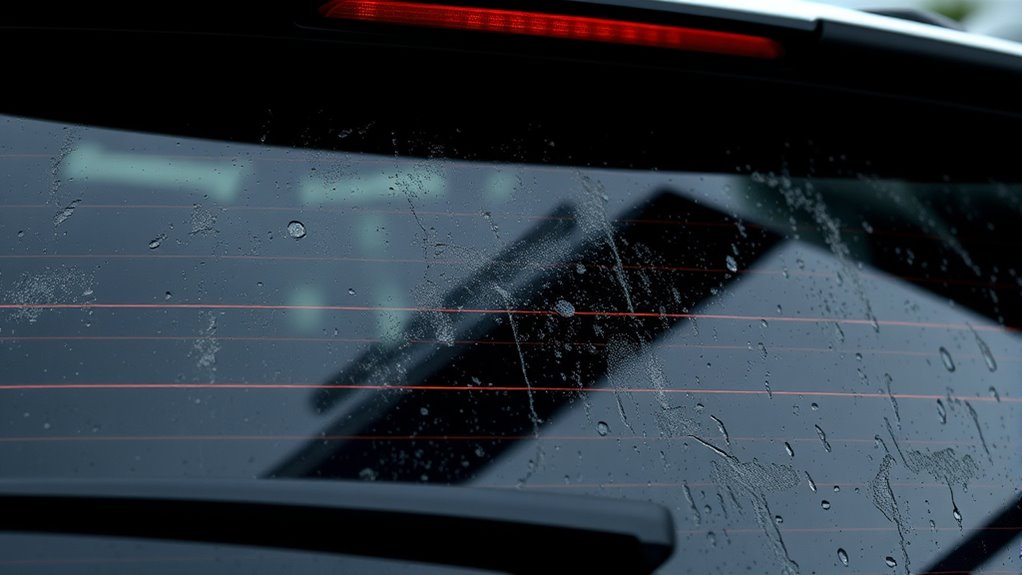
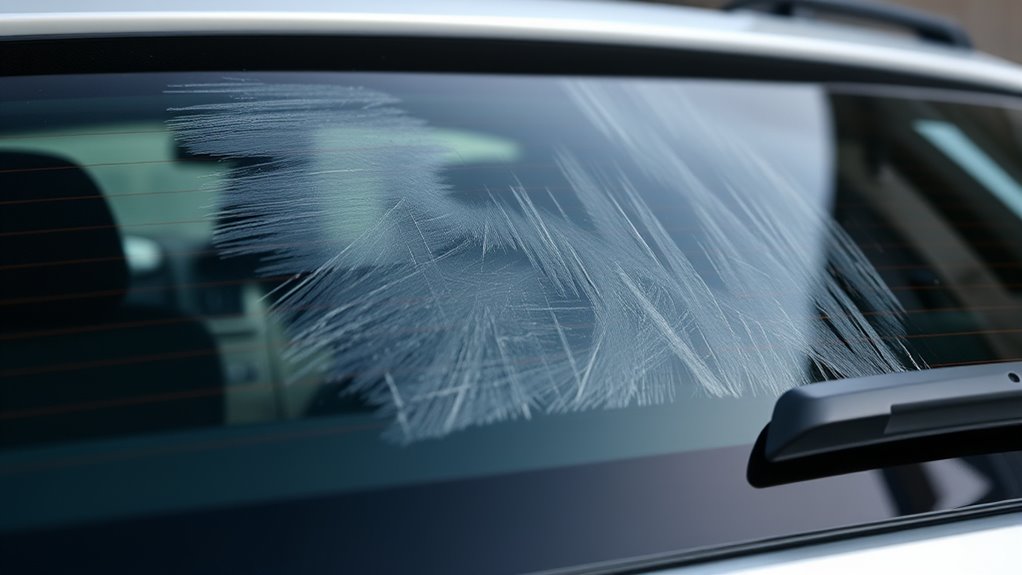
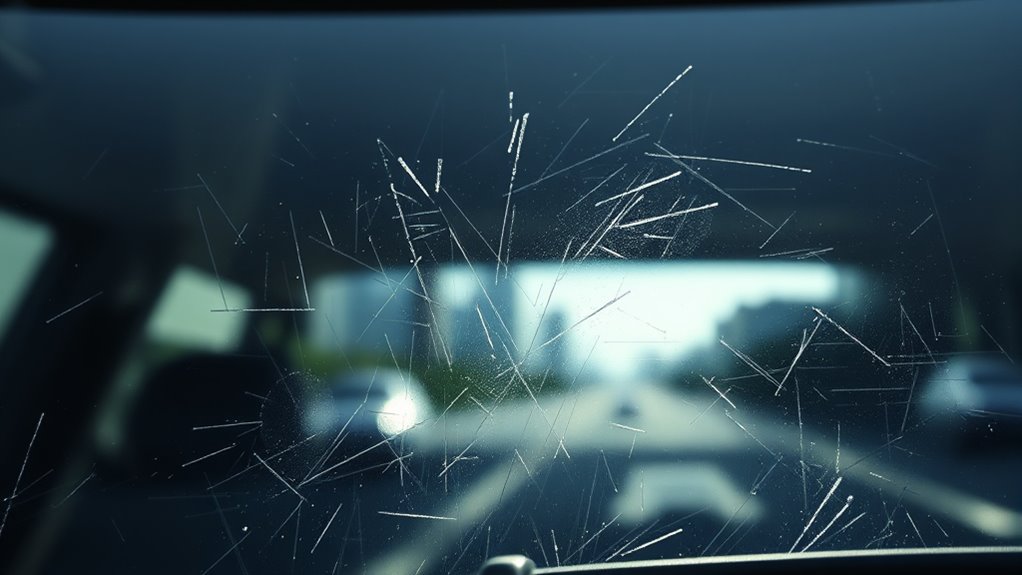
Rear wiper smears happen because dirt, grime, and water residues build up on the lens, and wipers often spread these instead of clearing them. Surface damage, coatings, and environmental factors like moisture or condensation can worsen the smear effect, making images blurry. If seals fail or dirt accumulates, clarity drops further. To fix this, proper cleaning and protective measures help, but exploring additional tips can guarantee your camera stays clearer in all weather conditions.
Key Takeaways
- Dirty or scratched camera lenses cause smearing and blurry images, especially if the lens surface is damaged or contaminated.
- Residual water, grime, or organic films on the lens create smears when wiped or wiped unevenly.
- Improper cleaning techniques or abrasive cleaning agents can scratch or spread dirt, worsening smudges.
- Seal failures or moisture ingress inside the camera housing lead to condensation and streaking on the lens.
- Wiper blades or washers may spread dirt or water unevenly, causing smears instead of clear visibility.
Altura Photo Camera Cleaning Kit – Lens Cleaner Spray, Brush, Pen, Blower, Microfiber Cleaning Cloths, Tissue Wipes for Canon Nikon Sony Fuji Olympus Pentax Sigma Tamron DSLR & Mirrorless Cameras
COMPLETE CAMERA CLEANING KIT: Our camera lens cleaning kit includes an alcohol & ammonia-free lens cleaner spray, cleaning…
As an affiliate, we earn on qualifying purchases.
As an affiliate, we earn on qualifying purchases.
Challenges of Rear Wiper Coverage and Design Limitations
Designing rear wipers involves balancing limited space, aerodynamic factors, and coverage needs. Modern SUVs have small rear windows, forcing tiny wipers that only sweep small arcs, reducing cleaning effectiveness. These small blades struggle to clear the entire glass, leaving large areas uncleaned. The limited space prevents fitting larger, more efficient wipers, and suggestions like extending horizontal belt lines aim to create taller windows for bigger blades. Aerodynamic issues also complicate design; sloping windshields cause airflow that naturally cleans the glass, but adding wipers disrupts this flow, increasing lift and drag. On vertical or square rear designs, debris and water tend to accumulate, and wipers often offer incomplete coverage. These constraints make it challenging to design rear wipers that are both functional and unobtrusive, often resulting in less effective cleaning. Additionally, European cloud servers can provide innovative solutions for smart sensor integration, potentially improving the effectiveness of rear camera systems in the future. Furthermore, advancements in sensor technology may lead to more effective cleaning methods that reduce reliance on traditional wipers altogether, making automotive sensor innovations increasingly important for future designs.

5 PLUS® 12 Inch Rear Wiper Blade Replacement for Honda CRV 2022-2017 Element 11-03/Nissan Murano 2024-2009 Armada 23-05 Pathfinder 12-04 Rear Windshield Wiper Blade(12-B)
【Use amazonconfirmrdfit, Enter your model】Fit for Acura MDX 2013-2007 RDX 2024-2019 TSX 2014-2011 /BMW X5 2018-2014 /Honda CR-V…
As an affiliate, we earn on qualifying purchases.
As an affiliate, we earn on qualifying purchases.
Common Sources of Lens Contamination and Residue
You’ll notice that your rear lens gets dirty from various sources, including road spray, airborne debris, and biological residues like pollen and bird droppings. Organic films, such as oil, plant resins, and insect remains, quickly form streaks and smudges that are hard to wipe clean. Chemical residues from road salts, pollutants, and cleaning products also settle on the surface, making smears worse during wipes. Additionally, surface contamination can be influenced by the environment’s humidity and temperature, affecting how residues adhere to the surface. Changes in environmental conditions, like humidity levels and temperature fluctuations, can also influence the contamination process, complicating cleaning efforts. Paying attention to the attention to detail in cleaning methods can help prevent smudges from worsening.
Road Spray and Debris
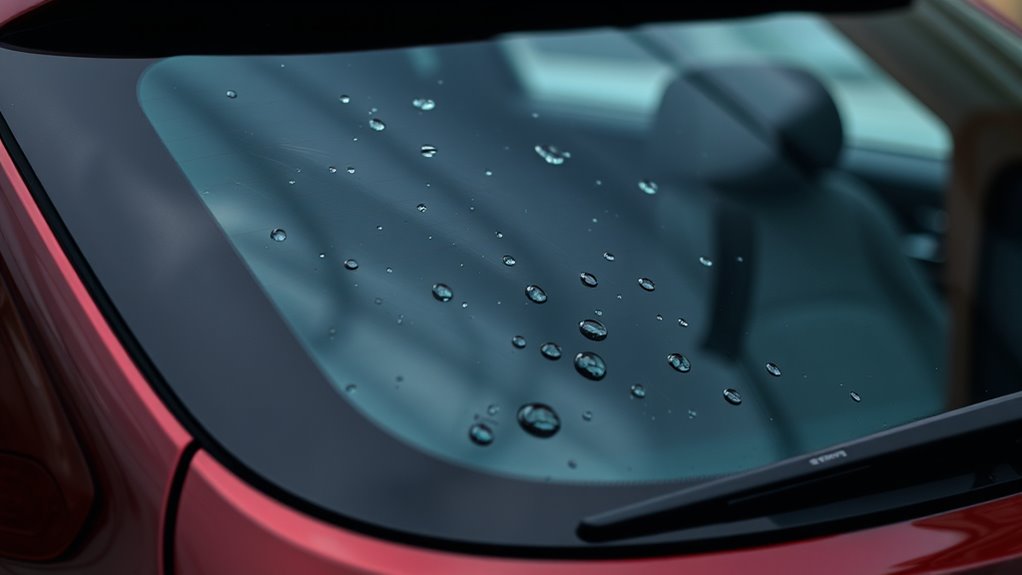
Road spray and debris are common sources of lens contamination for rear cameras, especially in wet and dirty conditions. Rain causes water to accumulate on rear glazing, forming droplets, rivulets, and water films that impair visibility. As vehicles pass, spray from tires creates clusters of water and dirt, coating the lens with grime. Mud, dust, snow, and salt from winter roads easily settle on the low-mounted cameras, creating a cloudy or hazy appearance. Debris like gravel or sand from trucks and plows scratches the lens surface, scattering light and causing glare. These contaminants reduce image clarity, often requiring frequent cleaning. The constant exposure to road spray and debris makes rear cameras prone to smearing and obscuration, especially during adverse weather, compromising your rearward visibility. Understanding lens materials can help in selecting more durable camera coatings that resist such buildup, especially those designed for environmental durability. Regular cleaning with appropriate lens cleaning techniques also helps maintain clear vision. Using protective lens coatings can further reduce buildup and ease cleaning efforts. Additionally, choosing cameras with weather-resistant features can provide extra protection against harsh conditions.
Biological and Organic Films
Beyond dirt and water, biological and organic films pose a persistent challenge to rear-camera clarity. These films often start as a thin biofilm made of bacteria, fungi, dust, and organic vapors that form within days under humid conditions. The extracellular substances in biofilms—polysaccharides, proteins, and lipids—bind tightly to glass and coatings, making simple wiping ineffective. Microbial byproducts like organic acids and pigments chemically interact with anti-reflective layers, altering their refractive index and increasing scatter. Environmental factors such as high humidity, warm temperatures, and organic aerosols from exhaust accelerate growth. Understanding biofilm formation can help in developing more effective cleaning strategies. Microbial colonies can produce hyphae and acids that etch coatings and glass, causing permanent damage, especially when protective coatings are compromised. Organic residues from bird droppings, insects, and plant sap also stain and harden, creating resistant films that diminish lens clarity. Incorporating Free Floating techniques can help in understanding and managing these persistent films more effectively.
Chemical Residues and Polymers
Chemical residues and polymers from cleaning products and road materials are common sources of lens contamination that can substantially impair rear-camera clarity. Residues from car wash soaps, household detergents, and surfactants form thin films that scatter light and reduce contrast, especially after water evaporates. Trace surfactants lower water surface tension, causing streaks when rain or washer fluid contacts the lens. Polymer-containing waxes and detailer sprays leave organic films that increase ghosting and scattering in images. Road-spray deposits from tire dressings, asphalt, and bitumen create hydrophobic smears and localized blurring. These films often resist water rinsing and may require solvents for removal. Regular exposure to road chemicals and cleaning residues accelerates coating degradation, worsening optical performance over time. Surfactant films scatter light and cause streaks These residues can also interfere with the adhesion of self-cleaning coatings, reducing their effectiveness. Organic polymer films increase ghosting. Road-spray deposits produce blurring and flare. Coating degradation reduces self-cleaning ability. Additionally, chemical residue buildup can lead to long-term damage to the lens surface, making regular cleaning and maintenance essential for optimal camera function. Proper cleaning techniques and avoiding harsh chemicals are vital to prevent coating damage and preserve image quality over time.
Altura Photo Camera Cleaning Kit – Lens Cleaner Spray, Brush, Pen, Blower, Microfiber Cleaning Cloths, Tissue Wipes for Canon Nikon Sony Fuji Olympus Pentax Sigma Tamron DSLR & Mirrorless Cameras
COMPLETE CAMERA CLEANING KIT: Our camera lens cleaning kit includes an alcohol & ammonia-free lens cleaner spray, cleaning…
As an affiliate, we earn on qualifying purchases.
As an affiliate, we earn on qualifying purchases.
How Surface Damage and Coatings Affect Clarity

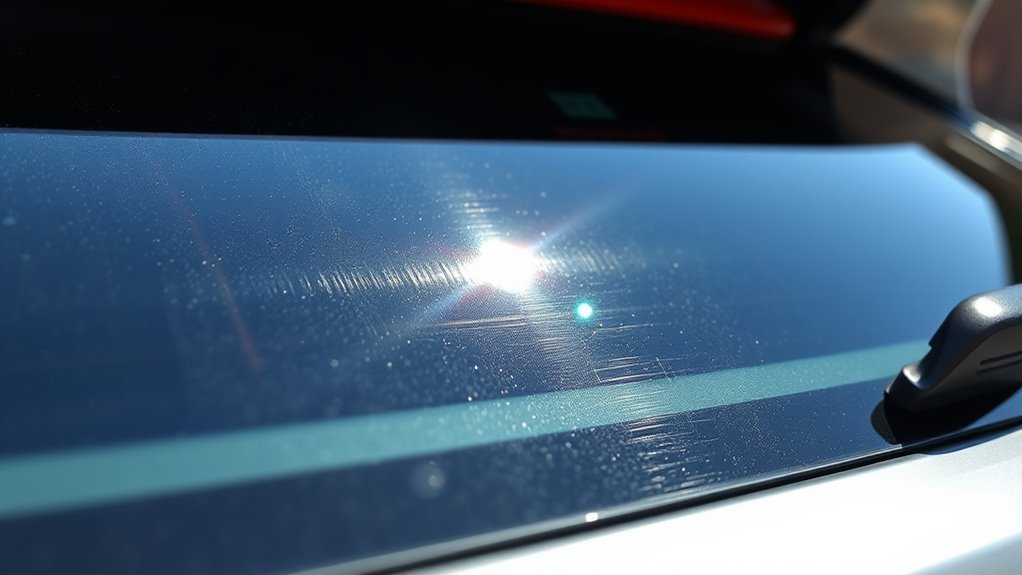
Surface damage and coatings directly influence how clearly you can see through your rear window. Chips and pits from debris or gravel weaken the glass and distort sunlight, making it harder to see clearly. Surface scratches and hazing create hazy areas that block your view and worsen camera clarity. Discoloration alters light transmission, reducing image quality. Multiple pits weaken the entire window, increasing the risk of further damage. Small pits can often be smoothed by technicians, but untreated damage can grow into larger cracks or fractures, further impairing visibility. Coatings designed to protect or enhance clarity can also degrade over time or be compromised by surface imperfections. All these issues scatter light and create optical distortions, making your rear view and camera images appear smeared or blurry. Proper maintenance and timely repairs can help preserve the clarity of your rear window and camera system.

2-Pack Car Backup Camera Lens Protector, Ultra Clear Protective Film for Rear View Camera, Waterproof Anti-Fog Scratch Resistant Cover, Easy Stick Installation for Car Reversing Camera
HD Clear Visibility: Ultra-transparent design maintains original camera quality without affecting image clarity, ensuring a clear rear view…
As an affiliate, we earn on qualifying purchases.
As an affiliate, we earn on qualifying purchases.
The Impact of Moisture, Condensation, and Sealing Failures
When seals fail or degrade, moisture can easily get into your rear camera housing, causing smears and fogging. This intrusion leads to water droplets and condensation that scatter light, reducing image clarity. Addressing seal integrity issues is essential to prevent long-term damage and maintain maximal visibility. Environmental exposure can accelerate seal deterioration, further increasing the risk of moisture ingress.
Seal Integrity Challenges
Seal integrity is critical to preventing moisture from entering camera housings, yet many seals degrade over time, compromising their effectiveness. When seals crack or wear, humid air can seep in, causing internal condensation and fogging. This moisture buildup leads to blurry images, distorted visuals, and potential electronics damage. Poor-quality rubber gaskets and sealants are common culprits, especially in models like Range Rover Sport that require specific foam seals after recalls. Over time, exposure to road spray, salt, and temperature fluctuations accelerate seal failure. As seals break down, water can infiltrate, risking corrosion and long-term damage to the camera’s electronics. Without proper maintenance or replacement, these seal failures can severely limit camera performance and safety. Seal degradation also increases the likelihood of dust and debris entering the housing, further compromising image quality and hardware longevity. Additionally, material deterioration can cause seals to lose their elasticity, making them more prone to cracks and leaks over time. The use of substandard sealing materials can significantly hasten this deterioration process, emphasizing the importance of proper sealant selection for longevity.
Moisture Intrusion Effects
Moisture intrusion can considerably impair rear camera performance by allowing water and vapor to enter the housing through various entry points. Exposure to rain, puddles, or road spray increases the risk of water ingress, especially around cable glands, connector interfaces, and antenna mounts. Temperature differences between inside and outside the vehicle promote vapor flow into the cavity, leading to condensation. When moisture settles on lens elements or filters, it scatters light, creating foggy, low-contrast images. Condensation can cause streaks, blurring, and glare, while mineral residues from road salts or detergents leave stubborn smears. Over time, persistent humidity accelerates corrosion, causes short circuits, and fosters mold growth, all of which degrade image quality and can lead to complete camera failure. Implementing effective sealing measures can prevent or minimize moisture entry, maintaining optimal camera function. Additionally, using desiccant packs inside the housing can help absorb residual moisture and reduce the risk of condensation.
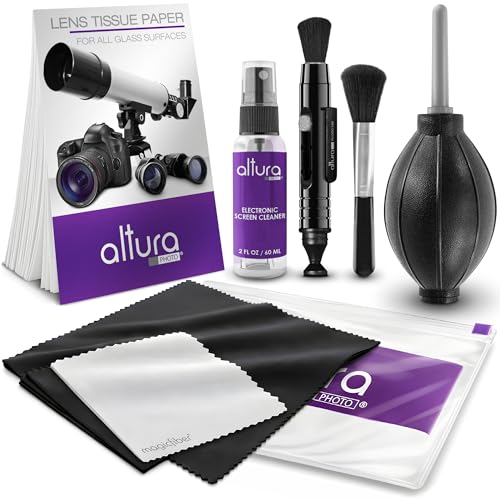
Best Practices for Cleaning and Maintaining Rear Camera Lenses
To effectively maintain your rear camera lens, start by removing loose dust and debris with a rubber bulb blower, which prevents scratching during cleaning. Follow with a soft-bristled brush or paintbrush to clear remaining particles gently. Apply a small amount of optical cleaning fluid to a microfiber cloth—never directly on the lens—and wipe in small concentric circles from the center outward to prevent streaks. Dry-polish with a clean, dry microfiber cloth, inspecting at a grazing angle for missed spots or streaks. For stubborn residues, use a lens pen’s soft tip or a carbon-cleaning pad if compatible. Keep your cleaning tools in a sealed container, and perform regular maintenance, especially after winter salt or mud exposure, to maintain clear visibility. Using gentle circular motions minimizes scratches and ensures even cleaning. Regularly inspecting your lens surface helps identify any scratches or residues that could impair visibility. Additionally, it’s beneficial to understand the net worth and background of your vehicle’s features to better appreciate their importance—this can lead to more attentive care. Proper knowledge of vehicle maintenance practices can also extend the lifespan of your camera lens. Use lint-free microfiber cloths or optical tissues. Apply dedicated optical cleaners or isopropyl alcohol. Rinse with distilled water for salt or grime. Avoid abrasive materials and harsh solvents.
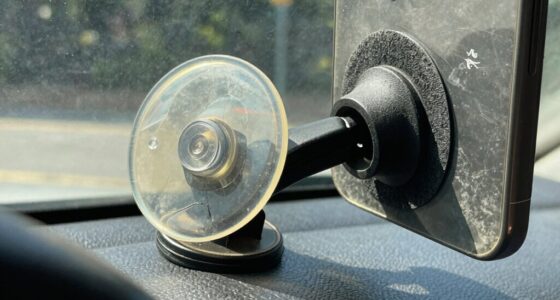
Vehicle Features and Aftermarket Solutions to Improve Visibility
Enhancing rear visibility often involves aftermarket solutions designed to combat common smearing and dirt accumulation issues. Heated rear wiper blades prevent ice buildup, ensuring better contact and clearer wipes in cold weather. Pressurized washer nozzles and foam jets deliver more cleaning solution directly to the camera area, effectively removing road film and salt. Applying hydrophobic or oleophobic coatings to the lens causes water to bead and run off, reducing smear persistence during light rain. Natural ingredients in cleaning solutions can also be gentle on camera lenses and reduce streaking. Customizing wiper arm geometry and blade length ensures proper contact with camera housings, preventing streaks. Integrated micro-heaters around camera housings provide localized de-icing, while dedicated splash shields and visors deflect spray and reduce dirt buildup. Recessed or gimbal-mounted housings and aerodynamic deflectors further lower contamination and improve overall rear visibility. Properly maintaining and choosing simple systems can significantly enhance your rearward view and safety, especially when combined with reliable power sources that ensure consistent operation in all weather conditions. Additionally, incorporating dedicated heating elements around the camera lens area can further improve visibility during extreme weather. Using vetted wave and wind solutions can also help mitigate the impact of harsh environmental conditions on your camera’s clarity.
Role of Software Enhancements and Limitations in Image Clarity

Software enhancements play a crucial role in improving rear-camera image clarity, but their effectiveness is limited by hardware constraints and real-time processing demands. ISP algorithms handle tasks like demosaicing, white balance, noise reduction, and sharpening, all of which influence detail and color. Aggressive noise reduction can smooth out textures, reducing water streak visibility but also losing fine details. Over-sharpening might create halo effects and emphasize smear artifacts, making streaks more visible. Dynamic range compression can clip highlights and obscure shadows, affecting scene depth. Additionally, processing trade-offs prioritize low latency for safety, limiting complex enhancements. Digital AHD cameras tend to have more advanced processing capabilities, which can mitigate some image issues but at a higher cost. – Temporal filtering reduces smear appearance through frame averaging. – Motion compensation partially restores detail from wiper motion. – Learning-based models require significant onboard computational power. – Hardware limits set the ceiling for software-based detail recovery.
Tips for Ensuring Clearer Rear Camera Views in All Weather Conditions
Keeping your rear camera clear in all weather conditions requires a combination of proper maintenance, protective measures, and smart driving habits. Regularly clean the lens with a microfiber cloth, applying water first to loosen dirt and avoid harsh solvents that can damage coatings. Use protective hydrophobic sprays and clear films to reduce water and grime smears. Install a rear-wiper or dedicated washer nozzle if possible, and consider heated modules to prevent ice buildup. Park facing away from spray sources, reduce following distances on wet roads, and avoid deep puddles. For added protection, choose cameras with recessed lenses or visors. Proper upkeep guarantees maximum visibility, even in challenging weather.
| Maintenance | Protective Measures | Driving Habits |
|---|---|---|
| Microfiber wipes | Hydrophobic coatings | Park strategically |
| Water-first cleaning | Clear lens covers | Reduce following distance |
| No harsh solvents | Rear washer kits | Avoid muddy puddles |
| Inspect for runoff | Sealed housing | Use covered parking |
| Regular reapplication | Factory lens covers | Manual check after rain |
Frequently Asked Questions
Why Does My Rear Camera Get Dirty so Quickly?
Your rear camera gets dirty quickly because it’s constantly exposed to road spray, dust, debris, and moisture. Wind, rain, and nearby vegetation all contribute to rapid buildup of grime and smudges. Additionally, the camera’s design often leaves it vulnerable to dirt entering housing or spreading from wipers. Frequent reversing and driving in dusty environments accelerate the contamination, making regular cleaning essential to keep your camera clear and functioning properly.
Can I Upgrade My Rear Wiper for Better Cleaning?
Yes, you can upgrade your rear wiper for better cleaning. Choose high-quality blades like Bosch Spectrum DirectFit™ or Rain-X® RearView™ designed specifically for rear windows. These options offer precise fit and enhanced wiping performance, reducing smears and streaks. Additionally, replacing rubber refills regularly with affordable options like eBay inserts can improve wiping efficiency. Upgrading guarantees clearer visibility and a cleaner camera lens, especially in adverse weather conditions.
How Do Coatings Affect the Camera’s Image Quality?
Coatings act like a shield, clearing the fog and smudges that cloud your camera’s view. When your lens has anti-reflective and hydrophobic coatings, light passes through more smoothly, reducing glare and water droplet distortion. Imagine a crystal-clear window—your images become sharper, colors more vibrant, and details crisper. These coatings minimize reflections, glare, and dirt, ensuring your camera captures a brighter, more accurate picture every time you back up.
Why Does Condensation Form Inside the Rear Camera Housing?
Condensation forms inside your rear camera housing because moisture-laden air enters through imperfect seals, micro-leaks, or during assembly. Rapid temperature changes from heated interiors to cold or humid environments cause internal surfaces to reach dew point, leading to water droplets. Additionally, trapped manufacturing moisture, thermal bridges, and environmental factors like rain or washing increase humidity, making condensation more likely, which can smear your camera lens and degrade image clarity.
Are There Effective DIY Methods to Keep My Rear Lens Clear?
To keep your rear lens clear, start with simple solutions like using a soft microfiber cloth to gently wipe away dirt and smudges. Follow with a blast of compressed air to dislodge dust. Apply a protective lens coating or a specialized headlight restorer to prevent fogging and oxidation. Regularly clean and shield your lens with a lens cap, and consider DIY dehumidifiers like silica gel to absorb internal moisture.
Conclusion
To keep your rear camera clear, stay on top of cleaning and check for surface damage regularly. For example, imagine driving in heavy rain, only to find your view obscured by smeared wiper residue. By maintaining your lens and considering aftermarket solutions, you guarantee maximum visibility in all weather. Remember, proper care and awareness can prevent smears, keeping your rear camera sharp and your drives safer.