
TL;DR
Moving your rig into a closet or separate room is the most effective way to reduce noise. Proper placement, ventilation, and targeted treatment are more impactful than buying foam or blankets alone. The key is balancing sound dampening with heat management.
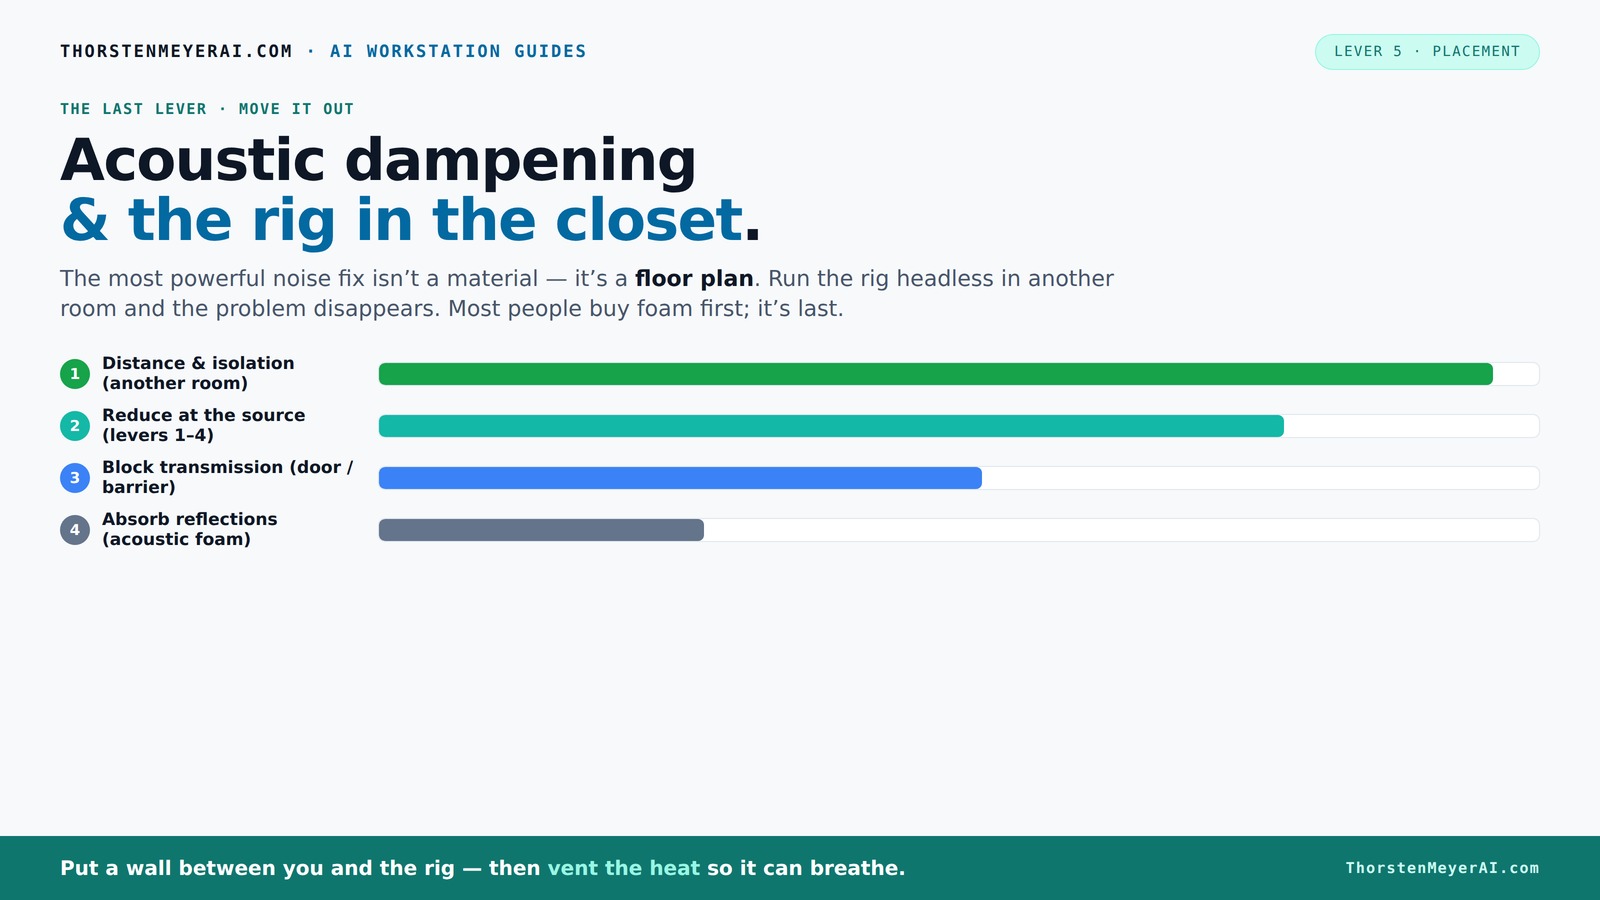
Acoustic dampening
& the rig in the closet.
The most powerful noise fix isn’t a material — it’s a floor plan. A rig you can’t hear because it’s in another room beats any amount of foam. Tap the approaches in Part 1 to see what actually works.
(another room)
(levers 1–4)
(door / barrier)
(acoustic foam)
Contain the noise, not the heat
Key Takeaways
- Moving your rig into another room or closet drastically reduces noise that reaches your workspace.
- Prioritize sealing gaps, treating reflection points, and bass trapping over excessive foam coverage.
- Proper ventilation is essential when placing a rig in a sealed closet—heat can ruin the hardware.
- Use the mirror trick for spot-on placement of acoustic panels at reflection points.
- Adding mass with drywall and Green Glue improves soundproofing more than foam alone.

Soundproof Room Divider with Wheels, 66in Office Dividers for Sound Proofing & Reducing, 3 Panel Sound Proof Dividers for Office Partitions Portable Temporary Wall Acoustic Wall Divider,Light Grey
BLOCKING OUT DISTRACTIONS: YASRKML Office Partitions is made of ECO-friendly, flame-retardant PET material with Fabric wrapping, which can...
As an affiliate, we earn on qualifying purchases.
As an affiliate, we earn on qualifying purchases.
Why Moving Your Rig Is the Most Powerful Noise Fix
If you want quiet, the fastest fix is to move your machine away from your desk. Think of it like a noisy neighbor—distance turns their loud music into a distant hum.
Putting your AI workstation in another room, basement, or closet means the sound doesn’t even reach you. You can SSH or connect over the network, and the noise becomes irrelevant. This simple step beats any foam panel or acoustic treatment for reducing noise at the source.
Imagine a GPU rig in a basement, roaring away. When you're working at your desk, all you hear is silence—because the sound’s gone. That’s the power of distance.

Focusound 52 Pack Acoustic Foam Panels 1" x 12" x 12" Sound Proof Foam Panles Soundproofing Noise Cancelling Wedge Panels for Home Office Recoding Studio with 300PCS Double-Side Adhesive
Soundproofing - Acoustic foam panels triangular grooves structure for better noise absorption, helps to reduce and absorb unwanted...
As an affiliate, we earn on qualifying purchases.
As an affiliate, we earn on qualifying purchases.
The 'Rig in the Closet' Setup — How to Do It Right
Placing a high-heat, high-noise machine in a closet can work beautifully—if you get ventilation right. It’s like giving your rig a mini climate control system. See how to optimize your closet setup.
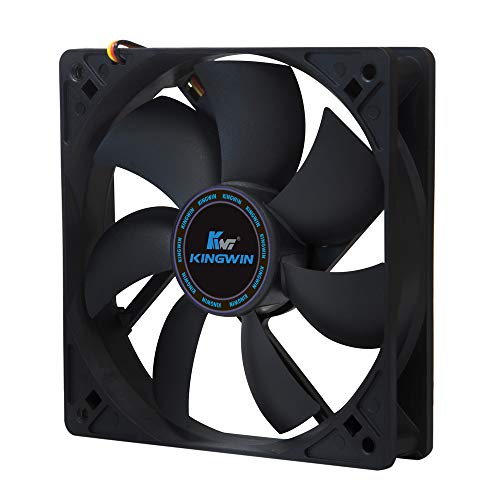
Start with active ventilation: a vent, a quiet exhaust fan, or even a ducted system. The goal is to keep hot air moving out, preventing heat buildup that can throttle your hardware.
For example, a creator in New York used a fan-controlled vent system in a closet to keep a 600W GPU rig cool. The result? Noise dropped by 20 dB, and the hardware stayed happy. Just remember: sealing gaps is key—any crack leaks sound and heat.
Beyond ventilation, consider the tradeoff between noise and heat. Adding a fan increases noise slightly but drastically improves cooling. Failing to ventilate properly can lead to overheating, which risks hardware failure. Sealing gaps also prevents the escape of sound and heat, but over-sealing without proper ventilation can trap heat, so balancing these factors is essential for a safe, quiet setup.
Kingwin 120mm Silent Fan for PC Cases, CPU Coolers, Mining Rigs – Quiet Computer Cooling Fan with Long Life Sleeve Bearing, High Airflow Ventilation – Black CF-012LB
special high profile fan blades for maximum air flow
As an affiliate, we earn on qualifying purchases.
As an affiliate, we earn on qualifying purchases.
Soundproofing vs. Dampening: What’s the Difference and What Works
Acoustic dampening and soundproofing aren’t the same. Dampening — with panels or foam — reduces echo and reflections inside a room. Soundproofing — sealing gaps, adding mass — keeps sound from escaping.
In small spaces like closets, you need both. Foam panels at reflection points cut down echo, but sealing the door and adding drywall with Green Glue blocks sound from leaking out. For example, doubling drywall can reduce noise transmission by up to 20 dB.
Understanding the implications: dampening improves the clarity and reduces harshness of sound within your space, making recordings cleaner and listening more comfortable. Soundproofing, on the other hand, prevents sound from disturbing others or leaking outside, which is crucial if you share walls or live in an apartment. The tradeoff is that soundproofing often involves more effort and cost but yields a more significant reduction in external noise. Combining both approaches provides a balanced solution—learn about effective soundproofing techniques.
Black Rubber Weather Stripping Door Seal Strip, D Shape Door Weather Seal Strip, Self-Adhesive Soundproofing Frame Insulation Tape for Doors Frame/Window Seal,Blocks Cold Drafts Noise
【THICKENED SILICONE MATERIAL - COMPLETELY BARRIERING AIR AND NOISE】:The weather stripping is made of thickened TPE material with...
As an affiliate, we earn on qualifying purchases.
As an affiliate, we earn on qualifying purchases.
Where to Place Acoustic Treatment for Maximum Effect
Placement is everything. Acoustic panels work best at first-reflection points—where sound hits directly and bounces back. Use the mirror trick: hold a small mirror along the wall at your listening or mic height, and place panels where you see the speaker or mic reflected. Find out more about acoustic treatment placement.
In a small closet, focus on the door, the walls behind your mic, and the ceiling. Corners matter too—bass tends to pile up there. Bass traps in corners can tame that low-end boom.
Proper placement of acoustic treatment can mean the difference between muddy, indistinct recordings and clear, professional-sounding audio. If panels are placed randomly, they may absorb some reflections but won’t address the primary problem areas. Strategic placement ensures you’re targeting the exact spots where sound reflections cause coloration and muddiness. This focused approach maximizes the effectiveness of your treatment budget and effort, leading to a more balanced and accurate sound environment.
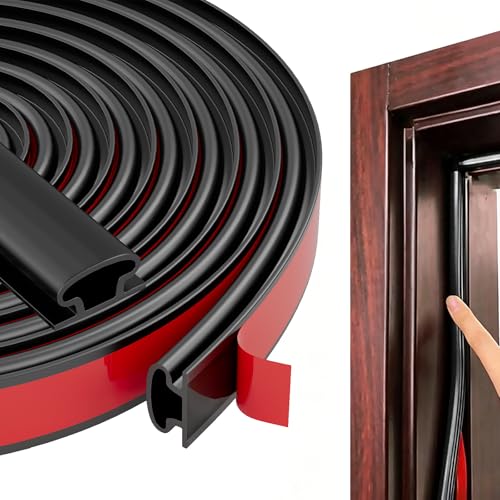
How to Seal Gaps and Block Sound Leaks Effectively
Small gaps around doors, vents, or electrical outlets leak sound like a sieve. Sealing these is one of the cheapest, easiest ways to cut noise. See tips on sealing gaps and soundproofing.
Use weatherstripping on the door frame, acoustic sealant around gaps, and draft stoppers. For example, sealing a closet door reduced noise leakage by over 15 dB in a DIY project.
When you seal gaps, you prevent sound from sneaking out and outside noise from sneaking in, which enhances the overall effectiveness of your treatment. It’s a tradeoff: tight seals improve sound containment but can make ventilation more challenging. Proper sealing combined with controlled ventilation ensures your space remains both quiet and cool. Overlooking this step often leads to frustrated attempts at noise control because sound will find its way through even tiny openings. Therefore, meticulous sealing is fundamental for a professional-quality setup.
The Role of Dense Materials and Mass in Soundproofing
Adding mass makes a big difference. Two layers of 5/8-inch drywall with Green Glue can drastically improve sound isolation, especially in small spaces like closets. Learn more about soundproofing materials and techniques.
Think of it like stacking blankets—more layers mean more resistance. Dense materials block low-frequency sounds better than foam or blankets alone.
In practice, increasing mass reduces the amount of sound energy that can pass through walls or doors. The tradeoff is that more mass adds weight and cost, and can be more difficult to install in tight spaces. However, for critical applications like voice recordings or sensitive equipment, investing in mass can yield significant improvements. For example, a DIY soundproof closet using drywall and Green Glue achieved about a 20 dB reduction in noise transmission, making it suitable for professional voice recordings. The key is balancing added weight and expense against the desired level of sound isolation.
Temporary Treatments: Blankets, Rugs, and Moving Blankets
If permanent treatment isn’t an option, blankets and rugs can help reduce reflections and echo. Hang moving blankets on walls or drape them over equipment.
While these won’t block sound effectively, they soften harsh reflections inside a tiny space. A gamer in a small apartment used blankets on the closet walls to dampen echo during voice chat, with noticeable improvement.
Remember: these are stopgap solutions—best paired with sealing gaps and strategic placement. They can make a noticeable difference in the short term but won’t replace proper treatment if you need a professional-level result. The key is understanding their limitations: they are primarily for reflection control, not sound isolation. Using them as part of a layered approach—alongside sealing and placement—can significantly improve sound quality in a pinch.
Mic Placement and Room Treatment — Do’s and Don’ts
The mic’s position is critical. Keep it close to your mouth and away from reflective surfaces. Use the mirror trick to find reflection points near the mic and treat those areas.
For example, placing a mic in the corner of a closet can cause it to pick up more bass and reflections. Moving it slightly away from the wall and adding a panel behind helps tame this.
Don’t forget: the more reflections your mic picks up, the muddier your recordings sound. Proper placement and treatment are a team effort. Understanding how room acoustics influence microphone pickup patterns helps you decide where to place your mic and treatment materials for optimal clarity. It’s about reducing unwanted reflections and standing waves that color your recordings, especially in small, untreated spaces. The tradeoff is that improper placement can lead to muddiness or boomy sounds, so experiment with positioning and treatment to find the sweet spot for your setup.