Choose and set up a dash cam that can record usable footage in low light, then check that it saves video correctly. This guide is for drivers with basic familiarity with their vehicle’s controls; it covers camera selection, installation, night settings, and a practical recording check. Allow 45-90 minutes, including a short test drive.

Get business pricing on garage and car supplies
- Business-only prices and quantity discounts
- Tax-exempt purchasing
- Multiple users, one account, clear invoices

IIWEY N6 4-Channel 360° Dash Cam with 128GB Card
- ✔ Channels: 4
- ✔ Video resolution: 1440p front; 1080p rear and sides
- ✔ Field of view: 170° front/rear; 150° sides

Four-Channel 1080p Dash Cam with 128GB Card
- ✔ Channels: 4
- ✔ Video resolution: 1080p
- ✔ Field of view: 360° stated coverage; 160° real angle of view

Galphi 4K Front Dash Cam with 5GHz Wi-Fi and 32GB Card
- ✔ Channels: 1 front camera
- ✔ Video resolution: 4K (2160p)
- ✔ Field of view: 160°
Difficulty: Beginner | Time: 45-90 minutes
What You’ll Need
Tools & Materials:
- Dash cam with a low-light sensor, preferably with a rear camera if you need rear coverage
- Compatible high-endurance microSD card of the capacity and speed class specified by the camera maker
- Vehicle owner’s manual
- Clean microfiber cloth and a small amount of glass cleaner
- Plastic trim tool and cable clips, if routing the power cable along the headliner
- Phone or computer with the camera’s app or video player, if required
Knowledge:
- Ability to identify the vehicle’s 12-volt outlet or USB power port
- Basic understanding of how to use the camera’s menu or companion app
Check local rules for windshield-mounted devices, recording audio, and filming passengers or public spaces. Use the camera maker’s power accessories and storage recommendations. If you plan to connect the camera to the fuse box for parking recording, follow the vehicle and camera instructions; ask an automotive installer if you are unsure about fuse selection or wiring.
IIWEY N6 4-Channel 360° Dash Cam with 128GB Card
The IIWEY N6 is our strongest match for drivers who want evidence from more than the road ahead. Its four channels record the front, rear, and both sides, and the front view records at 1440p while the other cameras record at 1080p. That front-resolution advantage matters when road-facing detail is the priority, while the adjustable side cameras extend coverage to areas a single-lens unit like the Galphi cannot see.For night use, the N6 combines eight infrared LEDs with Vision Enhance technology. Those features are intended to support low-light recording, especially across its multiple camera views, though the supplied details do not establish how much visible detail they resolve in every setting. Built-in GPS adds route logging without an extra logger, an advantage over the other four-channel pick. Dual-band Wi-Fi also gives it a broader connection option than the 5GHz-only models in this lineup.The tradeoff is a more involved setup. The camera needs vehicle power and has no built-in battery, and parking surveillance needs a separately sold hardwire kit. Its 128GB card is useful from the start, but capacity tops out at 256GB. Compared with the more basic 1080p four-channel camera, the N6 brings higher front resolution and built-in GPS; compared with the Galphi, it gives up a 4K single-camera image in exchange for seeing around the vehicle. We rank it first because that combination makes the most sense for night-focused, all-around incident documentation.
Pros:
- Four cameras cover the front, rear, and both sides.
- 1440p front recording exceeds the other multi-camera pick’s 1080p resolution.
- Eight infrared LEDs, Vision Enhance technology, and built-in GPS support night-focused recording and route logging.
- Includes a 128GB card and dual-band Wi-Fi.
Cons:
- Requires vehicle power and has no built-in battery.
- Parking surveillance requires a separate hardwire kit.
- Maximum supported memory is 256GB.
Best for: Drivers who want front, rear, and side recording with infrared support and built-in GPS.
Not ideal for: Drivers seeking a simple, battery-powered camera or a 4K front-only view.
Bottom line: Choose the IIWEY N6 when broad nighttime coverage and built-in GPS matter more than a 4K front-only image or a simpler installation.
“Choose the IIWEY N6 when broad nighttime coverage and built-in GPS matter more than a 4K front-only image or a simpler installation.”
Four-Channel 1080p Dash Cam with 128GB Card
For buyers who want a camera facing every direction but do not need the N6’s higher-resolution front channel, this four-channel 1080p model offers a straightforward alternative. Its four Full HD cameras record the front, rear, left, and right sides, and the included 128GB card means it is ready to store footage without an immediate memory-card purchase. That broad coverage is the key distinction from the Galphi: one records around the vehicle, while the other concentrates on a single front view.Its night-focused tools include eight infrared lights and WDR, which is intended to help manage difficult lighting. The stated f/1.6 aperture is another low-light specification, although specifications alone cannot establish real-world night footage quality. Loop recording and incident locking help keep selected clips available as the card fills. The 3-inch LCD gives us a direct way to view the camera interface, unlike the screen-free Galphi, which relies on its app.There are two notable omissions beside the IIWEY N6: GPS tracking requires a separate logger, and parking mode requires an optional ACC hardwire kit. Its views are all 1080p, so buyers prioritizing higher front-camera resolution should consider the N6’s 1440p front channel or the Galphi’s 4K recording. We place it second because it keeps four-direction night coverage while giving up some resolution and built-in route logging.
Pros:
- Four 1080p cameras record the front, rear, left, and right sides.
- Night vision, eight infrared lights, and WDR support low-light recording.
- Includes a 128GB card and provides a 3-inch LCD.
- Loop recording and incident locking help preserve selected footage.
Cons:
- GPS tracking requires a separately sold logger.
- Parking mode requires an optional ACC hardwire kit.
- All four cameras record at 1080p, below the IIWEY’s 1440p front channel and Galphi’s 4K front view.
Best for: Drivers who want four-direction Full HD recording, an included card, and an onboard screen.
Not ideal for: Drivers who want built-in GPS, a higher-resolution front camera, or parking mode without extra hardware.
Bottom line: Pick this model for four-way Full HD coverage and an onboard screen, provided separate GPS and hardwire accessories fit your setup.
“Pick this model for four-way Full HD coverage and an onboard screen, provided separate GPS and hardwire accessories fit your setup.”
Galphi 4K Front Dash Cam with 5GHz Wi-Fi and 32GB Card
The Galphi 4K suits a different kind of night-driving setup: one small camera focused on what happens ahead. Its 4K recording, 160-degree lens, f/1.6 aperture, and WDR make it the resolution-first option here. Where the two four-channel cameras can record side and rear incidents, Galphi keeps the installation visually simpler with an adhesive mount and no display. Its screen-free design reduces dashboard clutter, but all access and controls run through the app.For night recording, the f/1.6 aperture and WDR are the listed tools for handling low light and variable illumination. The 4K resolution gives this camera the highest stated front-video resolution in the group, but a higher pixel count by itself does not guarantee clearer footage in darkness. It has no infrared LEDs listed, unlike the IIWEY and the other four-channel model, so buyers seeking explicit infrared illumination should favor one of those options.Storage is the Galphi’s clearest compromise. The included 32GB card is smaller than the 128GB cards bundled with both multi-camera picks, and the camera supports up to 256GB. Its 24-hour time-lapse parking mode also depends on a separately purchased Type-C hardwire kit. Compared with the N6, it sacrifices all-around coverage and GPS; compared with the 1080p four-channel model, it offers a sharper front-facing specification and a more compact form. We rank it third for this roundup because its night vision use is limited to a single front view.
Pros:
- Records a 4K front view through a 160-degree lens.
- Compact, screen-free adhesive design keeps the dashboard uncluttered.
- f/1.6 aperture, WDR, and G-sensor event locking support its recording features.
- Includes a 32GB card and supports up to 256GB.
Cons:
- Records only the front view, unlike the two four-channel alternatives.
- The included 32GB card offers less storage than the other picks’ 128GB cards.
- 24-hour parking mode requires a separately purchased Type-C hardwire kit.
Best for: Drivers who prefer a discreet, screen-free camera and prioritize a 4K front view.
Not ideal for: Drivers who need side or rear recording, listed infrared LEDs, or ample included storage.
Bottom line: Choose the Galphi when a compact 4K front view matters more than infrared LEDs, larger included storage, or coverage around the vehicle.
“Choose the Galphi when a compact 4K front view matters more than infrared LEDs, larger included storage, or coverage around the vehicle.”
As an Amazon Associate we earn from qualifying purchases.
Before You Start
Park on level ground in a safe place, switch off the engine, and gather the camera, mount, power cable, and memory card. Do not place the camera where it blocks your view, covers an airbag deployment area, or interferes with sensors. A camera marketed as having “night vision” may use a sensitive image sensor, wide aperture, image processing, or infrared lights. Infrared can help inside a vehicle, but it does not make distant road details visible in the way headlights do. Judge a model by sample road footage recorded in darkness, not by the label alone.
Step-by-Step Instructions
Step 1: Choose a camera for the night conditions you face
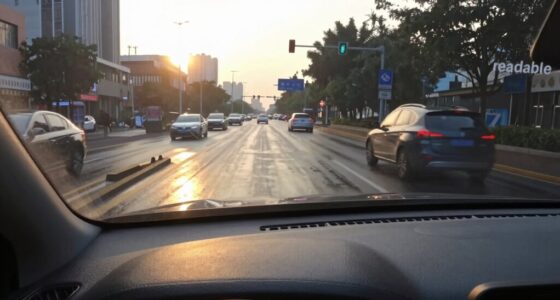
Compare sample footage recorded after dark on roads similar to yours. Look for readable license plates and road signs at realistic distances, balanced headlights that do not wash out the scene, and enough detail in shadowed areas. Prefer a model with a large, light-sensitive sensor, a wide aperture, and exposure control. If you need coverage behind the car, check that the rear camera records in low light too; a strong front camera cannot improve a poor rear view.
Check whether the camera supports the resolution, frame rate, and memory card capacity you intend to use. Higher resolution can capture more detail, but may use more storage and does not guarantee clear night footage.
Tip: Treat very bright sample footage with caution if it hides license plates or clips detail around headlights.
Check: You have selected a model with night sample footage that shows useful road detail and specifications compatible with your car and memory card.
Step 2: Prepare the memory card
Insert a compatible high-endurance microSD card while the camera is powered off. Turn the camera on and use its menu to format the card, following the manufacturer’s instructions. Formatting erases files on that card, so copy anything you need before formatting. Use a dedicated card for the dash cam, since continuous recording repeatedly writes data and can wear out cards not designed for that use.
Tip: Do not remove the card while the camera is recording or copying a clip.
Check: The camera recognizes the card and shows available recording time or a ready-to-record indicator.
Step 3: Mount the camera without blocking your view
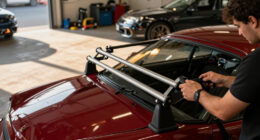
Clean and dry the inside of the windshield. Sit in your normal driving position and choose a mounting point high behind the rear-view mirror, where the camera has an unobstructed view of the road and stays outside the driver’s primary sightline. Check that the lens is not looking through a tinted or dotted section of glass. Attach the mount firmly, then fit the camera and adjust the lens so the horizon sits near the middle of the image and the hood occupies only a small portion at the bottom.
Tip: Check the owner’s manual for restrictions around airbags, cameras, and windshield sensors before routing or placing anything.
Check: From the driver’s seat, the camera does not obstruct your view, and its preview shows a level, centered road scene.
Step 4: Connect power and route the cable safely
Connect the supplied power cable to the camera and a suitable vehicle outlet. Start the car and confirm that the camera powers on and begins recording. If you want a tidy installation, switch the vehicle off, route the cable along the windshield edge and trim using a plastic tool, and keep it clear of airbags, pedals, steering parts, and moving trim. Do not force it into a panel. Secure loose sections with cable clips.
For parking recording, use a compatible hardwire kit with the camera maker’s voltage cutoff settings. Follow the kit and vehicle instructions, or have an automotive installer make the connection. A hardwire kit can draw power from the vehicle battery while parked.
Tip: If your vehicle’s outlet stays powered after the engine is off, check the camera’s power behavior so it does not drain the battery.
Check: The camera powers on when expected, records while the car is running, and the cable does not hang near the driver or interfere with vehicle equipment.
Step 5: Set recording and night options
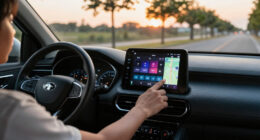
Open the camera menu or app and set the date, time, time zone, and video resolution. Enable continuous loop recording so older unlocked clips are replaced when the card fills. Turn on the microphone only if you want audio and local rules permit it. Set exposure or low-light options according to the maker’s guidance; start with automatic exposure unless test footage is too dark or bright. Enable impact locking if available, and check that it will not fill the card with locked clips.
For a rear camera, clean its lens, mount it securely, and connect it as described in the product instructions. Confirm that the app or display shows both views.
Tip: Avoid changing several image settings at once. Adjust one setting, record a clip, and compare results.
Check: The preview shows the correct date and time, loop recording is active, and the camera displays every view you installed.
Step 6: Check a night recording
After dark, drive a familiar route with streetlights and a darker section, following normal traffic rules. Do not handle the camera or phone while driving. Once parked safely, review the recording on the camera or transfer it to a phone or computer. Check a segment with approaching headlights, a lit sign, and a darker road area. Pause or enlarge the video to see whether lane markings and nearby signs remain distinguishable. Check the rear footage too if you installed a rear camera.
If the image is blurred, clean the windshield in front of the lens and the camera lens, then check the mount for vibration. If the image is consistently too dark or washed out, try a small exposure adjustment and record another sample.
Check: A saved clip plays from start to finish, includes accurate time information, and shows the road and nearby details without severe glare or blur.
Step 7: Confirm the files save and maintain the setup
With the vehicle parked, check that a recent clip appears in the camera’s file list and that a locked test clip, if created, remains protected from loop deletion. Use the camera’s playback controls or app to confirm the file is readable. Do not rely only on the live preview: a preview can look fine even when recording or storage has failed. Format the card in the camera periodically as directed by its maker, after backing up important footage, and inspect the mount and cable during routine checks.
Tip: Save important incident footage to another device promptly and follow local rules for retaining or sharing recordings.
Check: A recent video is stored on the card, plays correctly, and the camera starts recording again after the next vehicle startup.
Common Mistakes to Avoid
- Choosing a camera based only on “night vision” branding. — Review unedited nighttime road samples and confirm they show road signs or plates under conditions like yours.
- Mounting the camera too low or in the driver’s sightline. — Test the position from your normal driving seat and keep the lens clear of your primary view, sensors, and airbag areas.
- Using a card that is incompatible or not designed for continuous recording. — Match the camera maker’s capacity and speed requirements, choose a high-endurance card, and format it in the camera.
- Assuming a live preview proves the camera is recording. — Play back a saved clip and check that its date, time, image, and audio settings match your needs.
Troubleshooting
Problem: The camera does not power on with the engine.
Solution:
Check that the cable is fully seated at both ends and test the vehicle outlet with another suitable device. Check the vehicle manual for the outlet fuse if it remains unpowered. Replace a damaged cable with a compatible one; do not use an unapproved power adapter.
Problem: Night footage looks smeared, soft, or full of glare.
Solution:
Clean both sides of the windshield around the lens and wipe the lens with a soft cloth. Confirm the mount is firm and the lens points through clear glass. Review the exposure setting and reduce excessive exposure if headlights bloom across the image. Retest on the same route to compare.
Problem: The camera reports a card error or stops recording.
Solution:
Back up any readable files, power off the camera, and reseat the card. Format it in the camera. If the error returns, check that the card meets the required capacity and speed, then try a new compatible high-endurance card.
Problem: The car battery is low after the camera is parked.
Solution:
Disable parking mode or disconnect the camera when parked until you can check the power setup. For a hardwired camera, verify the voltage cutoff configuration and installation against the manufacturer’s instructions, and have the wiring inspected if the battery continues to drain.
What Success Looks Like
The camera starts recording when expected, the date and time are accurate, and a nighttime test clip is saved and playable. In that clip, the road, lane markings, and nearby signs remain visible in both lit and darker sections, with no severe blur, glare, or blocked view. The mount stays firm, cables do not interfere with driving, and the camera recognizes the memory card on the next startup.
Next Steps
Review a short clip after the first few night drives and after moving the camera, changing exposure, or replacing the memory card. Back up footage from an incident before it can be overwritten, and check the card and mount periodically. If your camera supports firmware updates, follow its instructions while parked and keep power connected throughout the update. Recheck local recording rules if you travel to another region.
Frequently Asked Questions
Does night vision let a dash cam see clearly in complete darkness?
No camera can show road detail without light. A sensitive sensor and bright lens can make better use of streetlights and headlights, but infrared LEDs mainly help with nearby interior views and do not illuminate a distant road like vehicle headlights.
What resolution should I use for night driving?
Start with the camera’s highest supported resolution that fits your card and recording needs. Resolution alone does not determine night clarity; sensor quality, exposure, lens, and motion handling also affect how much detail the video captures.
Can I leave the camera recording while the car is parked?
Only if the camera supports parking mode and has a suitable power setup. Use the specified hardwire kit or battery pack and configure its cutoff settings to reduce the risk of draining the vehicle battery.
How can I tell whether a dash cam video is clear enough?
Play a clip recorded after dark. Check whether lane markings, nearby signs, and road layout are recognizable during movement, and whether headlights leave enough detail to read the scene. A stationary image may look sharper than footage from a moving car.