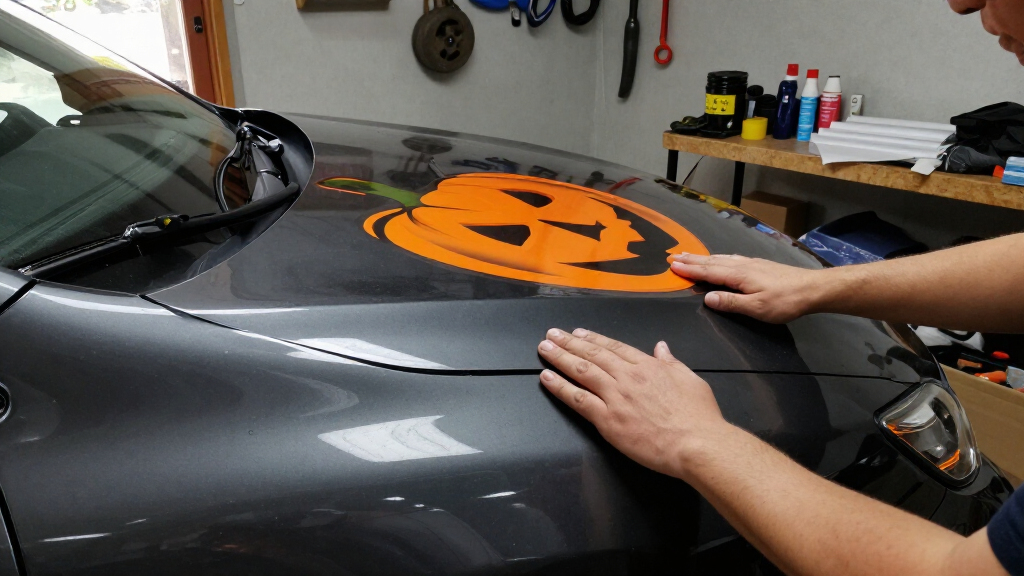
This guide walks you through the process of applying Halloween car decals, helping you create a fun and spooky look for your vehicle. It is suitable for beginners with basic manual skills and takes about half an hour. Proper application ensures the decals stay in place and look sharp, making your vehicle stand out during the holiday season.

Get business pricing on garage and car supplies
- Business-only prices and quantity discounts
- Tax-exempt purchasing
- Multiple users, one account, clear invoices
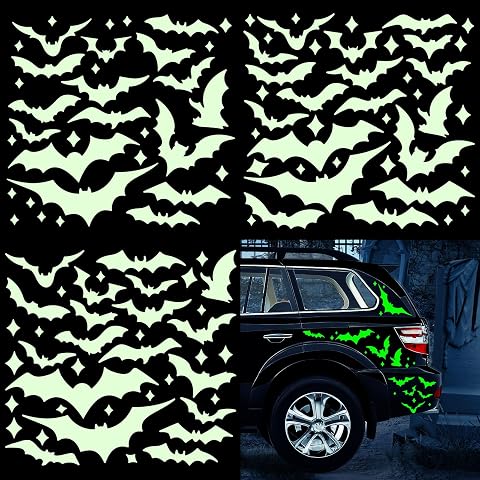
Whaline 3 Sheets Halloween Glow in The Dark Bat Car Decals
- ✔ Style: Color Green Fluorescent
- ✔ Theme: Halloween
- ✔ Subject Character: Halloween
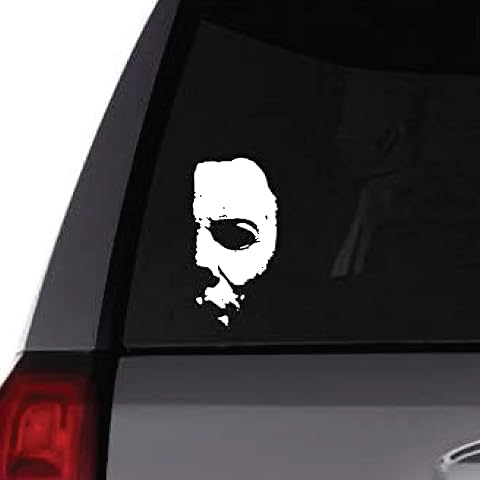
Michael Myers Creepy Half Face Vinyl Sticker – Waterproof Decal for Car, Laptop, Indoor & Outdoor Use
- ✔ Material: Vinyl
- ✔ Reusability: Single-Use
- ✔ Room Type: Indoor, Outdoor
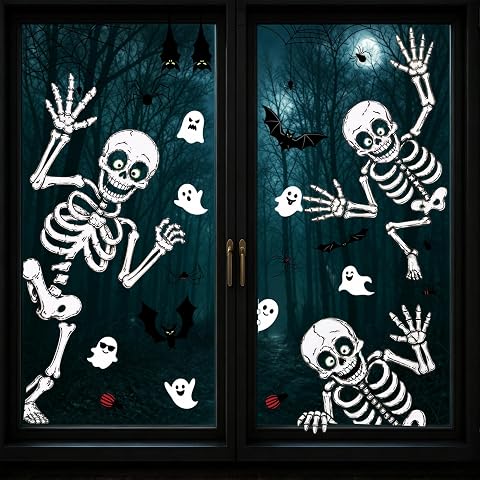
Halloween Skeleton and Ghost Window Clings Decorations
- ✔ Number of pieces: Multiple
- ✔ Reusable: Yes
- ✔ Application surfaces: Windows, mirrors, glass doors, tiles, car windows
Difficulty: Beginner | Time: 30-45 minutes
What You’ll Need
Tools & Materials:
- Decals (pre-cut or custom-made)
- Mild soap or automotive cleaner
- Water spray bottle
- Squeegee or plastic card
- Lint-free cloth or microfiber towel
- Masking tape (optional)
- Application solution (optional, e.g., a mix of water and a few drops of dish soap)
Knowledge:
- Basic understanding of surface cleaning
- Careful handling of decals to avoid tearing or misalignment
Ensure your vehicle’s surface is clean and dry before starting. Work in a dust-free environment to prevent debris from sticking to the decals during application.
Whaline 3 Sheets Halloween Glow in The Dark Bat Car Decals
The Whaline glow-in-the-dark bat decals stand out for their ability to create a spooky nighttime effect. Made from durable, waterproof PVC, they are designed to last outdoors and are easy to apply without damaging your paint. They come in three sheets with assorted bat designs, making it easy to customize your car’s look. Compared with static clings, these decals glow brightly after exposure to light, enhancing their spooky atmosphere at night. However, their glow depends on prior light exposure, which may limit their brightness in very dark areas. Additionally, the adhesive may not perform well on hot or dirty surfaces, and the limited bat shapes might not suit all tastes.
Pros:
- Glow-in-the-dark effect enhances nighttime visibility and spooky atmosphere
- Durable, waterproof PVC material ensures long-lasting use
- Easy to apply and remove without damaging vehicle paint
Cons:
- Requires exposure to light to glow effectively
- Adhesive may struggle on hot or dirty surfaces
- Designs are limited to bat shapes, which may not suit all tastes
Best for: Halloween enthusiasts who want a bright, fun, and reusable decoration that shines at night.
Not ideal for: People seeking subtle or minimalist decor, or those who prefer decals that don’t rely on light to glow.
Bottom line: A versatile, glow-in-the-dark option perfect for creating a fun, spooky vibe during night drives.
“A versatile, glow-in-the-dark option perfect for creating a fun, spooky vibe during night drives.”
Michael Myers Creepy Half Face Vinyl Sticker – Waterproof Decal for Car, Laptop, Indoor & Outdoor Use
The Michael Myers vinyl sticker makes a bold statement for Halloween lovers who want a permanent, eye-catching design. Its high-quality vinyl material ensures durability against weather and outdoor conditions, and it’s easy to apply on smooth surfaces like cars, laptops, and windows. The glossy finish enhances the creepy half-face design, adding a spooky edge to any item. Compared with decals that are reusable, this sticker is designed for single-use, which means you’ll need to replace it if you want to change your decor. Its bold design might be too intense for those preferring subtlety, and it demands a clean, smooth surface to adhere properly.
Pros:
- Durable and waterproof for outdoor use
- Easy to apply and remove without residue
- Bold, eye-catching design adds personality
Cons:
- Single-use; not reusable after removal
- Design may be too bold for subtle preferences
- Requires clean, smooth surface for best adhesion
Best for: Fans of horror who want a striking, long-lasting decoration that’s easy to apply outdoors and indoors.
Not ideal for: Those seeking reusable or more understated decorations, or with textured surfaces that complicate application.
Bottom line: A perfect choice for bold, permanent Halloween decorations that stand out on any surface.
“A perfect choice for bold, permanent Halloween decorations that stand out on any surface.”
Halloween Skeleton and Ghost Window Clings Decorations
The Halloween skeleton and ghost window clings offer a versatile and reusable way to add spooky scenes to glass surfaces. Made from static cling material, they are easy to apply without mess and can be repositioned multiple times. Their fun skeleton, ghost, bat, and spider designs make them ideal for window displays, mirrors, and glass doors, making them suitable for both home and party decorations. Compared with decals that rely on adhesive, these clings are less durable on non-glass surfaces and may not stick well if the glass surface is dirty or textured. Their designs are simpler and less detailed up close, but they’re perfect for a quick, reusable Halloween touch.
Pros:
- Reusable and easy to reposition
- Suitable for various glass surfaces
- Kid-friendly and fun for family decorations
Cons:
- May not stick well on non-glass surfaces
- Limited to static cling surfaces
- Designs may be less detailed upon close inspection
Best for: Those seeking an easy, reusable, and non-damaging decoration that works well on glass surfaces.
Not ideal for: Decorators wanting permanent or highly detailed designs, or those decorating non-glass surfaces.
Bottom line: An excellent reusable option for quick, easy, and damage-free Halloween window decor.
“An excellent reusable option for quick, easy, and damage-free Halloween window decor.”
As an Amazon Associate we earn from qualifying purchases.
Before You Start
Check the weather forecast. Do not apply decals if it is raining, very humid, or extremely cold, as these conditions can prevent the decals from adhering properly. Gather all tools and materials in a clean, flat workspace to facilitate a smooth process.
Step-by-Step Instructions
Step 1: Clean the Vehicle Surface
Wash the area where you will apply the decal with mild soap or automotive cleaner, then rinse thoroughly. Dry the area completely with a lint-free cloth to remove any dirt, grease, or residue that could interfere with adhesion.
Tip:Use a microfiber towel to avoid scratching the paint. For stubborn grease or sap, use a specialized cleaner designed for vehicle surfaces.
Check: The surface feels smooth, dry, and free of dust or grease. No streaks or residue should remain.
Step 2: Position the Decal
Hold the decal above the desired placement to visualize its position. If needed, use masking tape along the edges to mark the intended location. Do a dry run by placing the decal without peeling off the backing to confirm positioning.
Tip:Use masking tape to create a guide line or border, helping to align the decal accurately.
Check: The decal placement appears symmetrical and aligned as planned before peeling off the backing.
Step 3: Peel and Apply the Decal
Carefully peel the backing paper from the decal, starting from one corner. Hold the decal by the edges to prevent fingerprints or air bubbles. Gently lay the decal onto the vehicle surface, starting from the center and smoothing outward.
Tip:Work slowly to avoid trapping air bubbles. Use your fingers or a squeegee to press the decal firmly onto the surface.
Check: The decal is smoothly adhered without wrinkles, air bubbles, or edges lifting.
Step 4: Smooth Out Air Bubbles
Use a squeegee, plastic card, or your fingers to press and smooth the decal from the center outward, pushing out any trapped air or water. Focus on edges and corners to ensure full adhesion.
Tip:If bubbles persist, prick them with a pin and press out the air with a squeegee.
Check: The decal lies flat against the vehicle surface with no visible bubbles or wrinkles.
Step 5: Remove the Transfer Tape (if applicable)
If your decal has a transfer tape layer, carefully peel it away at a sharp angle, starting from one corner. Do this slowly to prevent lifting the decal edges.
Tip:Peel back the tape slowly and evenly, checking that the decal remains adhered to the surface.
Check: The decal remains firmly attached and is free of wrinkles or lifting edges.
Step 6: Final Inspection and Cleanup
Inspect the entire decal for any air bubbles, edges lifting, or misalignment. Use a damp cloth to wipe around the decal for a clean finish. If needed, press down any edges to secure.
Tip:Avoid washing the vehicle immediately; wait at least 24 hours for full adhesion.
Check: The decal is smoothly integrated into the vehicle surface with no bubbles, wrinkles, or loose edges.
Common Mistakes to Avoid
- Applying decals on dirty or greasy surfaces — Always thoroughly clean and dry the area before application to ensure good adhesion.
- Peeling the backing paper too quickly or unevenly — Peel slowly and steadily, starting from one corner, to prevent tearing or misalignment.
- Not smoothing out air bubbles during application — Use a squeegee or plastic card to press out bubbles immediately after applying the decal.
- Applying decals in unsuitable weather conditions — Choose a dry, mild day with low humidity for optimal results.
Troubleshooting
Problem: Decal is lifting or bubbling after application
Solution: Repress the area with a squeegee, or gently prick bubbles with a pin and press out air. If lifting persists, remove and reapply in better conditions.
Problem: Decal not sticking properly in cold or humid weather
Solution: Remove the decal, wait for better weather, then clean the surface again and reapply in optimal conditions.
Problem: Edges start to peel after a few days
Solution: Apply a clear automotive sealant or trim adhesive around edges for extra durability.
What Success Looks Like
The decal is firmly attached without air bubbles, wrinkles, or edges lifting. The design is sharply visible, aligned properly, and stays in place after washing or exposure to weather.
Next Steps
Allow the decal to set undisturbed for at least 24 hours before exposing it to rain or washing. Regularly check edges for lifting and reapply or seal if necessary. For removal, peel slowly from one corner, and clean the surface afterward.
Frequently Asked Questions
Can I apply decals on a car with existing paint or decals?
Yes, but ensure the surface is clean and free of old decals or paint damage. Test a small area first to confirm adhesion.
How long will the decals last outdoors?
Most automotive decals last 1-3 years depending on weather conditions and exposure. Use sealants for longer durability.
Can I remove the decals later without damaging the paint?
Yes, peel slowly at a low angle. Use heat from a hairdryer to loosen adhesive if necessary. Clean with automotive adhesive remover afterward.
Fall Picks
fall essentials
As an affiliate, we earn on qualifying purchases.