When planning clean OBD installs, you can’t overlook foot space. Position the OBD connector for easy access without awkward bending or stretching. Think about how often you’ll use the tool and where you’ll need it most. Good cable management prevents clutter and tripping hazards, enhancing comfort during diagnostics. By optimizing the installation for both you and the vehicle, you’ll boost efficiency and usability. You’ll find even more tips to streamline this process ahead.
Key Takeaways
- Assess vehicle specifications to identify optimal OBD placement that enhances accessibility without compromising foot space.
- Ensure ergonomic access by positioning the OBD connector at a height that prevents awkward bending or stretching.
- Maintain organized cable management to avoid clutter and tripping hazards, keeping the foot area clear during diagnostics.
- Consider vehicle compatibility to streamline the installation process and prevent issues related to varying OBD layouts.
- Plan installations to maximize user interaction and comfort, ensuring the OBD system integrates seamlessly into the vehicle experience.
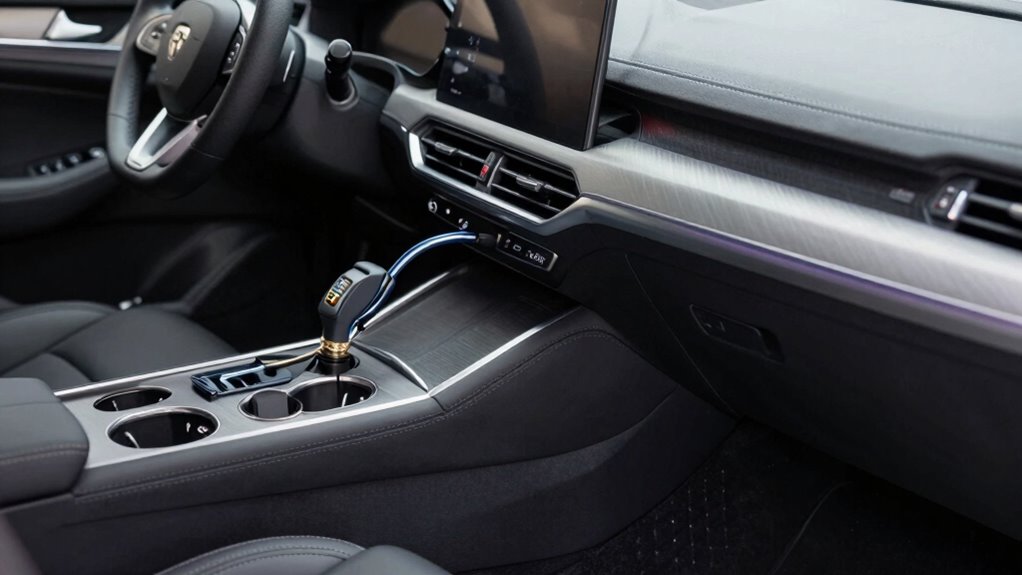
When you’re planning OBD (On-Board Diagnostics) installs, it’s vital to take into account both the vehicle’s specifications and your specific needs. One often overlooked aspect is foot space around the OBD placement. Proper positioning not only enhances user accessibility but also guarantees that you can perform diagnostics efficiently. You want to avoid any awkward bending or twisting while accessing the diagnostic port, which can lead to discomfort during regular use.
Planning OBD installs requires careful consideration of vehicle specs and foot space for optimal accessibility and comfort during diagnostics.
Consider the ergonomic aspects of your installation. You’ll want to choose a location that allows for easy access without having to stretch or reach excessively. If the OBD connector is too low or too high, it can become a hassle to plug and unplug. Think about how you’ll be using the OBD tool – whether for quick checks or extensive diagnostics – and choose a placement that accommodates your routine.
Cable management is another essential element. A clean installation isn’t just about where you place the OBD unit; it’s also about how you route the cables. Make sure you’re optimizing the available space in the vehicle to prevent clutter. Tidy up any loose cables that might interfere with foot space or become a tripping hazard. Good cable management not only looks professional but also contributes to overall diagnostic efficiency. Additionally, understanding vehicle configurations can help you identify the best placement options based on vehicle compatibility. Knowing how different vehicle configurations impact OBD placement can save you time and effort during installation. Proper planning can also help you avoid installation challenges that might arise from misjudging space or vehicle design. Considering space optimization techniques can further improve your installation process and ensure a seamless integration.
Don’t forget to check vehicle compatibility as well. Different vehicles have varying configurations, and the OBD placement may differ based on the make and model. You’ll need to guarantee your installation tools can accommodate these variations. Using the right tools can save you time and frustration during the installation process, making it smoother and more effective. Being aware of vehicle-specific layouts can further streamline your installation process and prevent potential issues. Space optimization is key. Consider the layout of the vehicle’s interior; every inch matters. You want to maximize the utility of the area without encroaching on the driver or passenger foot space. A well-thought-out installation can greatly improve how users interact with the OBD system. It should be a seamless part of the vehicle experience rather than an obstacle.

XHF 50pcs Medium Self Adhesive Cable Clips Black,Wire Clips Cable Management Wire Organizer Cord Holder for Under Desk, Car, Wall, TV PC Ethernet Cable
High quality material:XHF Adhesive Cable Clips are manufactured from 3M Strong Adhesive and PA66 nylon
As an affiliate, we earn on qualifying purchases.
As an affiliate, we earn on qualifying purchases.
Frequently Asked Questions
What Tools Are Essential for a Clean OBD Install?
For a clean OBD install, you’ll need a few essential tools. Start with a quality OBD-II scanner, zip ties for cable management, and a wire stripper for any necessary connections. A torque wrench guarantees proper tightening, while electrical tape helps secure loose ends. Don’t forget a panel removal tool to avoid damaging your vehicle’s interior. Mastering these installation techniques will keep your setup neat and functional, enhancing your vehicle’s overall performance.
How Long Does a Typical OBD Install Take?
A typical OBD installation duration can range from 30 minutes to a few hours, depending on various installation time factors. You’ll need to take into account the vehicle model, your experience level, and the tools at your disposal. It’s like piecing together a puzzle; every part plays an essential role. So, prepare for potential hurdles, and don’t rush. Taking your time guarantees a clean, effective install that’ll serve you well in the long run.
Can I Install OBD Devices Without Professional Help?
Yes, you can handle a DIY OBD installation without professional help! Just make certain the OBD device you choose is compatible with your vehicle. Gather the necessary tools, follow the installation instructions carefully, and take your time. It’s important to double-check all connections to guarantee everything works smoothly. With a bit of patience and attention to detail, you’ll have your OBD device up and running in no time!
What Are Common Mistakes During OBD Installation?
Common mistakes during OBD installation include poor wire routing, which can lead to interference or damage, and overlooking device compatibility, causing connection issues. You might forget to check the vehicle’s specifications, resulting in malfunctioning devices. Not securing wires properly can also pose safety risks. Always double-check your connections and verify the device fits your vehicle’s system. Taking time to plan and research can save you from these pitfalls and guarantee a smooth installation.
How Do I Troubleshoot Issues After Installation?
About 30% of OBD installations face challenges, often due to overlooked details. To troubleshoot issues after installation, start by checking connections; guarantee everything’s secure. Use basic troubleshooting techniques like scanning for error codes and reviewing vehicle logs. If problems persist, consider re-evaluating your installation process for any overlooked steps. Document each issue you encounter; it’ll help you identify patterns and improve future installations. Don’t hesitate to consult online forums for additional insights!

iKKEGOL Right Angle OBD II OBD2 16 Pin Splitter Extension Cable 1x Male and 2X Female Low Profile Ribbon Slim Extender Cord Adapter 60cm/2FT 24" Inch
Versatile Compatibility: This is Ultra flat low profile 1 to 2 OBD splitter adapter, installed under the dash…
As an affiliate, we earn on qualifying purchases.
As an affiliate, we earn on qualifying purchases.
Conclusion
In the world of OBD installs, a little planning goes a long way. Remember, “an ounce of prevention is worth a pound of cure.” By carefully considering foot space, you not only enhance the cleanliness of your install but also guarantee safety and comfort during use. So, take the time to map out your setup. It’ll save you headaches down the line and keep your project running smoothly, letting you focus on what really matters.

Case for BlueDriver Bluetooth Pro OBDII Scan Tool for iPhone & for Android, Car and Auto Mini Carry Holder for Veepeak. Bag Only (Full Black)
Travel case for bluedriver, veepeak code reader: Car code reader storage box design for BlueDriver Bluetooth Pro OBDII…
As an affiliate, we earn on qualifying purchases.
As an affiliate, we earn on qualifying purchases.
ANCEL AD310 Classic Enhanced Universal OBD II Scanner Car Engine Fault Code Reader CAN Diagnostic Scan Tool, Read and Clear Error Codes for 1996 or Newer OBD2 Protocol Vehicle (Black)
CEL Doctor: The ANCEL AD310 is one of the best-selling OBD II scanners on the market and is…
As an affiliate, we earn on qualifying purchases.
As an affiliate, we earn on qualifying purchases.