
Unwanted rear hatch movement can quickly ruin your installation plans by causing misalignment, which leads to difficulty closing or opening it smoothly. This movement can shift measurements, making adjustments more complicated and increasing frustration. It might also result in leaks, wind noise, or damage to the hatch components. Even small changes in cargo area or vehicle geometry can make the hatch bind or fit improperly. Keep going to find out how to prevent these issues from occurring.
Key Takeaways
- Unexpected hatch movement disrupts precise alignment, making installation adjustments difficult and prolonging the process.
- Hatch shifting during installation can cause miscalculations, requiring re-measurements and rework.
- Movement can lead to misaligned gaps, affecting vehicle appearance and sealing integrity.
- Unintended hatch motion may interfere with mounting points, compromising secure attachment.
- Changes or modifications to cargo area components can increase hatch instability, complicating installation plans.
When you’re in the middle of installing a new rear hatch, unexpected movement can throw off your entire plan. Rear hatch alignment is crucial for a smooth, secure fit, and any shift during installation can lead to misalignments that are tough to fix later. If the hatch isn’t perfectly aligned, it might not close properly, causing leaks, wind noise, or difficulty opening and closing. This can be incredibly frustrating, especially when you’ve already invested time and effort into the process. You might find yourself adjusting hinges repeatedly or trying to force the latch into place, but the hatch keeps shifting, throwing off your measurements and making the entire task more complicated.
Unexpected hatch movement during installation can cause misalignment and frustration, making the process more difficult and less precise.
Cargo area modifications can often complicate rear hatch installation. If you’ve added or removed panels, altered the shape of the cargo space, or installed aftermarket components, these changes can interfere with the hatch’s proper movement. For example, if a new cargo barrier or custom trim isn’t perfectly fitted, it can push against the hatch or restrict its movement. Even small modifications can cause the hatch to misalign or bind during operation. This misalignment can result in uneven gaps, making the rear of your vehicle look sloppy and potentially allowing water or debris to enter. It also increases the risk of damaging the hatch or its components during use. Additionally, cargo modifications can alter the original geometry, making precise alignment even more critical. Ensuring that all mounting points are properly secured and free of obstructions is essential for maintaining correct hatch movement, as well as understanding how vehicle geometry impacts installation and long-term operation.
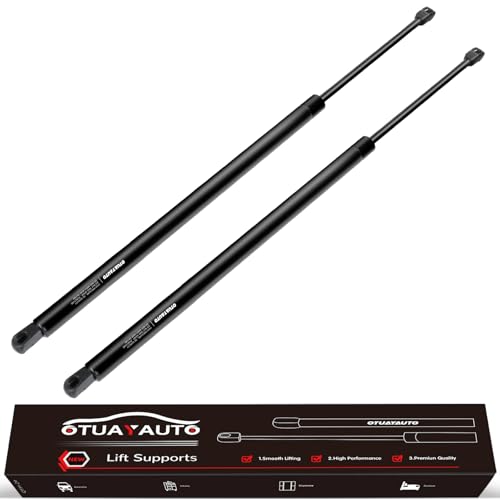
OTUAYAUTO Rear Liftgate Hatch Shock Struts, SG226013 Lift Support Replacement for Honda Pilot EX LX EX-L- fits 2003-2008 Vehicles, Pack of 2
Fitment: Replacement for 2003 2004 2005 2006 2007 2008 Honda Pilot EX LX EX-L, rear hatch tailgate struts
As an affiliate, we earn on qualifying purchases.
As an affiliate, we earn on qualifying purchases.
Frequently Asked Questions
How Can I Prevent Rear Hatch Movement During Installation?
To prevent rear hatch movement during installation, focus on proper hatch alignment and secure it firmly. Use safety precautions like clamps or supports to stabilize the hatch while working. Double-check the alignment before tightening bolts, ensuring everything lines up correctly. Taking your time and working carefully will minimize movement, making installation safer and more accurate. This approach guarantees a proper fit and reduces the risk of damage or misalignment later.
What Tools Are Best for Stabilizing the Hatch?
Surprisingly, the best tools for stabilizing your hatch are simple yet effective. Use a rubber mallet for gentle adjustments, ensuring hatch alignment stays perfect. Clamp sets can hold the hatch in place, but only if they’re compatible with your vehicle’s design—so check tool compatibility first. A sturdy jack or support props also work wonders, preventing unnecessary movement and making your installation smoother, no matter how stubborn the hatch seems.
Does Hatch Weight Affect Installation Difficulty?
Yes, hatch weight can considerably affect installation challenges. Heavier hatches require more effort to lift, hold, and secure during installation, increasing the difficulty and risk of mishaps. You might find it helpful to use additional support tools or ask for help with heavier hatches. Managing hatch weight carefully guarantees a safer, smoother installation process, preventing unnecessary strain or damage to the vehicle and the hatch itself.
Are There Specific Vehicle Models Prone to Hatch Issues?
Certain vehicle models, especially older SUVs and hatchbacks, are more prone to hatch issues, with some having a 30% higher incidence of hatch misalignment or movement problems. This is often due to hatch design flaws or aging components affecting vehicle safety. When installing accessories, you must consider these model-specific issues, as faulty hatch movement can compromise safety and complicate installations, making it essential to assess hatch design before starting your project.
How Long Does a Typical Rear Hatch Repair Take?
A typical rear hatch repair takes about two to four hours, depending on the issue. If you’re dealing with rear hatch alignment problems or hydraulic lift issues, the process might take longer. You’ll need to have the hatch properly aligned to prevent future movement problems, and hydraulic lifts might require replacing or repairing faulty components. Timely repairs guarantee your hatch functions smoothly and avoids further damage or installation setbacks.

2 PCS Car Hood Prop Struts Clamp, Hood Strut Clamp, Car Lift Support Retaining Clip, 0.43 Inch Hood Lift Support Clip for Car, Automotive Tools for Tailgate Hatch Car Trunk (Blue)
Superior Material: Hood strut tool lift support is made of high-strength aluminum alloy, which is sturdy, durable, corrosion-resistant,…
As an affiliate, we earn on qualifying purchases.
As an affiliate, we earn on qualifying purchases.
Conclusion
As you stand there, realizing your install plans are unraveling, the rear hatch’s unexpected movement leaves you on edge. Will this setback derail everything, or is there a way to turn the situation around? The fix might be simpler than you think, but the clock’s ticking. One wrong move could turn a minor hiccup into a major headache. Stay sharp—your next step could make all the difference between a successful install and chaos.

Qty (2) QiMox Rear Hatch Hatchback Struts Lift Supports Shocks Compatible with 2011-2016 Scion tC (PM3236,689500W611,68950-0W61)
Placement on Vehicle:Rear Hatch/Htachback
As an affiliate, we earn on qualifying purchases.
As an affiliate, we earn on qualifying purchases.

Blshwez Rear Hatch Struts, Liftgate Lift Supports Shock, Heavy Duty Tailgate Struts Replacement for 2010-2015 Lexus RX350 RX450H, 2 Pack
MODEL-SPECIFIC COMPATIBILITY: Compatible with Lexus RX350 Base/F Sport, 2014 to 2015 Lexus RX350 Sportdesign, 2010 to 2015 Lexus…
As an affiliate, we earn on qualifying purchases.
As an affiliate, we earn on qualifying purchases.