To create a clean cable routing setup, start by planning a clear pathway that minimizes crossing and avoids obstacles. Use quality fasteners and secure cables along walls, ceilings, or moldings, making gentle bends to prevent damage. Keep cables organized with labels and avoid sharp bends or pinching. Regularly inspect and maintain the setup to guarantee safety and reliability. Keep exploring these tips, and you’ll discover how to achieve a professional, clutter-free install.
Key Takeaways
- Plan a direct, obstacle-free route using cable channels or raceways for organized, neat wiring.
- Use appropriate fasteners like clips or brackets every 3-4 feet to secure cables and prevent sagging.
- Measure twice and cut once to ensure precise cable lengths, avoiding slack and tension issues.
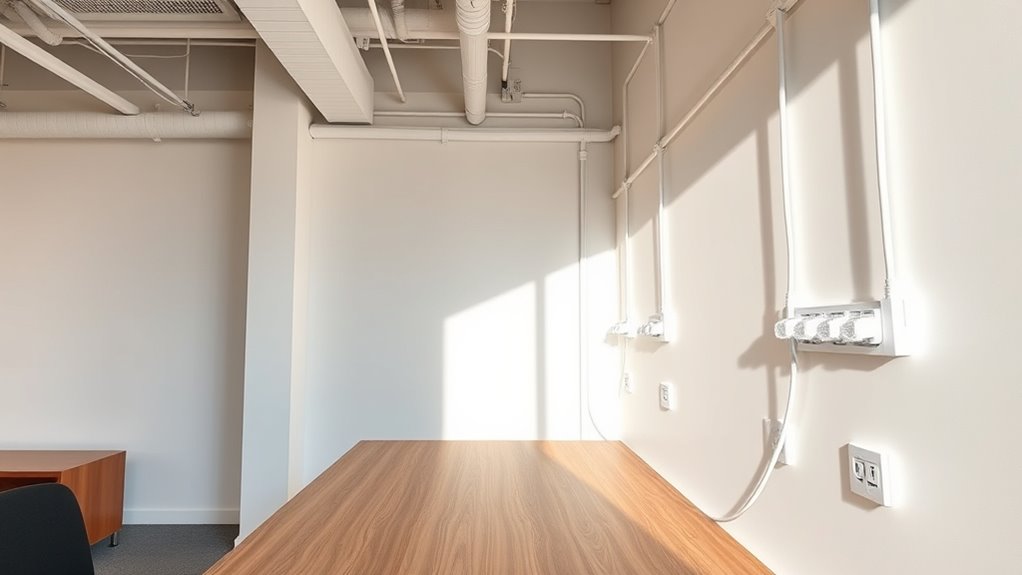
- Conceal cables behind molding or baseboards for a clean aesthetic and protection.
- Regularly inspect and maintain cables and supports to ensure safety, signal integrity, and durability.

Tymate TM7 Tire Pressure Monitoring System, Wireless TPMS with 4 External Sensors & 6 Alarm Modes, Colorful Display, Real-time Tire Pressure Monitor System, Ideal for RV SUV MPV Truck Sedan(0-144 PSI)
[Accurate Real-time Monitoring & Multi-Alert System]: Tymate TM7 tpms sensor can be used to monitor your tires’ pressure...
As an affiliate, we earn on qualifying purchases.
Planning Your Cable Layout
Before you begin routing cables, it’s essential to plan your layout carefully. Start by evaluating your space and identifying key points where devices connect. Consider wireless alternatives for devices that don’t require wired connections, reducing clutter and making troubleshooting tips easier down the line. Map out a clear path that minimizes cable crossing and avoids high-traffic areas to prevent damage or interference. Think about cable length, accessibility, and future expansion needs. Proper planning ensures a clean, efficient setup, reducing the risk of tangled cables or signal issues. Additionally, understanding projector technology helps in selecting the right cables and placement for optimal performance. Incorporating smart home automation concepts into your cable routing can enhance your overall system efficiency. Planning for future upgrades can save significant time and effort as your system evolves. Considering cable management techniques during planning can further improve organization and ease of maintenance. Using cable routing tools can streamline the installation process and improve accuracy. Whether you’re wiring a home or office, detailed planning is your first step toward a neat and reliable cable installation.

Marcala Tire Pressure Monitoring System - Set of 4 TPMS Sensors for Trailer, RV, Camper, Truck (0-98PSI) | 32ft Extended Range Air Monitor Kit | Solar Charge & 6 Alarm Modes | Be Safe & Prevent Flats
✅ NEW SENSORS & HUB for an EXTEDED RANGE up to 32 FEET! Perfect for Large RVs, Campers,...
As an affiliate, we earn on qualifying purchases.
Choosing the Right Cables and Accessories

Choosing the right cables and accessories is essential for guaranteeing your setup is reliable and efficient. Start by considering wire gauge selection; thicker gauges handle higher power loads and reduce voltage drops, which is vital for performance. For data and audio, thinner gauges are sufficient. Next, evaluate connector types—there are various options like RJ45 for Ethernet, HDMI for video, and USB for peripherals. Using the correct connectors ensures secure, stable connections and minimizes signal loss. Compatibility is key, so double-check the specifications for each device and cable. Selecting appropriate cables and accessories upfront saves you time and prevents issues later. Focus on quality, match cable types to their intended functions, and always choose connectors that fit properly to maintain a clean, professional installation. Incorporating emerging nanotechnology innovations can also enhance cable durability and performance for future-proof setups. Paying attention to cable ratings helps ensure you choose cables that meet safety and performance standards, avoiding potential hazards. For example, selecting cables with industry-standard certifications can further guarantee safety and quality. Additionally, considering the best hot rollers for long hair can be useful when styling your setup area for comfort and efficiency. Being aware of cable management techniques can also help keep your install tidy and reduce wear on your cables over time.

Tymate TM2 RV Tire Pressure Monitoring System, Tire Pressure Monitor with Solar Charge, TPMS with 4 Sensors(Max. 10) & 6 Alarm Modes, New Updated w/Color LCD Display, 0-87PSI for RV/Trailer/Truck/SUV
[Discover Five Alarm Modes and Simple Setup for Alarm Thresholds]: With the Tymate Tire Pressure Monitoring System TM2,...
As an affiliate, we earn on qualifying purchases.
Measuring and Cutting for a Precise Fit
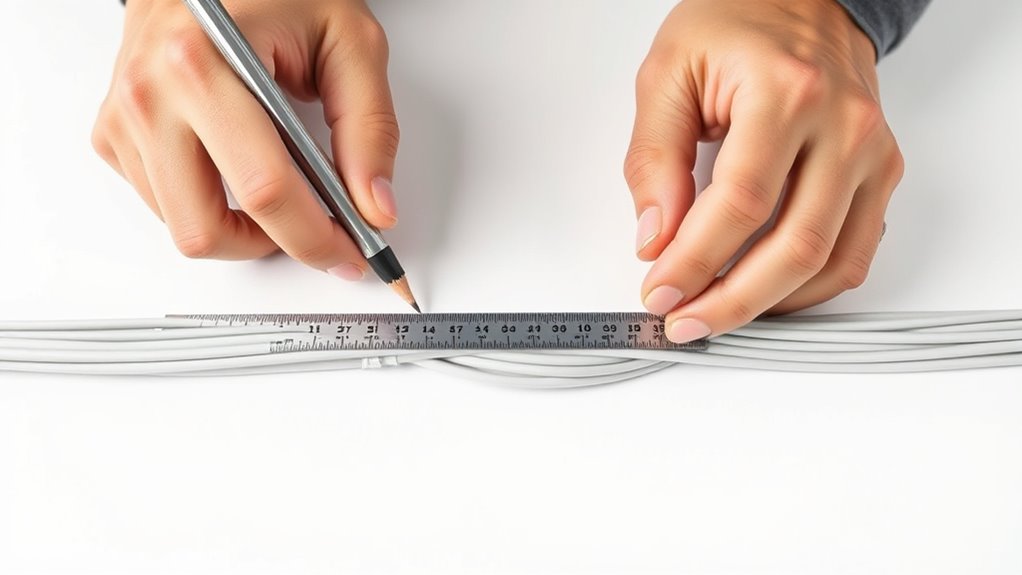
Accurately measuring and cutting your cables is essential to ensuring a clean, professional installation. Start by double-checking your measurements to maintain high measuring accuracy, which prevents slack or tight spots. Use quality cutting tools, like cable cutters or scissors designed for the cable type, to ensure clean, straight cuts. Avoid guessing or using dull tools, as rough cuts can damage the cable’s integrity or affect signal quality. Measure multiple times before cutting to confirm your length, especially around corners or tight spaces. When cutting, hold the cable firmly and make a quick, decisive cut to avoid fraying or uneven edges. Proper cable measurement techniques and precise cutting tools help you achieve a tidy, reliable cable run that looks great and performs well. Additionally, understanding the safe installation practices ensures your setup remains secure and compliant with safety standards. Incorporating proper wiring methods can further enhance your installation’s durability and safety, and reviewing filtering and pump protection guidelines can help maintain optimal equipment performance over time. Being familiar with cable management strategies also helps in organizing your cables neatly, reducing potential damage or interference.

Tymate TM12 RV Tire Pressure Monitoring System, TPMS with USB/Solar Charge, 2026 Latest Version, Set of 6 Sensors(Max. 12), 6 Alarm Modes, 50ft Range, 0-144PSI for RV/Truck/SUV/Towing Medium Trailer
[Upgraded Six-Wheel Simultaneous Display & 12-Wheel Split-Screen Cycling]: The 2026 Tymate TM12 TPMS introduces a fully upgraded display...
As an affiliate, we earn on qualifying purchases.
Securing Cables With Proper Fasteners
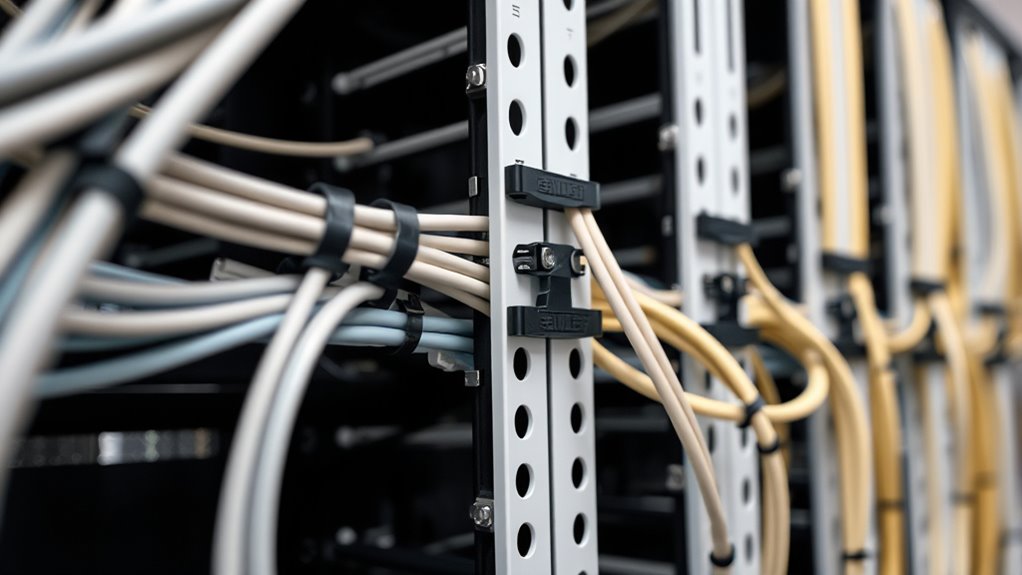
Securing cables with proper fasteners is essential to maintaining a neat and reliable installation. Cable fasteners keep your cables in place, preventing sagging, damage, or accidental disconnection. Use the right securing tools to attach these fasteners securely to walls, ceilings, or cable trays. Make sure to space the fasteners evenly, typically every 3 to 4 feet, to prevent unnecessary tension. Avoid over-tightening, which can damage cables or fasteners, and ensure cables aren’t pinched or bent sharply. Proper fasteners also help organize your cables, reducing clutter and making future maintenance easier. Always choose fasteners suited for your cable type and environment, whether plastic clips, metal brackets, or cable ties. Choosing the right fasteners ensures long-term durability and safety. Incorporating visual and auditory cues can also enhance the effectiveness of your cable management, especially in complex installations. Understanding cable types and environments can help select the most appropriate fasteners for your specific needs. Using proper fastener placement can prevent stress points that cause cable wear over time. Securing cables properly from the start guarantees a safe, professional-looking installation that lasts.
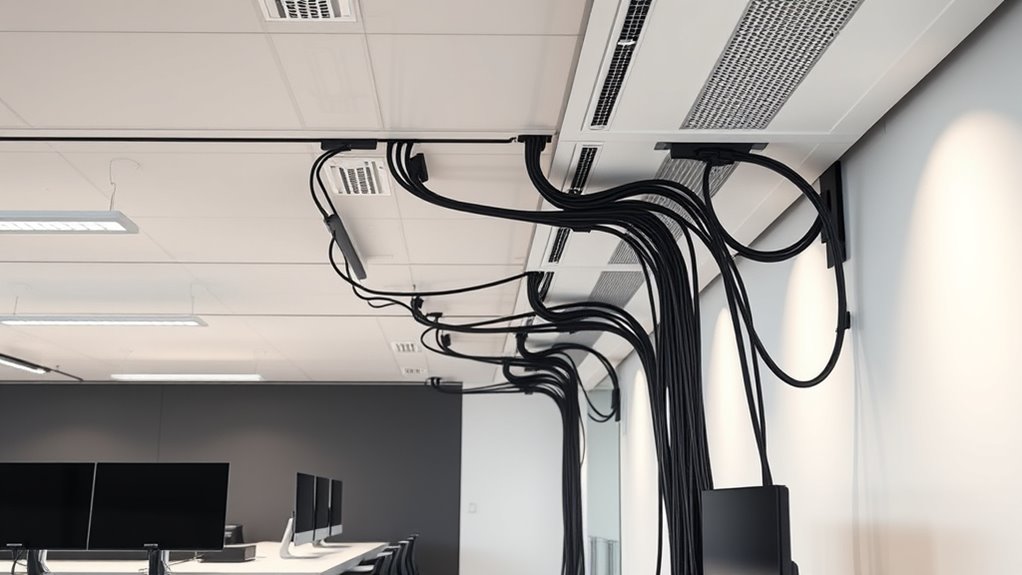
Creating Clear Pathways and Avoiding Obstacles
Start by planning your cable route to guarantee a smooth and organized path. Identify any obstacles like sharp edges or moving parts that could interfere with the cables. Use proper fasteners to secure the cables neatly and keep them clear of potential hazards.
Plan Your Cable Route
Before laying out your cable route, it’s essential to identify a clear pathway that minimizes obstacles and potential interference. Planning ahead helps you avoid unnecessary bends and disruptions. Consider using wireless alternatives where possible to reduce clutter. When laying cables, prioritize routes with good cable insulation to prevent signal loss and damage. Use the following ideas to guide your planning:
| Idea | Tip | Benefit |
|---|---|---|
| Avoid obstacles | Map out potential barriers early | Easier installation |
| Use cable channels | Keep cables organized and protected | Cleaner look and safety |
| Choose direct routes | Minimize length and interference | Better performance |
Identify Obstructive Elements
To create an effective cable route, you need to identify and eliminate potential obstructions early on. Obstructive elements, like sharp edges, moving parts, or tightly packed spaces, can cause cable interference and damage over time. Carefully examine your planned path for anything that might impede smooth cable flow or cause wear. Check for existing wiring, plumbing, or structural components that could block access or create pinch points. Removing or rerouting these obstacles prevents future issues and keeps your setup clean. Be vigilant about potential interference sources, such as metal objects or electrical components, which can disrupt signal quality. By proactively identifying obstructive elements, you ensure your cable routing remains efficient, safe, and easy to maintain.
Use Proper Fasteners
Using proper fasteners is key to creating clear pathways and preventing obstacles along your cable route. Selecting the right cable fasteners guarantees your cables stay organized and secure. Use fastening techniques that avoid pinching or damaging cables. Proper spacing keeps cables neat and prevents tangling. Secure cables along walls or ceilings to prevent movement. Avoid over-tightening fasteners, which can cause damage. Consider the environment—use weatherproof fasteners outdoors. Use cable clips or ties for flexible routing. Keep cables away from heat or sharp edges. Regularly check fasteners to maintain a tidy setup. Proper fastening techniques improve safety and accessibility, making future maintenance easier. By choosing the right cable fasteners and applying correct methods, you’ll create a clean, obstacle-free cable pathway. Additionally, understanding the importance of proper filtration can help minimize dust and debris buildup around your cables, ensuring a safer and more efficient installation. Incorporating consistent maintenance routines helps sustain the organized and safe cable layout over time. Paying attention to fastener quality also ensures longevity and reliability of your cable management system. Ensuring proper heat management can help prevent damage caused by heat buildup around your cables and fasteners. Properly managing cable strain relief helps prevent damage caused by tension or pulling on the cables over time.
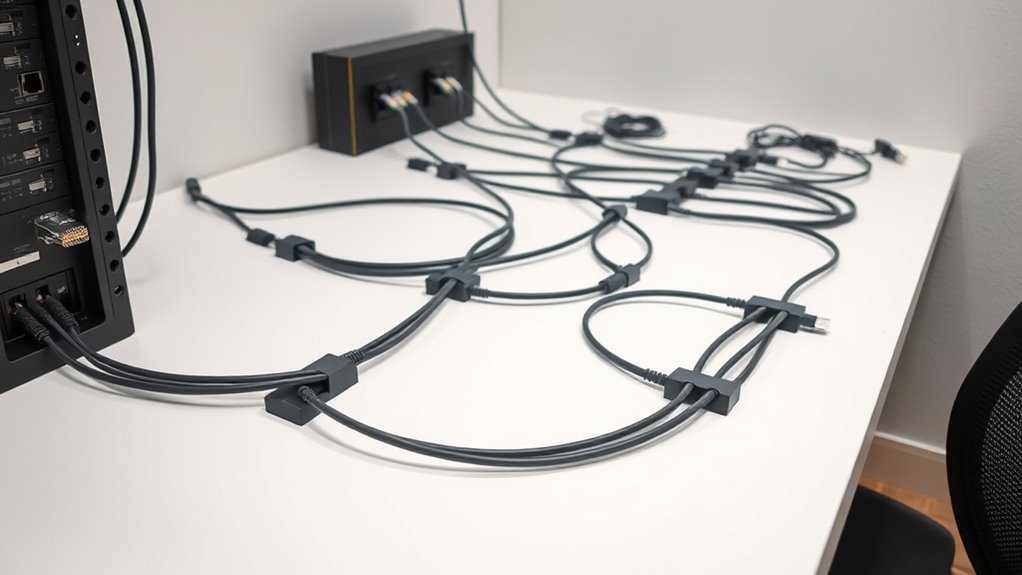
Using Cable Management Products Effectively

Effective cable management begins with selecting the right products for your setup. Use cable clips, sleeves, and raceways to keep cables organized and prevent clutter. These products help protect cable insulation and guarantee easy access for maintenance. When choosing connector types, consider compatibility with your devices and the strength needed for your environment. Proper management reduces stress on connectors and minimizes signal interference. Additionally, understanding cable routing best practices ensures a cleaner and more efficient installation. To further improve your setup, consider cable organization techniques that promote both safety and aesthetics. Implementing these methods can also help you develop organized habits that keep your space tidy over time. Here’s a quick reference:
| Product Type | Purpose | Best For |
|---|---|---|
| Cable Clips | Securing cables to surfaces | Preventing movement |
| Cable Sleeves | Protecting from abrasion | High-traffic areas |
| Raceways | Concealing cables along walls | Aesthetic needs |
| Velcro Straps | Bundling multiple cables | Easy adjustments |
| Cable Ties | Permanent cable bundling | Neat, secure setups |
Routing Cables Along Walls and Corners
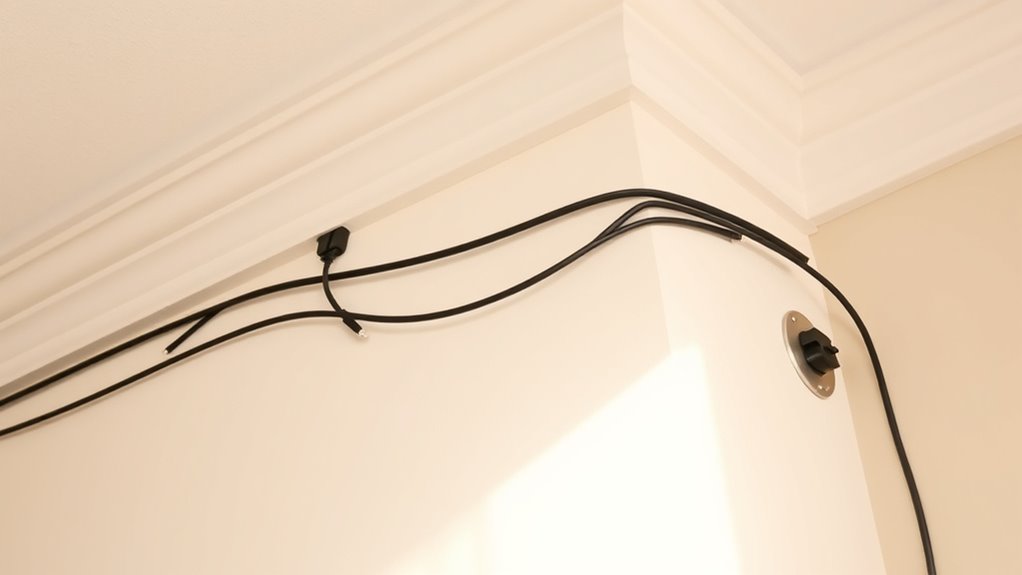
Routing cables along walls and corners requires careful planning to guarantee a clean and professional look. Wall mounted solutions, such as cable channels or raceways, help hide cables and keep them organized. When steering corners, use smooth corner cable bends to prevent cable damage and maintain a sleek appearance. To achieve a seamless setup, consider these tips:
- Choose appropriate wall mounted solutions for your space
- Use gentle corner cable bends to avoid stress on cables
- Conceal cables behind baseboards or molding when possible
- Secure cables with clips or adhesive mounts for stability
- Plan cable paths to minimize crossing or clutter
Labeling Cables for Easy Identification

You should place labels where they’re easy to see, such as near connectors or at regular intervals along the cable. Using a consistent labeling system helps you quickly identify cables without confusion. Clear, uniform labels make troubleshooting and future adjustments much simpler.
Clear Label Placement
Clear label placement is vital for quickly identifying cables and avoiding confusion during maintenance or troubleshooting. Properly positioned labels ensure you can trace cables easily, even when cables are bundled or hidden. Place labels at regular intervals along the cable length, especially near connection points or cable insulation. Use clear, durable labels that resist wear and tear. If you’re considering wireless alternatives, labeling remains essential for identifying which cable connects to specific devices. Make sure labels are visible and avoid obscuring important markings or cable pathways. Keep labels consistent in size and font for quick recognition. Regularly update labels if changes occur. Proper placement minimizes mistakes and speeds up repairs, making cable management more efficient overall.
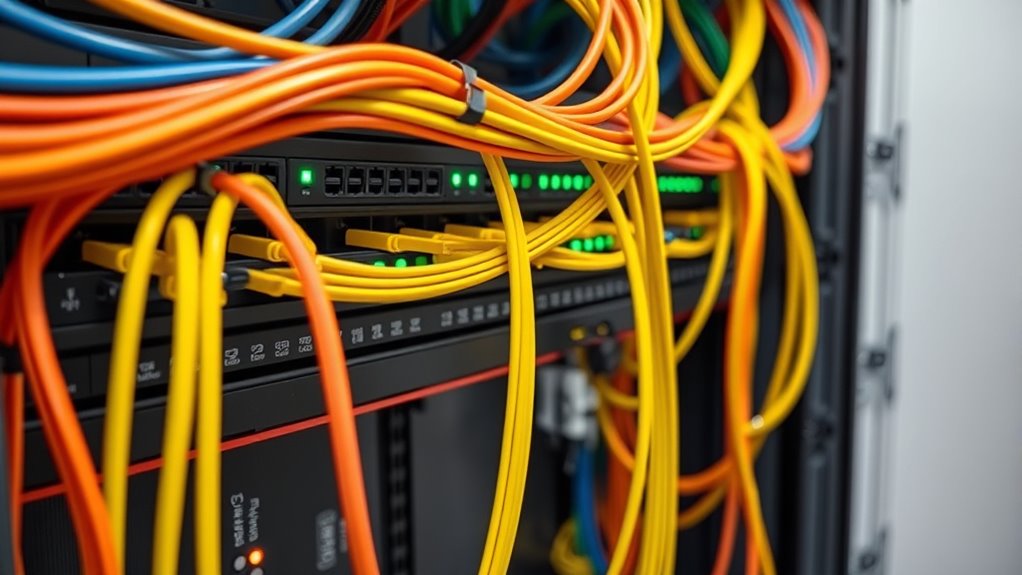
Consistent Labeling System
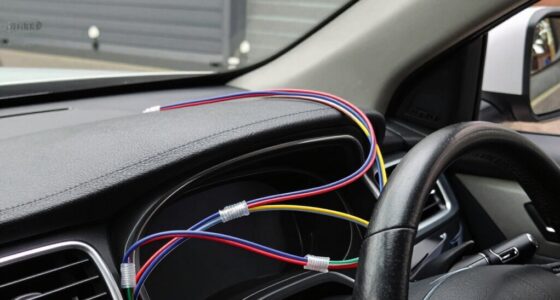
Have you ever spent extra time identifying a cable because labels were inconsistent or unclear? A consistent labeling system saves you time and prevents mistakes. Use color coding to differentiate types of cables—red for power, blue for data, green for audio, and so on. This visual cue helps you quickly identify cables at a glance. Place labels in the same spot on each cable, such as near connectors or entry points, to maintain uniformity. Keep label placement clear and easily readable, avoiding clutter or wrapping labels around cables. Using a standardized system guarantees that anyone working on the setup can easily follow and understand your cable organization, making future troubleshooting and upgrades much smoother.
Testing Your Setup Before Finalizing
Before finalizing your cable routing, it’s crucial to thoroughly test your setup to guarantee everything functions properly. Check for signal interference by running devices to spot any disruptions or noise. Confirm that power management is effective by ensuring cables are not causing overloads or heat buildup. Here’s what to focus on:
- Test all connections for stable signals and clear audio/video
- Verify that cables are not touching sources of electromagnetic interference
- Ensure power cables are neatly organized to prevent overheating
- Confirm that no cables are loose or strained
- Observe device performance during typical use to catch issues early
Performing these tests helps you identify potential problems before sealing everything in place, saving time and effort later. Proper testing ensures your setup is reliable, with minimized signal interference and optimized power management.
Maintenance and Tips for Keeping Cables Organized
To keep your cables organized over time, it’s essential to establish regular inspection routines to catch any wear or loose connections early. Labeling and color coding your cables helps you identify them quickly, saving time during maintenance or troubleshooting. Implementing these tips ensures your setup stays neat, functional, and easy to manage.
Regular Inspection Routines
Regular inspections are essential for maintaining organized and safe cable setups. During these checks, you should verify that cables remain secure, free from damage, and properly supported. Always consider cable material selection and insulation properties to ensure durability and safety. Look for signs of wear, such as cracks or fraying, which can compromise insulation and performance. Keep an eye on connectors and fittings, tightening or replacing them as needed. Regularly test for signal integrity, especially in critical systems. Additionally, check for overheating or discoloration, indicating potential issues.
- Confirm cable supports are intact and not sagging
- Inspect insulation for cracks or degradation
- Ensure cables are free from pinching or sharp bends
- Verify connectors are secure and corrosion-free
- Test for consistent signal quality
Labeling and Color Coding
Proper labeling and color coding are key to maintaining an organized cable system. They help you quickly identify connections, troubleshoot issues, and prevent mistakes. Follow labeling best practices by using clear, consistent tags that include information like source, destination, and purpose. Color coding simplifies identification; assign specific colors for different functions or networks—blue for data, red for power, etc. Use a chart to track your scheme for easy reference. Here’s an example:
| Color | Usage | Label Description |
|---|---|---|
| Blue | Data cables | Network connection to router |
| Red | Power cables | Main power supply |
| Green | Audio/video | Speakers or monitors |
| Yellow | Auxiliary | Peripheral devices |
This system streamlines maintenance and keeps your setup neat.
Frequently Asked Questions
How Do I Choose the Best Cable Management Tools for My Setup?
To choose the best cable management tools, start by evaluating your setup’s needs and space. Look for cable accessories like clips, sleeves, and ties that keep cords organized and secure. Use cable labels to identify different cables easily, simplifying maintenance. Prioritize durable, flexible options that fit your environment, ensuring a clean, professional look. Combining the right accessories with clear labels helps you maintain an efficient, clutter-free setup.
What Safety Precautions Should I Take During Cable Installation?
When installing cables, you should prioritize fire safety and follow electrical codes to prevent hazards. Always turn off power before starting, wear insulated gloves, and use tools with proper insulation. Keep cables away from heat sources and flammable materials. Secure cables neatly to avoid damage and accidental disconnections. Regularly inspect your work for wear or damage, ensuring your setup remains safe and compliant with local electrical standards.
How Can I Hide Cables for a More Aesthetic Look?
To hide cables for a sleek, aesthetic look, consider using concealed wiring techniques that run behind walls or through existing moldings. You can also install decorative covers or cord concealers along baseboards and walls, seamlessly blending cables into your decor. This approach keeps your space tidy and visually appealing. Just make sure to choose covers that match your wall or furniture color for a seamless, professional finish.
What Are Common Mistakes to Avoid in Cable Routing?
To avoid common mistakes in cable routing, you should prevent creating cable clutter by keeping cables organized and secured. Avoid improper labeling, which can make troubleshooting difficult later. Don’t run cables across walkways or in areas prone to damage, and skip over tight bends that can damage cables. Always plan your route in advance, use cable management tools, and double-check connections to make a clean, safe, and efficient setup.
How Often Should I Inspect and Maintain My Cable Organization?
You should inspect and maintain your cable organization every 3 to 6 months. For example, if you notice tangled or loose cables during a routine check, it’s time for a reorganization. Establish a regular organization schedule and perform a frequency check to prevent issues. This proactive approach keeps your setup tidy, reduces potential damage, and guarantees peak performance of your cables over time.
Conclusion
Believe it or not, a clean cable setup isn’t just about looks—it can actually improve your system’s performance and lifespan. When you plan carefully and follow these routing tips, you prevent potential damage and interference. Think of your cables as the nervous system of your tech—keeping them organized and secure guarantees everything runs smoothly. So, don’t underestimate the power of a tidy install; it’s the secret to a reliable, hassle-free setup.