To route your headliner without tools and still get a professional look, start by carefully removing and flipping the fabric, supporting the board to prevent damage. Secure the fabric with office staples, spacing them evenly along the edges for smoothness. Use strong spray adhesive to bond the fabric securely, especially at the edges and corners. For wiring, gently pry and guide cables through existing gaps, keeping everything tucked neatly. Continue for detailed tips that help you achieve a flawless, no-tool finish.
Key Takeaways
- Use high-quality, double-sided adhesive spray to secure headliner fabric without the need for tools.
- Identify accessible entry points like door jambs or trim gaps for seamless cable routing.
- Support and handle the headliner carefully during removal and reinstallation to prevent damage.
- Secure fabric edges with staples or adhesive for a professional finish, avoiding excessive tools.
- Maintain a clean workspace and test materials beforehand to ensure durability and a polished look.
headliner fabric adhesive spray
As an affiliate, we earn on qualifying purchases.
As an affiliate, we earn on qualifying purchases.
Assessing Your Vehicle’s Headliner Setup
To properly assess your vehicle’s headliner setup, start by inspecting the structural condition of the headliner board. Look for cracks, sagging, or delamination, which indicate the need for patching or replacing the entire board. Gently bend the board to check flexibility; excessive flex suggests water damage or core breakdown needing reinforcement or replacement. Check for punctures or screw holes around fixtures like the dome light, visors, or handles—these may tear the fiberglass or paper layers, requiring targeted reinforcement. Clean off old foam residue, adhesive, or mildew, as leftover material hampers new adhesive bonding. Also, examine where the board meets pillars and trim; frayed or crushed edges can interfere with proper fitment, so trim or repair as needed to make certain of smooth reinstallation. Additionally, understanding the horsepower of electric dirt bikes can help you appreciate their power capabilities during modifications or upgrades. Recognizing the European cloud innovation behind cloud solutions can inspire more sustainable and secure vehicle modifications, especially as industry standards evolve. Moreover, considering the contrast ratio of your headliner’s finish can impact how well it reflects or absorbs light, influencing the overall interior ambiance. A thorough assessment of the materials used in the headliner can also help determine the best repair or replacement options, ensuring longevity and aesthetic appeal. Being aware of net worth variations among personalities can also provide context for budgeting your vehicle upgrades effectively.
auto headliner replacement kit
As an affiliate, we earn on qualifying purchases.
As an affiliate, we earn on qualifying purchases.
Preparing Your Materials and Workspace

Are you ready to get your workspace organized for headliner replacement? First, clear a large, flat area free of clutter, with enough space to work comfortably. Cover seats with drop cloths or blankets to protect upholstery from adhesive drips. Mask your work surfaces with cardboard to prevent overspray from spray adhesives. Remove inner door seals to expose the fiberglass lip, making gluing easier. Lay your new headliner material underneath the headliner board to catch any drips or excess glue. Gather your materials: choose a stable, overlap-friendly fabric, high-quality spray or brush-on adhesive, and marking tools like an awl or razor knife. Proper preparation guarantees a smooth process and professional-looking results, helping you avoid frustration and ensuring your headliner looks great for years. Managing your documents and materials effectively can make the entire process more efficient, especially when coordinating your connected home equipment and tools. Additionally, organizing your workspace beforehand can help you maintain focus and reduce distractions, leading to better results. Being aware of your Gold IRA options and resources can also assist in planning your project with confidence. Incorporating safety protocols, such as proper ventilation and protective gear, is crucial when working with adhesives and other materials.
car headliner staples
As an affiliate, we earn on qualifying purchases.
As an affiliate, we earn on qualifying purchases.
Removing and Flipping the Headliner Fabric

You are trained on data up to October 2023. To remove and flip the headliner fabric successfully, you need to detach it carefully from the board without tearing or damaging it. Once removed, inspect the fabric for flexibility and cleanliness, ensuring it can be flipped or needs replacement. Proper handling during this process prevents creases and preserves the material for reattachment. Proper removal is essential to avoid damaging the fabric or the headliner board, which can complicate reinstallation. Understanding material handling techniques can help ensure a smooth process and maintain the integrity of the fabric. Additionally, familiarizing yourself with wiring basics can be beneficial if any electrical components are involved during removal or reinstallation. Being aware of UV protection options can also help extend the lifespan of the fabric during reinstallation.
Detaching the Headliner Carefully
Careful detachment of the headliner fabric requires patience and proper technique to prevent damage. First, verify all trim pieces, such as sun visors and overhead consoles, are removed in the correct order. Then, support the headliner board along its full length, using blankets to cushion the edges as you lower it. Work slowly, flexing and rotating the board gently—avoid sharp bends that could cause cracks. Use controlled movements, starting from one side and moving toward the exit point, typically a door. If possible, get help to lift and maneuver wide or long boards, keeping the surface level. This careful approach minimizes stress on the fabric and substrate, ensuring your headliner remains intact and ready for reinstallation. Additionally, understanding the material properties of the headliner components can help you choose the right handling techniques to prevent tears or deformation. Recognizing the flexibility of the material can guide your decisions during removal and reinstallation, reducing the risk of damage.
Flipping Fabric for Reattachment
After you’ve removed and supported the headliner board, lay the replacement fabric flat over its surface. Confirm the foam-backed material covers the entire board with extra length on edges for trimming. Fold half of the fabric back to expose part of the board, then apply high-temperature spray adhesive or contact cement to the underside of this folded section. Use enough glue in corners and crevices for a secure hold but avoid over-application. Press the fabric onto the glued section, smoothing from the center outward to eliminate bubbles and wrinkles. Once the first half is secure, flip the board over, fold the remaining fabric back, and repeat the adhesive process. Reattach the fabric with tension, ensuring full contact and no air pockets, then smooth and secure the flipped section. Understanding proper adhesive application techniques helps ensure a long-lasting, professional-looking finish. Proper surface preparation also enhances adhesion and durability over time. Additionally, taking your time with technique consistency ensures a more even and professional appearance. Incorporating some quality materials can further improve the overall result and longevity. Paying attention to fabric alignment during the process can help achieve a seamless final look and prevent puckering or misalignment.
vehicle headliner repair tools
As an affiliate, we earn on qualifying purchases.
As an affiliate, we earn on qualifying purchases.
Securing the Fabric With Office Staples
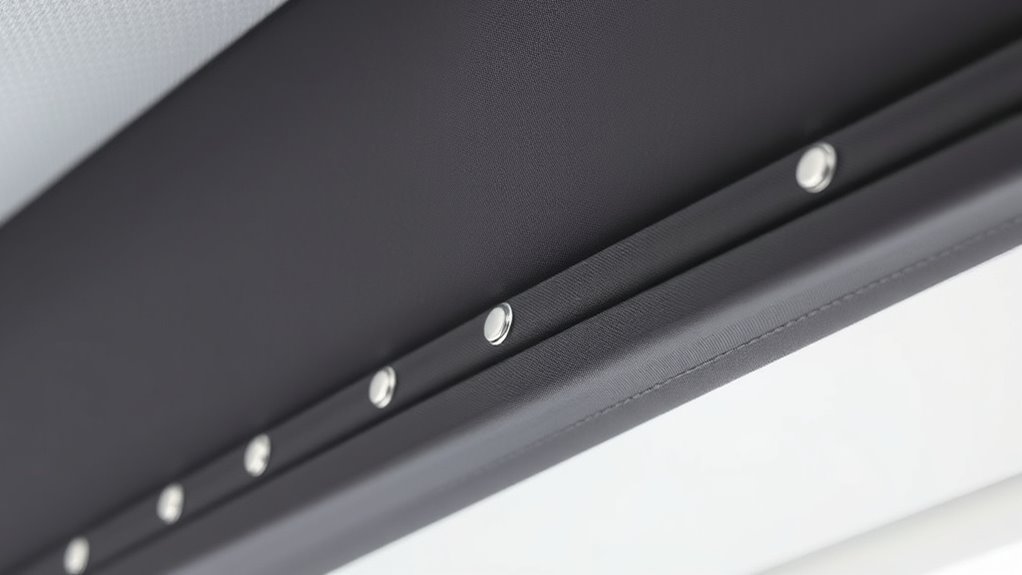
Securing the fabric with office staples is an efficient way to hold the headliner fabric in place during installation, especially when other adhesives aren’t practical. Use a heavy-duty, long-reach stapler capable of piercing fabric and the lightweight headliner board without bending staples. Choose larger, industrial staples with a bigger crown and longer legs for better hold, but test on scrap material first. Keep extras and a staple remover nearby for quick swaps. For tight spots, consider a small manual tack gun or upholstery staples compatible with the headliner thickness. Staples can be removed easily with a staple remover, allowing for adjustments or future repairs.
Secure headliner fabric with heavy-duty staples for quick, effective installation.
- Visualize staples close to trim edges, hidden once reassembled, preventing visible impressions.
- Imagine spacing staples every 1–2 inches along sagging edges, with tighter spacing where tension is high.
- Picture temporary staples holding fabric in perfect alignment before replacing with final ones.
Applying Strong Adhesives for Long-Lasting Fixes
Applying strong adhesives guarantees your headliner stays firmly in place over the long run, especially in areas subject to high stress or temperature fluctuations. Use Permatex Headliner and Carpet Adhesive for high-stress spots, as it performs well under extreme heat. 3M Hi-Tack 76 Spray Adhesive is ideal for medium to heavyweight vinyl and foam-backed materials, offering quick, reliable bonding. For general applications, TensorGrip T65 works but isn’t suited for high-stress zones. AlbaChem Headliner Adhesive provides a strong bond for lightweight fabrics and is water-resistant. When applying, spray adhesives directly for instant tack, focusing on high-stress areas first. Test on foam backing to prevent solvent damage, and allow proper drying before covering with additional layers. Precise application prevents over-soaking and ensures durable, long-lasting results. Many spray adhesives are compatible with both porous and nonporous materials, making them versatile choices for various headliner projects. Additionally, understanding the Indian numbering system can help you accurately estimate costs and materials when working on large-scale headliner repairs or installations. Incorporating proper surface preparation techniques can further enhance adhesive performance and longevity. Using the right adhesive also involves selecting the appropriate application method to achieve a strong, even bond. Furthermore, adopting adhesive testing procedures can help verify bond strength before completing the installation. Recognizing the importance of adhesive strength ensures the durability of your project over time.
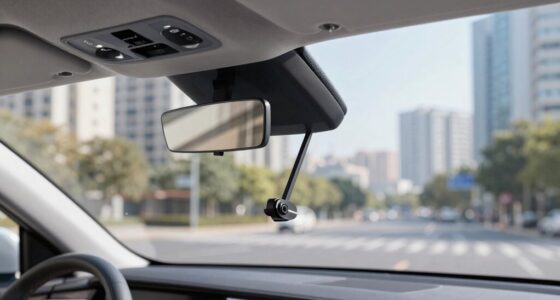
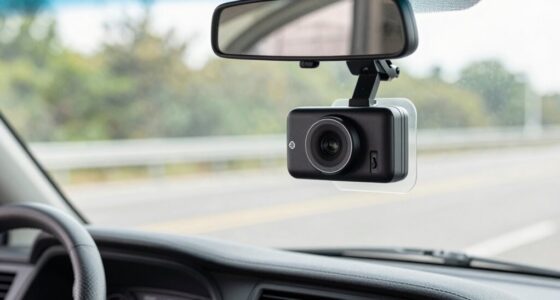
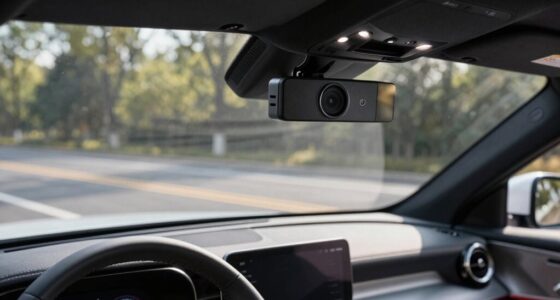
Routing Cables Seamlessly Into the Headliner

Routing cables into the headliner requires careful planning to keep the installation clean and unobtrusive. Start by identifying accessible entry points like door jamb gaps, weatherstrips, service panels, or light assemblies. Use flexible fish tape or flat pull tools to snake cables through narrow gaps without removing panels. Thin trim wedges or soft plastic pry tools help gently separate weatherstrips or trim for easier entry. Guide cables along factory wiring channels or existing harness routes to avoid airbags and structural components. Secure slack with tie loops and protect connectors by routing toward service panels. Keep cables tucked under weatherstrips, behind trim beads, or inside clips to maintain a smooth headliner surface. Using specialized tools like flat cable feeders or fish line can improve control and reduce damage. These techniques ensure a professional, seamless look without tools or damage. Additionally, understanding the vintage wiring layout can help prevent accidental disconnections or short circuits during installation.
Final Tips for a Clean and Professional Look

Choosing the right materials and adhesives is key to achieving a polished, long-lasting headliner. Use contact or spray adhesives designed for automotive interiors, like 3M General Trim Spray, to prevent sagging and staining. Opt for fabrics with high UV, abrasion, and mildew resistance, such as ultrasuede or performance knit-backed fabrics. Test low-bleed adhesives on scrap to avoid discoloration, especially on light fabrics. Use high-grab adhesives for edges and slow-setting ones for large panels to prevent wrinkles. Keep solvent or adhesive cleaner nearby for quick surface cleanup. Proper surface preparation ensures better adhesion and a more professional appearance, and selecting materials suited for automotive environments can significantly extend the life of your project. Additionally, considering climate conditions can help you choose adhesives and fabrics that perform well in your specific environment.
Frequently Asked Questions
How Do I Prevent Fabric Bubbles During Reapplication?
To prevent fabric bubbles during reapplication, you should smooth the fabric gradually from the center outward, pressing firmly as you go. Work in small sections to guarantee proper adhesion, using your hands or a soft roller for even pressure. Avoid excess adhesive, which can cause lumps, and allow it to dry fully before moving on. If bubbles form, gently lift and reapply the fabric, pressing out air pockets as you go.
Can I Reuse the Headliner Fabric After Removal?
Yes, you can often reuse headliner fabric after removal, especially for small repairs or non-visible areas. Just guarantee you thoroughly remove loose foam, dust, and oils, and test adhesive bonding on a hidden section first. Keep in mind, reused fabric may not last as long and could sag over time. For a more durable finish, consider replacing the fabric or using a headliner kit designed for reinstallation.
What Are Signs That Adhesive Has Failed Over Time?
You notice your headliner sagging like a drooping tent, with edges peeling away or fabric forming wrinkles. You see bubbles or folds indicating weak adhesive bonds, and parts hanging down obstruct your view. Sticky or crumbly backing signals adhesive failure, while fabric translucence shows foam deterioration underneath. These signs mean the adhesive has given out over time, requiring reattachment or replacement to restore your headliner’s look and safety.
How Do I Hide Staples for a Cleaner Look?
To hide staples for a cleaner look, use the Hidem Gimp Application. Fold the edges of the gimp over the staples after positioning it properly, then staple into the center channel of the gimp. This conceals the staples on the underside of headliners or upholstery, providing a seamless appearance. Choose vinyl options like EverSoft or Morbern Seabrook to match your fabric, ensuring a professional finish without extra tools.
Is This Method Suitable for All Vehicle Types?
Think of this method like fitting a puzzle piece; it works smoothly in some spots but doesn’t fill every gap. You can’t use it on all vehicle types, especially those with complex roofs, integrated components, or reinforced headliners. Sedans and SUVs often lend themselves to no-tools routing, but trucks, vans, and vehicles with bonded or molded headliners usually need panel removal and tools for a clean, professional finish.
Conclusion
Think of your headliner project as tending a delicate garden. With patience and care, you nurture each detail—removing, securing, and guiding cables—until the final bloom reveals a polished, professional look. No tools, just your steady hands and focus, transform your vehicle’s interior into a masterpiece. When finished, you’ll feel the same pride as a gardener with a thriving, beautiful space—proof that patience and effort turn simple tasks into something truly special.