To fix sky-heavy footage in one move, start by applying a quick brightness and contrast adjustment or use AI-based sky replacement tools in your editing software. Blur or mask out bright skies and replace them with more balanced skies using built-in sky swapping features. For seamless results, refine edges and match color grading with the rest of your scene. Keep experimenting with these techniques, and you’ll discover even more ways to enhance your footage efficiently.
Key Takeaways
- Use sky replacement tools in software like Photoshop or Luminar Neo for quick, realistic sky correction.
- Mask the sky precisely with feathered edges and refine using Smart Radius for complex transitions.
- Match the new sky’s color and brightness to the scene with LUTs and color grading for seamless integration.
- Adjust exposure and highlights to balance the scene, preventing overexposure of the sky and underexposure of foreground.
- Frame shots with lower horizons and use graduated ND filters during shooting to reduce sky heaviness upfront.

Hitfilm Video Production software User Guide: Master Professional Editing and Visual Effects with Comprehensive Step-by-Step Lessons (Video Editing Essentials)
As an affiliate, we earn on qualifying purchases.
As an affiliate, we earn on qualifying purchases.
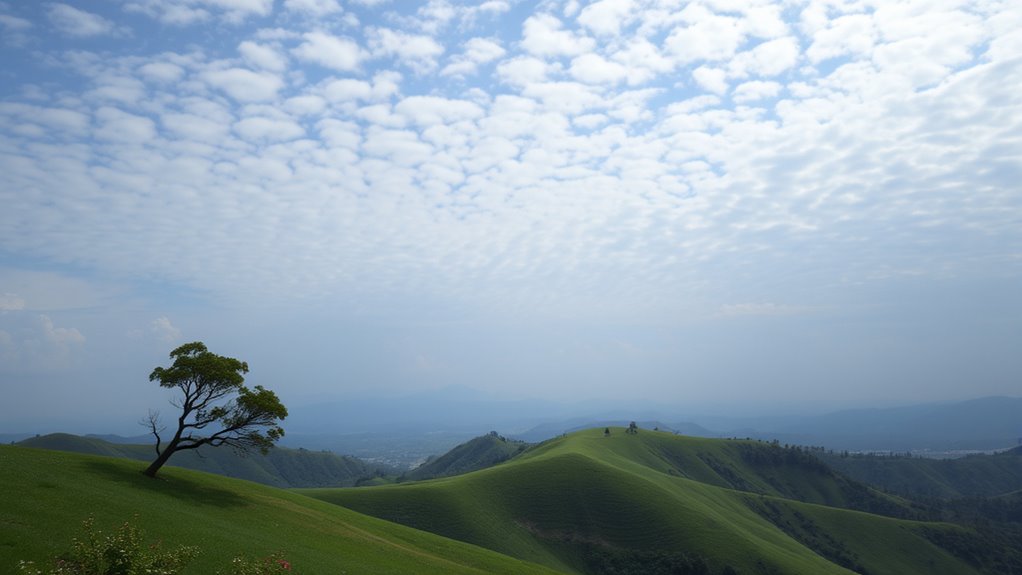
Identifying Sky-Heavy Footage Challenges

Capturing footage with a sky-heavy composition presents unique challenges because bright skies tend to overexpose, washing out clouds and losing essential detail. You’ll notice highlights blow out easily, making clouds appear flat and dull. To keep sky details intact, you might underexpose the foreground, but this results in muddy, dark subjects. The high dynamic range between sky and ground makes it tough to balance exposure in a single shot. Auto metering often favors midtones, overexposing the sky and sacrificing cloud detail. Changing light conditions, like shifting clouds or the low sun during golden hour, cause rapid exposure fluctuations. Wide-angle lenses and aerial shots amplify these issues, with large sky areas dominating the frame and reducing subject prominence. Recognizing these challenges is the first step to fixing sky-heavy footage effectively. Understanding Skyscape Photography can help you better anticipate and address these exposure issues, especially when employing exposure compensation techniques to achieve a balanced shot. Additionally, utilizing dynamic range capabilities of modern cameras can significantly improve the handling of high-contrast scenes.

14 PCS Square Filter Kit Graduated ND Filters Color Lens Filter Set for Cokin P Series with Adapter Rings(49-82mm) Filter Holder Lens Cleaning Pen and Other Accessories for DSLR Cameras
[Compatibility] : This square lens filter set is suitable for Cokin P Series(For Canon Nikon Sony Leica FujiFilm…
As an affiliate, we earn on qualifying purchases.
As an affiliate, we earn on qualifying purchases.
Preparing Your Footage for Correction

To prepare your footage for correction, start by optimizing your camera and exposure settings to preserve as much sky detail as possible. Use spot or highlight-weighted metering to prevent blown highlights and keep subject exposure manageable. Shoot with the lowest practical ISO and expose to the left (ETTR) in RAW or log to maximize highlight headroom. Employ log or RAW profiles to increase dynamic range and retain recoverable sky detail. On location, use graduated neutral-density (GND) or variable ND filters to balance bright skies with darker foregrounds without altering colors. Frame your shot to minimize sky in the composition, placing key subjects away from the brightest areas. These steps help guarantee your footage holds valuable sky information for effective correction in post. Additionally, understanding the camera limitations and challenges in outdoor exposure can guide you in making better initial decisions to capture balanced footage, especially considering dynamic range constraints inherent in many cameras. Recognizing exposure latitude is also critical, as it influences how much correction is possible without degrading image quality. Being aware of camera capabilities can further refine your approach to achieve optimal results in challenging lighting conditions.
color grading LUTs for landscape footage
As an affiliate, we earn on qualifying purchases.
As an affiliate, we earn on qualifying purchases.
Utilizing Keying Techniques for Seamless Edges

To achieve seamless edges in your keying, you need to focus on edge refinement methods that clean up harsh borders and blend the subject naturally. Mask animation tips can help you track and adjust edges dynamically, ensuring consistent quality throughout your footage. By applying these techniques, you can create polished composites with smooth, realistic shifts. Proper software selection plays a significant role in enhancing the quality of edge refinement and overall keying results. Incorporating connected equipment and immersive apps can further improve your workflow and final output, making your home setup more efficient and effective.
Edge Refinement Methods
Edge refinement methods leveraging keying techniques are essential for achieving seamless backgrounds in compositing workflows. You start by performing a primary key—using color or luma—to isolate the subject. Next, clean the matte with despill, choke, or expand adjustments to tighten or soften edges. Applying feather or soften controls helps create smooth transitions, but avoid overdoing it to prevent softness or jagged artifacts. Use decontamination or despill to remove background color spill, carefully balancing to preserve fine details like hair. For precise control, employ matte blur or edge-specific soften to refine the perimeter without affecting interior detail. Sampling edge pixels for color matching and grain ensures a natural blend, while backplate light wrap enhances integration. These methods, combined, produce clean, realistic edges that blend seamlessly into the background. Additionally, utilizing edge detection algorithms can further improve edge accuracy and facilitate more refined adjustments.
Mask Animation Tips
Mastering mask animation is essential for achieving seamless edges in compositing, especially when working with keying techniques. To start, select your layer and use the Pen tool to draw a mask shape, holding Shift for symmetry. Reveal mask properties with MM and click the stopwatch on Mask Path to set your first keyframe. Move the CTI to the desired time and adjust the mask with the Selection tool (V). Animate the mask’s softness by keyframing Mask Feather (press F). For smoother motion, apply Easy Ease to your keyframes. Use Smart Mask Interpolation between keyframes for natural transitions, adjusting vertex matching for flexibility. Animate mask position and shape over time by keyframing Mask Path, and control size dynamically with Mask Expansion. This guarantees your masks stay aligned and fluid throughout your footage. Additionally, understanding Keyframe Timing and Adjustment allows you to maintain precise synchronization between mask movements and underlying footage, ensuring a more professional and polished result.
highlight and exposure adjustment tools
As an affiliate, we earn on qualifying purchases.
As an affiliate, we earn on qualifying purchases.
Applying Sky Replacement Tools Effectively

Applying sky replacement tools effectively requires selecting the right software for your image’s complexity and your editing goals. For quick swaps, Luminar Neo’s AI detection and scene relighting are ideal. Advanced users prefer Photoshop’s detailed control with layer masks and the Sky Replacement workspace. Mid-range options like ON1 Photo RAW, Affinity Photo, or plugins offer a balance between speed and control. Use the table below to choose the best tool based on your needs: AI-powered editing features. When working with realistic landscapes, choosing a tool with landscape-specific presets can help achieve more natural results. Additionally, understanding software compatibility and hardware requirements can streamline your editing workflow. Recognizing the importance of creative exploration can also motivate you to experiment with different tools and techniques to find what works best for your sky replacement projects. Considering essential oil benefits can also enhance your understanding of different tools and their capabilities.
Enhancing Realism With Post-Production Matting

To make your rear camera shots look more realistic, start by desaturating the sky layer to match the overall scene mood. Then, adjust brightness and contrast to guarantee the sky blends seamlessly with the foreground elements. Finally, refine the mask edges to eliminate harsh lines and create a smooth, natural progression between layers. Video matting techniques can be used to precisely separate the sky from other scene components, ensuring a more seamless integration.
Desaturate Sky Layer
Desaturating the sky layer in post-production can considerably enhance realism by subtly toning down overly vibrant or unnatural hues. Begin by creating a precise sky selection using tools like Range Masking, Channels, or manual brushes, ensuring only sky pixels are affected. Apply a Hue/Saturation or Vibrance adjustment, reducing saturation gradually (around -10 to -40), then evaluate for natural look. Use a soft feathered mask (20–80 px) to blend edges seamlessly into the foreground, avoiding harsh seams. When needed, tweak luminance or brightness on the sky layer with Curves or Camera Raw to preserve cloud details after desaturation. Match grain or noise on the sky to the original scene to maintain texture, preventing the desaturated sky from appearing flat or artificial. Proper masking techniques are essential to avoid affecting other elements in the image and to achieve a seamless, natural result.
Adjust Brightness & Contrast
Adjusting brightness and contrast is essential for enhancing realism in your rear-camera shots, especially when working with post-production matting. Use exposure controls to uniformly brighten or darken the entire frame, preserving relative contrast, and avoid abrupt adjustments that cause clipping or noise. Instead, tweak exposure gradually, monitoring waveforms and clipping indicators. When dealing with sky-heavy scenes, reduce exposure on the sky mask slightly to prevent highlight clipping, then raise midtones to maintain foreground detail. For contrast, employ Curves or Gamma to lift highlights and deepen shadows, keeping midtones natural. Adjustments should be made in a color-managed space like ACES for accuracy. Use the table below to guide you through these nuanced controls:
| Control Type | Purpose | Best Practice |
|---|---|---|
| Exposure | Overall brightness adjustment | Gradually increase, watch for clipping |
| Brightness Sliders | Post-process luminance lift | Use for fine-tuning after exposure adjustment |
| Contrast Curves | Add depth and definition | Shape S-curve for natural tonal separation |
| Lift/Gain/Gamma | Fine tonal control | Adjust shadows, highlights, midtones separately |
| Scope Monitoring | Visualize luminance distribution | Use waveforms and histograms for balanced adjustments |
+In scenes with significant sky elements, considering the main factual point that noise tends to increase in dark areas, it’s often beneficial to reduce overall exposure slightly to prevent noise amplification in the sky and shadows, thereby maintaining a cleaner image.
Refine Mask Edges
Refining mask edges improves the realism of your compositing by ensuring smooth, natural changes between foreground and background elements. Use a small radius (1–3 px for high-res frames) to limit the refinement zone and prevent bleeding into fine details. Enable Smart Radius if available, to automatically adapt for hair or foliage transitions. Visualize the radius zone to see where sampling occurs before applying adjustments. Combine radius tuning with manual brush corrections for areas where automatic detection struggles, like dense branches or motion blur. Use dedicated Select and Mask or Refine Edges workspaces for real-time previews with overlay modes, adjusting feather and smooth sliders carefully. Applying contrast tightens fuzzy edges without clipping detail. Output masks as layer masks for iterative, non-destructive refinements.
Retaining Color Grading for Consistent Look

To guarantee your footage maintains a consistent look throughout the project, it’s essential to use LUTs strategically. They enable you to quickly apply a specific style, saving time during grading. With customizable LUTs, you can create or select pre-made options that match your desired aesthetic, ensuring uniform color tones across multiple shots. This consistency helps achieve a cohesive professional look from start to finish. DaVinci Resolve supports LUTs effectively, making it straightforward to implement them into your workflow. Before applying creative grading, perform basic correction to balance exposure and white balance, which lays a solid foundation. Using LUTs on properly corrected footage guarantees that your color grading remains consistent, helping your project look polished and unified. Additionally, LUTs facilitate rapid style application, streamlining your workflow and allowing you to focus more on creative adjustments. Employing proper color management techniques further enhances the accuracy and consistency of your final output.
Final Touches to Integrate the Replaced Sky

Once you’ve replaced the sky, the focus shifts to seamlessly integrating it into the scene. To do this effectively, you need to refine color, edges, and lighting. First, match the sky’s luminance and white balance to the foreground, ensuring consistency in exposure and color temperature. Second, use edge refinement techniques—like multi-pass mattes and feathering—to eliminate halos and blend transitions naturally. Third, adjust the scene’s lighting by relighting foreground elements, creating contact shadows, and matching highlights to the new sky’s directional light. This approach guarantees your composite looks believable. Remember, fine-tuning these details helps the sky feel like part of the original environment, elevating the overall realism of your shot. Additionally, color grading can help unify the entire scene, making the sky and foreground appear more cohesive and natural.
Tips for Preventing Sky-Heavy Shots During Shooting
Achieving a balanced shot requires strategic camera positioning and composition choices that prevent the sky from overwhelming the scene. Keep the horizon lower in the frame when the sky is visually dominant to balance sky-to-ground ratio during capture. Position the sun 90–180° from your lens to avoid overexposed skies and maintain proper exposure for your subject. Use wide-angle lenses to include more foreground context, which reduces perceived sky dominance. Frame with strong foreground elements like leading lines, architecture, or vegetation to draw attention away from the empty sky and add a sense of scale. Avoid tilting the camera upward; level or slightly downward angles preserve ground detail and prevent sky-heavy compositions. Planning your shot beforehand helps anticipate light conditions and scene elements that promote balanced, natural images. Additionally, using filters such as graduated neutral density filters can help balance exposure between the sky and land, ensuring neither is overpowered.
Frequently Asked Questions
How Can I Identify a Sky-Heavy Shot Before Shooting?
To identify a sky-heavy shot before shooting, check your scene’s composition and lighting. Look for wide open vistas, bright midday skies, or minimal foreground elements that make the sky dominate. Use your camera’s live histogram and highlight warnings to spot overexposed sky areas. Take quick test shots in both orientations and adjust your camera height or focal length. If the sky appears larger than your subject, consider repositioning for a better balance.
What Camera Settings Help Minimize Sky Exposure Issues?
You can minimize sky exposure issues by using a narrow aperture like f/4 or higher, which reduces light intake and prevents overexposed skies. Pair this with a lower ISO, around 1600, to lessen noise, and keep shutter speeds between 15-25 seconds to avoid star trails. Using graduated neutral-density filters also helps balance the sky and foreground, ensuring your footage isn’t sky-heavy and stays well-exposed.
Which Keying Effects Work Best for Detailed Edges?
You should use EdgeMatteTechniques for detailed edges, as they build separate edge mattes to smooth fringes and reduce noise. Adjust feather and erode controls to refine soft or frayed edges, especially around fine hair or motion blur. Combining these with spill suppression and matte blur helps create clean, realistic edges. For best results, fine-tune the alpha contrast and reduce chatter, ensuring your keying accurately captures all intricate details.
How Do I Match the Replaced Sky’s Lighting With the Original Scene?
Think of matching sky lighting like syncing your playlist to the vibe—everything has to flow. You’ll want to adjust the sky’s temperature, exposure, and contrast so they match your scene’s white balance and lighting conditions. Enhance rim lights where the sky’s light hits, paint subtle shadows, and tweak bounce light to mirror the sky’s hue. Use these adjustments to create seamless integration, making your scene look naturally lit and cohesive.
What Are Quick Tips to Avoid Sky-Heavy Footage During Filming?
To avoid sky-heavy footage, tilt your camera downward to reduce sky visibility and prioritize foreground details. Keep the horizon low in the frame, ideally near the lower third, to balance exposure. Use filters like GND or polarizers to control sky brightness and deepen colors. Position your subject with the sun behind or at a 90° angle, and shoot during golden hour or overcast conditions for softer, more balanced lighting.
Conclusion
Now that you know how to fix sky-heavy footage with a simple move, imagine the possibilities. Will you choose a dramatic sunset or a clear blue sky? The power to transform your shots is in your hands, but the real challenge is knowing when to act. Don’t wait—your perfect scene is just a click away. Are you ready to take that leap and create visuals that leave everyone in awe?