
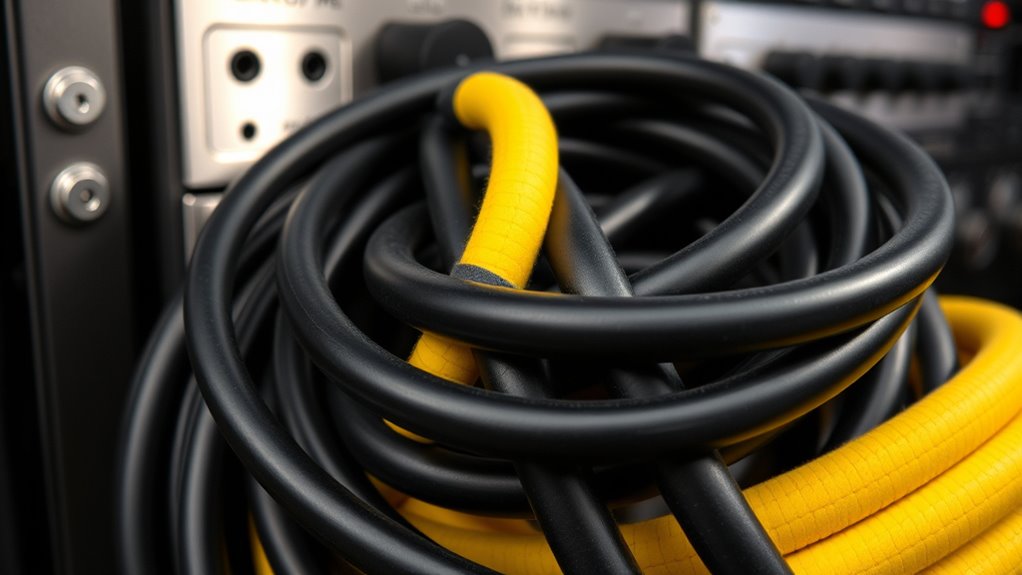
To hide excess cables without rattling, start by neatly coiling or bundling them using the over-under method to prevent twists. Secure the cables with proper clips, adhesive mounts, or Velcro straps, ensuring they stay in place and don’t move inside tubing or along pathways. Use foam padding around the cables for added soundproofing and route them along smooth, gentle curves away from moving parts. Keep the setup tidy—more tips await if you continue exploring.
Key Takeaways
- Use foam or braided sleeving to neatly conceal excess cables and prevent internal movement that causes rattling.
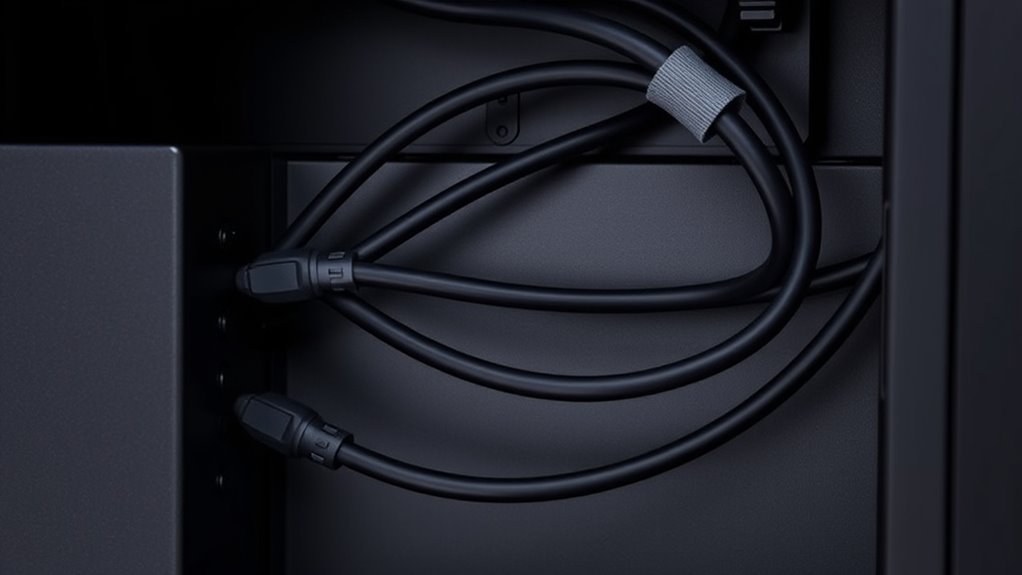
- Secure cables with Velcro straps or releasable ties to maintain tension and reduce vibrations.
- Route cables along fixed, stable pathways with gentle curves and low bend-radius to minimize movement and noise.
- Employ specialized clips, magnetic holders, or cable trays to keep excess lengths firmly anchored and prevent swinging.
- Avoid loose loops; coil excess cables using the over-under method and hide them behind panels or within cable management boxes.
Assessing Your Cable Routing Needs

How do you determine if your current cable setup is efficient and safe? Start by inspecting your cable layout for tangles, sagging, or overloads. Use visual checks and thermal imaging to spot damage or overheating. Assess how equipment is arranged, considering environmental factors and workflow to identify inefficiencies. Measure cable lengths and compare them to your current demands to detect shortages. Document your overhead pathways with photos and create detailed diagrams before making changes. Calculate electrical loads to ensure cables can handle the power needed, allowing space for future expansion. Verify support hardware ratings and check bend-radius compliance. Map out hazard zones, separate power from data lines, and identify ventilation paths. Conducting regular inspections helps maintain your system’s safety and performance, and reviewing cable management practices can further optimize your setup. Additionally, staying informed about cable safety standards can prevent potential hazards. Incorporating proper cable labeling can also facilitate easier troubleshooting and maintenance. Implementing cable concealment techniques can further improve the aesthetics and rattle prevention in your setup. Exploring effective cable routing methods can help prevent clutter and reduce noise issues, ensuring your system remains both reliable and quiet. These steps help you plan a safe, organized, and scalable cable routing system.
Using Foam Tubing and Padding Effectively
Using foam tubing and padding effectively can considerably enhance your cable management by protecting wires from mechanical damage, reducing noise, and maintaining organized bundles. Choose foam sleeves with flame-retardant properties and excellent electrical insulation for added safety. Use split tubing to easily slide over cables without disassembly, especially around corners and obstacles. For odd-sized wires, braided expandable sleeving allows flexible expansion, ensuring a snug fit. Corrugated tubing keeps cables neat, reduces tangling, and offers mechanical protection. PVC foam padding is ideal for high-friction environments, minimizing wear and friction noise. Cut tubing to the required length and shape it around bends for a clean look. Proper padding not only prevents rattles but also prolongs cable lifespan, reducing maintenance needs. Incorporating wiring basics into your planning ensures safe and efficient cable routing. Additionally, selecting appropriate padding materials can further improve durability and noise reduction in your cable setup. Always verify that your padding and tubing choices meet fire safety standards to prevent hazards. Using quality materials ensures long-term performance and safety of your cable management system. Considering noise reduction techniques can also enhance your overall home environment by minimizing disruptive sounds from loose or rattling cables.
Securing Cables With Tape and Adhesives

Choosing the right tape or adhesive is key to securing your cables effectively without causing damage. Use wrapping techniques that guarantee a firm hold, like overlapping layers and proper tension, to keep cables neat and stable. Be careful with adhesives—select products suited for your surfaces to prevent residue or wire damage. Proper surface preparation ensures optimal adhesion and longer-lasting results. Additionally, understanding Free Floating concepts can help you select the most adaptable and safe securing methods for various environments. Incorporating flexible fastening methods can also accommodate movements and vibrations, preventing cable strain and noise. Recognizing cable management principles can further improve the organization and safety of your setup. Employing thermal behavior awareness can help you choose the best securing solutions that withstand outdoor conditions and temperature fluctuations. Furthermore, considering environmental factors can optimize your cable securing strategy for diverse settings.
Proper Tape Selection
Selecting the right tape is essential for securely bundling and hiding excess cables without causing damage or leaving residue. For general purposes, gaffer tape like AT0165 offers standard adhesive strength, while AT0202 ensures residue-free removal, ideal for professional setups. If you need a reflection-free surface, the original Gaffa Tape AT0200 with fabric backing works well. For heavier or outdoor applications, premium cloth gaffer tape (67665) is easier to remove and less likely to cause issues with flash photography. Duct tapes, such as B2280, can secure cables but are less suitable for long-term or delicate use due to their strong adhesive and potential residue. Vinyl electrical tapes, like Scotch Super 33+, provide insulation and flexibility, making them suitable for electrical applications. Choose your tape based on surface compatibility, removal needs, and environmental conditions. [Using the appropriate tape ensures that cables are secured effectively without damaging surfaces or leaving sticky residues, especially when dealing with delicate or temporary setups.
Wrapping Techniques for Firm Hold
To guarantee a firm hold when securing cables with tape and adhesives, mastering effective wrapping techniques is essential. The over-under wrapping method is ideal for audio-visual cables, as it prevents twists and maintains cable integrity. Hold the cable end over your hand with the connector on the little finger side, create an overhand loop, then alternate with underhand loops by twisting your wrist. Keep loops even in size and tight enough to prevent movement. For thicker cables, use the coil and twist method—coil in a consistent direction and gently twist sections to distribute tension evenly, avoiding kinks. The figure-eight technique distributes stress across the length, reducing knots. Securing with Velcro straps on the connector side keeps the bundle stable. Proper wrapping ensures a secure, rattle-free cable setup. Additionally, understanding filtration can help in choosing the right adhesives or tapes that won’t damage your cables or leave residue.
Avoiding Adhesive Damage
Using the right adhesives and proper surface preparation can substantially reduce the risk of damage when securing cables. Choose acrylic-based adhesives for long-term strength and lower moisture degradation, minimizing reapplication. Use low-tack or removable pressure-sensitive adhesives on painted walls or finished wood to prevent paint lift and residue. If possible, opt for magnetic mounts on metal surfaces to avoid adhesives altogether, allowing repositioning without damage. Select cable clips with documented peel-strength ratings and follow manufacturer removal instructions to predict surface impact. For delicate or high-value finishes, mechanical anchors like screw-mount clips eliminate adhesive stress. Before application, clean surfaces thoroughly with isopropyl alcohol or mild detergent to remove oils and dust, and test adhesives on inconspicuous areas. Proper surface prep and suitable adhesives help protect your surfaces while securely hiding cables.
Implementing Zip Ties for Stable Management

Using zip ties helps you secure cables firmly, preventing them from shifting or becoming loose over time. They also stop internal movement, which can cause wear or noise, keeping your setup neat and stable. When applied correctly, zip ties make it easy to access cables when needed without disturbing the entire bundle. Additionally, ergonomic handles on some zip ties can improve user comfort during installation. Properly managing cable strain relief with zip ties can further extend the lifespan of your wiring and prevent accidental disconnections. Incorporating fire-resistant materials into your cable management can also enhance overall safety. Understanding the importance of balanced designs can help you create a more organized and visually appealing setup, reducing clutter and potential hazards. Incorporating creative storytelling techniques can help you develop innovative cable management solutions that stand out.
Secure Cables Firmly
Choosing the right zip ties and applying them correctly is essential for secure cable management. Select ties based on environment—nylon 6/6 for indoor, UV-stabilized or stainless steel for outdoor or high temperatures. Match tensile strength to your cable bundle load: light-duty for small cords, heavy-duty for thick or strained bundles. Use releasable or hook-and-loop ties if you expect frequent adjustments. Pick the right width and length to avoid over-compression, which can damage cables. Use heat- or chemical-resistant variants near heat sources or solvents. Proper tensioning is key—avoid over-tightening to prevent damage. Space multiple ties evenly and leave slack where needed. Anchor bundles securely to prevent sway and reduce rattling. Additionally, selecting appropriate cable ties can greatly improve overall stability and noise reduction. For optimal durability, consider cable tie materials that are designed for long-term use in your specific environment. Ensuring proper cable management techniques can help prevent cable damage and maintain a tidy appearance. Incorporating anti-rattle features into your cable setup can further minimize noise caused by vibrations or movement.
Prevent Internal Movement
To prevent internal movement in your cable bundles, it’s essential to strategically position ties at intervals that limit cable loop motion to less than the bundle’s diameter. Place ties at both ends of long runs and every 12–18 inches in dense areas to prevent mid-span shifting. Use staggered placement to avoid creating flat surfaces that transmit vibrations. Anchor ties to fixed structural points, like brackets or trays, rather than relying solely on cable-to-cable restraint. Distribute multiple ties evenly to share shear forces and reduce localized wear or micro-movements. Avoid over-tightening ties, which can cause stress and looseness. Instead, secure cables firmly but gently. Proper tie placement and anchoring keep bundles stable, minimizing internal movement and preventing rattling noise. Additionally, considering field‑of‑view and imaging‑scale] when organizing your setup can help optimize your imaging experience. Incorporating cable management techniques, such as slack loops and flexible ties, can further reduce vibrations and noise. Implementing cable organization with thoughtful planning ensures long-term stability and reduces the need for frequent adjustments. Utilizing carrier oils for cable insulation or protection, although less common, can also help in specialized setups to reduce friction and wear. For optimal results, consult Waterparks safety and maintenance guidelines to ensure your cable management setup adheres to best practices.
Maintain Easy Access
Ever wonder how to keep your cables organized and accessible without sacrificing stability? Using zip ties strategically helps you achieve this balance. They securely bundle cables, making adjustments simple without unraveling the entire setup. Color-coded zip ties let you quickly identify different cables, saving time during maintenance. Reusable zip ties offer flexibility, allowing you to loosen or tighten as needed. Mounting zip ties to surfaces keeps bundles stable and near access points, preventing tangling or shifting. Layered zip tie applications can secure excess length without restricting movement, maintaining easy reach. Extra long cable ties are especially useful for managing larger bundles and ensuring durability in demanding environments.
- Bundle cables for quick adjustments
- Use color-coding for fast identification
- Mount zip ties for stable positioning
- Reuse zip ties for ongoing access
- Secure excess lengths without tight coils
Optimizing Cable Pathways for Minimal Rattle
Effective cable pathway optimization begins with careful route planning that minimizes free slack and avoids sharp bends. Choose continuous pathways with gentle curves, reducing vibration-induced movement and stress on cable jackets. Use pathfinding algorithms like JPS–Theta* or sampling methods to identify collision-free, low-curvature routes in constrained spaces, especially around harnesses and panels. Prioritize routes with gradual bends to limit local flexing, which can cause micro-movements and contact noise during vibration. Allocate preferred zones and maintain minimum clearances from moving parts or vibration sources to prevent intermittent contact. Model multi-cable bundles as grouped entities to share routing lengths and minimize independent movement. This approach reduces rattle and guarantees a stable, quiet cable installation. Proper cable management techniques further help prevent unwanted noise by securing cables firmly and reducing unnecessary movement.
Employing Specialized Clips and Holders
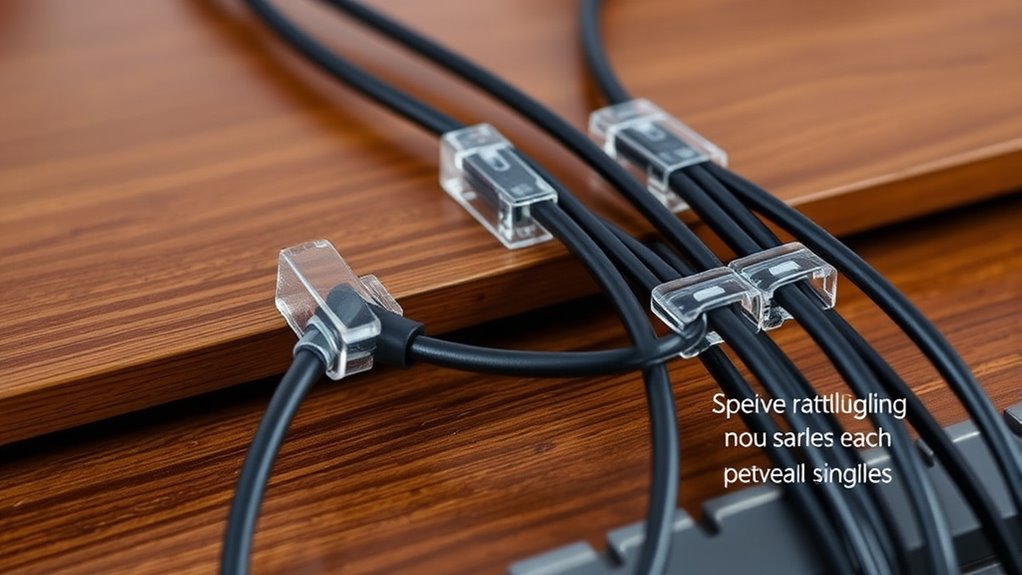
Using specialized clips and holders is a practical way to keep cables organized and reduce rattling. Adhesive cable clips, like TidyHelper, securely attach under desks or along edges, preventing detachment and noise. Magnetic cable holders, such as Anker’s, stick firmly to surfaces and allow quick addition or removal of cords, reducing movement. Cable trays and mounts from brands like Pamo or Steelcase support heavy loads and keep cables neatly contained. Velcro ties and straps, including Trilancer’s, bundle cords flexibly without damage, making management easier. Specialized mounts and clamps, like saddle tie mounts and twist lock clips, secure bundles firmly and prevent slippage. These tools help you maintain a tidy, rattle-free setup with minimal effort.
Final Tips for a Clean, Rattle-Free Finish

Achieving a clean, rattle-free setup depends on proper coiling and storage techniques. Use the over-under coiling method to prevent cable memory, kinks, and twists. Flip the first loop over, then roll the wrist to create an under loop with the next, maintaining a flat bundle. Secure the coil with a Velcro strap, but don’t tighten too much to avoid spring-back. Store cables in neat, flat bundles, and retrain any previously miscoiled cables through repeated over-under practice. Wrap IEM cables around your hand in a natural pattern, positioning connectors correctly. Keep cables separated with S-hooks or clips, and avoid parallel runs with power lines. Regularly inspect and clean cables, label them for easy identification, and use proper clips to prevent rattling during movement. Proper cable management also reduces the risk of internal damage that can cause noise or rattling over time.
Frequently Asked Questions
How Can I Prevent Cables From Rattling During Off-Road Rides?
To prevent cables from rattling during off-road rides, secure them firmly with zip ties and wrap them with split loom tubing for extra protection. Use foam or rubber dampeners at key points to absorb vibrations, and route cables upward or along stable surfaces to minimize movement. Regularly check and tighten fasteners, and apply felt tape or adhesive-backed dampening materials to areas prone to noise, keeping your cables quiet and secure.
What Materials Are Best for Silent Cable Management?
You should use silicone, Velcro straps, and trays for silent cable management. Silicone dampens noise and allows smooth 360° rotation, preventing rattles. Velcro straps and magnetic cable sheaths keep cables secure, reducing movement noise. Trays and channels, especially those with strong adhesives or magnetic features, organize cables neatly while minimizing vibrations. Combining these materials guarantees your cables stay silent and well-managed, even during active or off-road environments.
How Do I Adjust Cable Tension to Reduce Noise?
You should adjust cable tension to be tight enough to prevent slack that causes movement but not so tight that it stresses the conductors. Use a calibrated tension meter or spring scale to measure and set the tension within recommended ranges, typically just enough to limit movement to less than 1-2 mm. Regularly recheck tension after initial operation, and support cables at consistent intervals to minimize vibrations and rattling.
Are There Eco-Friendly Options for Cable Padding?
Yes, you can choose eco-friendly options for cable padding. Use biodegradable materials like bamboo or recycled paper-based wraps, which decompose naturally over time. Recyclable options such as TPE or polypropylene-based padding also work well and are easier to recycle locally. Reusable solutions like FibreStrap or Rapstrap help secure cables without waste. These eco-friendly choices reduce environmental impact while keeping your cables organized and protected efficiently.
How Often Should I Inspect and Re-Secure Cable Management Systems?
You know what they say—prevention is better than cure. You should inspect your cable management systems at least every 3–6 months, especially in high-traffic or harsh environments. Re-secure and organize cables during each inspection to prevent rattles and damage. Regular checks help catch wear, loose fittings, or signs of stress early, ensuring safety and longevity. Keep your system tight and tidy to avoid unnecessary trouble down the line.
Conclusion
Think of cable management like tuning a musical instrument—you want everything to flow smoothly without rattles. By evaluating your needs, using the right tools, and securing cables properly, you create a tidy, silent setup. When you take your time and fine-tune your routing, your cables will stay quiet and organized, like a well-played symphony. With a little effort, you’ll enjoy a clean, rattle-free space that sounds as good as it looks.