

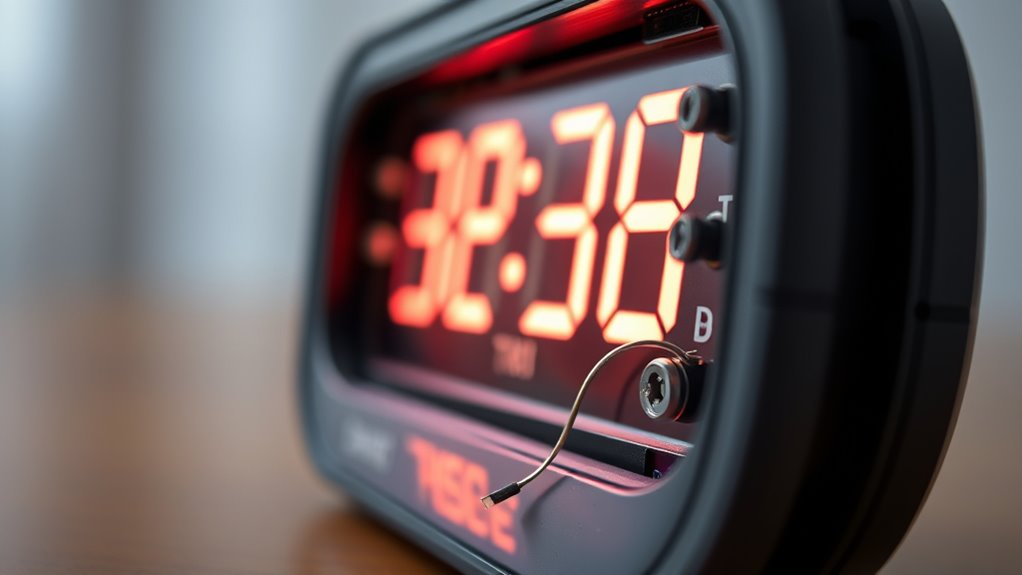
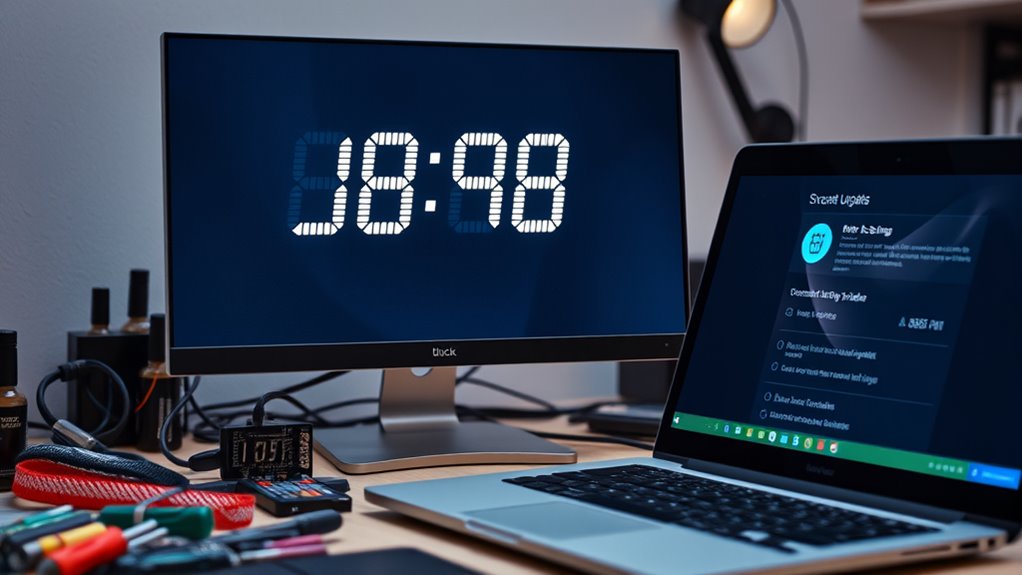
If your clock keeps resetting, the tiny cause is likely a dead CMOS battery. This small component supplies power to your BIOS settings and system clock to retain info when turned off. Replacing it is straightforward—just locate the battery in your desktop or laptop, remove it, and put in a new one. Afterward, you may need to reset your BIOS and check your time zone. For more tips on fixing this common issue, keep exploring the solutions below.
Key Takeaways
- A dead or weak CMOS battery is a common cause; replacing it often resolves clock resets.
- BIOS settings reset after replacing the battery, requiring manual reconfiguration of date and time.
- Ensure the system is powered off and unplugged before replacing the CMOS battery to prevent damage.
- Verify the CMOS battery type (e.g., CR2032) and install it with correct polarity for proper functioning.
- Persistent resets despite replacement may indicate motherboard issues or faulty connections needing professional diagnosis.
Identifying the Signs of CMOS Battery Failure
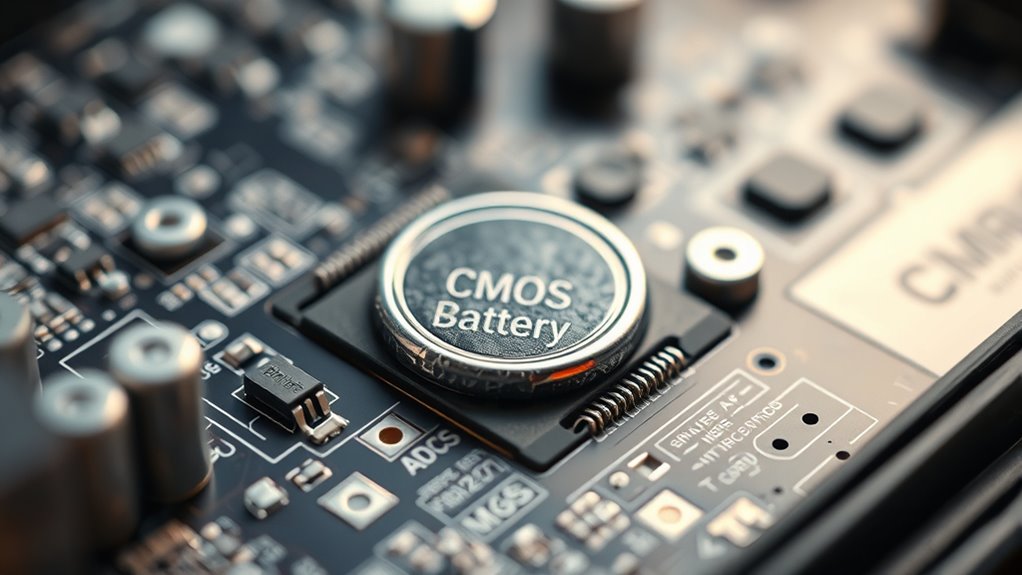
Have you noticed your computer’s clock resetting or displaying incorrect times after powering it off? That’s a key sign of CMOS battery failure. When the battery starts dying, your system’s clock and date revert to default or earlier years after shutdowns. You might also see the system clock gradually lose minutes or hours between reboots, which indicates declining CMOS voltage. BIOS or POST messages like “CMOS Checksum Error” or “Settings Reset to Default” often appear at startup, confirming issues with stored configurations. Additionally, BIOS settings—such as boot order or security options—fail to save after shutdown, reverting to defaults. These signs point to the CMOS battery struggling to provide backup power, and addressing it can often restore proper system function before more serious issues develop. The system clock’s inaccuracy also worsens over time, leading to synchronization problems with network services or scheduled tasks. In some cases, the inability to save BIOS changes may prevent hardware updates or new peripherals from functioning correctly, further indicating CMOS battery failure. Regularly checking the system logs can help detect early warning signs before the problem becomes critical. Furthermore, understanding how system hardware interacts with the CMOS chip can help you troubleshoot and prevent future failures. A thorough knowledge of motherboard components can aid in diagnosing and resolving underlying issues more effectively.
Replacing the CMOS Battery in Desktop and Laptop Systems
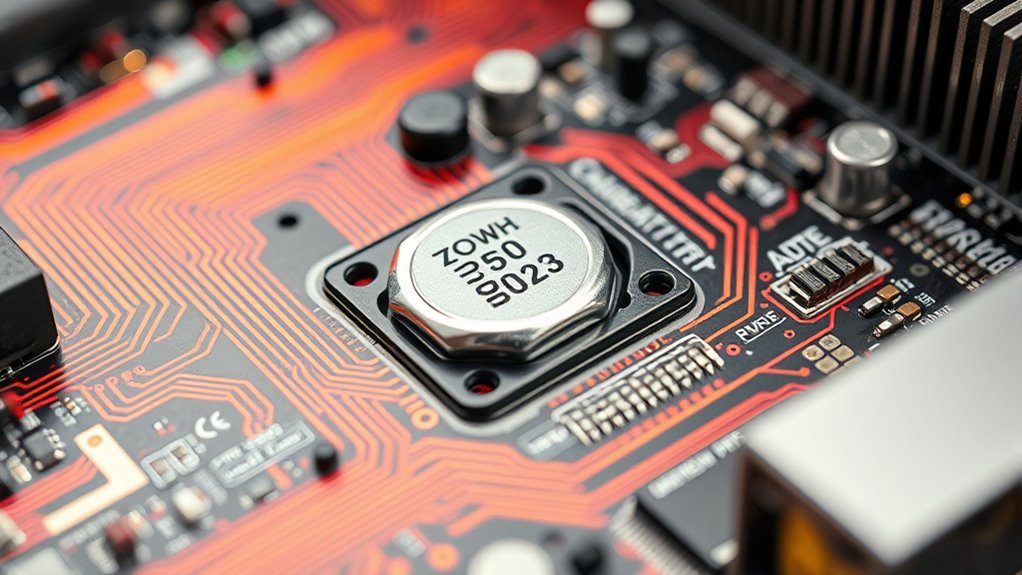
To replace the CMOS battery, you need to locate it first, which varies between desktops and laptops. Once found, follow proper procedures to remove and install the new battery securely. Afterward, you’ll need to adjust BIOS settings to ensure your clock keeps accurate time. The CMOS battery’s depletion is the primary cause of the clock resetting issue, so timely replacement can prevent further system problems. Additionally, understanding system maintenance best practices can help you identify other potential issues before they cause system failure. Regularly inspecting your system’s hardware components can also help prevent unexpected failures and extend the lifespan of your device. Being aware of component lifespan helps in planning timely replacements and avoiding sudden malfunctions. Performing routine checks can also assist in early detection of hardware degradation, ensuring your system remains reliable.
Locating the CMOS Battery
Locating the CMOS battery in your desktop or laptop is a crucial first step before replacement. In desktops, look near the BIOS chip, PCIe slots, or the edge of the motherboard, often held by a spring clip or retainer. Some may hide under GPUs or heatsinks, requiring component removal. High-end or compact models might have a holder or compartment for easy access. For laptops, the coin cell is usually under the bottom panel, beside RAM or WLAN modules, or inside a small compartment after removing the keyboard or chassis parts. Some models use soldered or wired batteries, making replacement more complex. Always confirm the battery type and polarity before removal. Understanding the location helps ensure a smooth replacement process, especially since some motherboards may have non-standard configurations. Being aware of different laptop designs can also prevent accidental damage during the process. Additionally, consulting the device’s manual or technical documentation can provide specific guidance tailored to your model.
Proper Replacement Procedures
Replacing the CMOS battery requires careful disassembly and attention to detail to avoid damaging your system. First, gather your screwdriver, a new CR2032 battery, and an anti-static wrist strap. Work on a clean, static-free surface, and verify your computer is fully powered off and unplugged. For desktops, remove the side panel; for laptops, access via the bottom panel or keyboard. Carefully disconnect cables or components blocking access. When removing the old battery, press the retaining clip or tab to release it, then slide or lift it out at an angle. Insert the new battery, ensuring the positive side faces up and it clicks into place. Reassemble your system, reconnect cables, and power on to verify the clock remains set. Additionally, checking the battery type before replacement can prevent compatibility issues. Being aware of AI-driven solutions in healthcare might influence future hardware and software considerations for maintenance. Proper handling and understanding of hardware components can extend the lifespan of your system and improve reliability. Using proper tools during installation can also prevent accidental damage and ensure a secure fit. Moreover, consulting the system manual can provide specific guidance tailored to your device model.
Post-Installation BIOS Settings
After installing a new CMOS battery, your system’s BIOS settings will reset to their default configurations, so you’ll need to reconfigure essential options. Start by booting directly into BIOS setup; use F2 or the designated key. Check and set the date and time, as these often revert to defaults. Review the boot priority list, ensuring your primary OS drive or Windows Boot Manager is correctly prioritized. If available, restore saved settings from a file to streamline this process. Adjust display settings if needed, especially if you have an add-on graphics card, ensuring the primary video adapter is correct. Save your changes with F10 or the specified key, then exit. Expect a few restarts, and verify that your system boots Windows normally. This process guarantees your BIOS settings are properly configured after the CMOS battery replacement. Additionally, double-check the power management settings to ensure optimal system stability and performance. It’s also helpful to review system security options, especially if you notice any login or startup issues afterward, and consider the BIOS update process if persistent issues occur.
Resetting BIOS Settings After Battery Replacement

When you replace the CMOS battery, it’s common for BIOS settings to reset or revert to defaults. This happens if the new battery isn’t making proper contact or if there are faults in the circuitry. Check the battery’s orientation and guarantee it’s the correct type, like a CR2032 for desktops. Confirm good contact by inspecting the battery holder, springs, and terminals—poor contact or bent contacts can cause issues even with a fresh battery. Use a multimeter to verify voltage at the board pads, not just the battery. Also, examine the solder joints, PCB traces, and nearby components for damage or corrosion, as broken connections or faulty diodes can prevent power from reaching the RTC. Proper contact and healthy components are essential for BIOS settings to persist after replacement. Additionally, ensuring the power supply circuitry is functioning correctly can help prevent reset issues related to the battery replacement. Remember that circuit integrity plays a crucial role in maintaining stable BIOS configurations after hardware changes.
Ensuring Accurate Time Zone Settings
To guarantee your system displays the correct local time, you need to properly configure the time zone settings in your operating system. First, select the correct time zone manually in your Date & Time settings instead of relying on automatic detection, which can misidentify your region. Be aware that some zones have incorrect DST rules, causing recurring one-hour shifts during changes. Disable location services if automatic detection causes issues or if you’re on a VPN or private network, as these can supply misleading geolocation data. Remember, changing the time zone without restarting affected applications can lead to inconsistent times. Additionally, in managed environments, policies enforced via Group Policy or MDM may override your settings. Ensuring correct time zone configuration helps prevent persistent offsets and resets. Incorrect time zone settings can also lead to synchronization issues with your system clock, so double-check your configurations regularly. Regularly reviewing system synchronization settings can help maintain accurate time across devices, especially when dealing with time drift caused by hardware or software inconsistencies. Properly configuring time zone settings and understanding how Vetted policies influence your system can help you avoid future discrepancies and ensure your system remains accurate over time.
Troubleshooting Windows Time Service Issues

If your clock keeps resetting, start by checking if the Windows Time Service is running and set to start automatically. Restart the service to apply any changes and make certain it stays active. Then, verify that your system is synchronized with an internet time server to keep your clock accurate. Ensuring the Windows Time Service is configured correctly helps prevent recurring time discrepancies and keeps your system’s clock reliably synchronized. Additionally, reviewing the Windows Time Service settings can help identify underlying issues that may be causing the resets. Confirming that your system’s time synchronization settings are properly configured can further improve stability. It’s also helpful to check that your network connection is stable, as it affects the ability to communicate with time servers effectively.
Restart Windows Time Service
Restarting the Windows Time service is a fundamental step in troubleshooting synchronization issues. First, check if the service is running using Services MMC or command-line. If it’s stopped, you’ll need to restart it. You can run `net stop w32time` followed by `net start w32time`, or use PowerShell’s `Restart-Service w32time`. After restarting, force a resync with `w32tm /resync`. If the service fails to start, inspect Event Viewer logs for error codes. Proper service operation is critical for the default Windows time synchronization process, as the service communicates with external NTP servers and maintains internal clock accuracy.
- Verify service status with `w32tm /query /status`.
- Restart using `net stop w32time` and `net start w32time`.
- Force resync with `w32tm /resync` after restart.
Set Automatic Startup Type
Setting the correct startup type for the Windows Time service guarantees it runs continuously and maintains accurate system time. The recommended setting is Automatic, ensuring the service starts with Windows and stays active during normal operation. This prevents issues caused by the service being disabled, especially after updates or image deployments. If boot performance is a concern, you can opt for Automatic (Delayed Start), which starts the service shortly after boot. To set this manually, open services.msc, double-click *Windows Time*, and choose Automatic. Alternatively, use the command `sc config w32time start= auto` in an elevated Command Prompt. Always verify the change with `sc query w32time` or in the Services console to confirm the service is enabled and running properly.
Synchronize Internet Time
Troubleshooting Windows Time Service issues starts with verifying the reachability and configuration of your NTP servers. Ensure you select reliable, reachable sources like pool.ntp.org or vendor-recommended servers to avoid single points of failure. Use commands like w32tm /query /peers and w32tm /query /status to confirm peers are reachable and synchronized. Also, check that UDP port 123 is open end-to-end, including firewalls and routers, as blocked traffic prevents NTP packets from reaching your device.
- Verify server reachability and synchronization status
- Confirm UDP 123 is open and unblocked
- Use multiple peers or pools for redundancy and accuracy
Addressing Secure Time Seeding and Network Connectivity Problems
Addressing secure time seeding and network connectivity problems involves understanding how SSL/TLS handshake data influences system clock accuracy. STS uses handshake metadata, such as timestamps and certificate expiry dates, to estimate and correct large time errors, especially when hardware issues cause significant drifts. Problems often occur when SSL implementations send incorrect timestamps or when stale registry data is reused after a restart, leading to inaccurate time readings. Network issues, like lost internet access, can prevent STS from refreshing its data, causing persistent errors. To fix these problems, you can disable STS with `w32tm.exe /config /update` and adjust registry settings. Reconnecting to the internet or using NTP servers directly ensures reliable time updates, helping your system maintain accurate time and avoid resets.
Updating Firmware and Drivers to Prevent Clock Resets
Updating firmware and drivers plays a vital role in preventing clock resets caused by outdated software or hardware issues. Regular updates fix bugs, enhance synchronization, and prevent corruption. Firmware updates often include dual-bank storage, allowing safe rollbacks if something goes wrong. Bootloaders manage updates smoothly, reducing the risk of bricking your device. To guarantee successful updates, keep a backup of your data, close background applications, and verify a stable internet connection. Implementing resilient update mechanisms can further reduce the risk of failures. – Use manufacturer-approved tools and verify compatibility before updating. – Enable automatic time sync after installing new drivers. – Perform a hard reset if persistent time issues occur post-update.
Staying current with firmware and drivers minimizes clock-related problems and maintains device reliability, ensuring your device keeps accurate time without resets.
When to Seek Professional Repair Assistance

Repeated clock resets despite basic fixes often signal deeper mechanical or electrical issues that require professional diagnosis. If your clock continues resetting after replacing the battery or power cycling, it’s time to call in a pro. Intermittent resets linked to movement—like vibrations or tilts—often stem from worn pivots, bushings, or misaligned parts needing a clockmaker’s expertise. Unusual noises such as grinding or clicking accompanying resets suggest mechanical wear or electrical failures that demand shop inspection and component repair. If you’ve attempted DIY repairs or replaced parts without success, professional help is essential to avoid further damage. For valuable or antique clocks, consulting a specialist ensures careful handling and preservation. Proper diagnosis by a trained technician can identify issues like worn bushings or faulty wiring early. Professional repair ensures accurate diagnosis, proper part fabrication, and long-term reliability, saving you time and money down the line.
Frequently Asked Questions
Can a Faulty CMOS Battery Cause System Instability Besides Time Issues?
Yes, a faulty CMOS battery can cause system instability beyond time issues. When the battery is dead or weak, BIOS settings revert to defaults, which might disable critical hardware features or misconfigure system parameters. This can lead to boot failures, hardware initialization errors, or system freezes. Intermittent errors during startup and unstable performance are common symptoms. Replacing the battery often stabilizes the system by restoring proper BIOS settings and preventing these issues.
Is It Necessary to Update BIOS After Replacing the CMOS Battery?
Did you know that over 60% of users never need a BIOS update after replacing their CMOS battery? You don’t have to unless you experience specific issues. Usually, a battery swap only resets your settings, not the firmware. If your system runs into boot errors, hardware compatibility problems, or security vulnerabilities, then updating BIOS is recommended. Otherwise, just reconfigure your settings, keep backups, and enjoy your system without unnecessary updates.
How Do I Know if My BIOS Reset Was Successful?
You can tell your BIOS reset was successful if you see the POST splash screen, hear the default beep pattern, or notice the BIOS prompts like “Press F2/Del to enter Setup” appear. Check that system settings like date/time are back to defaults, and hardware detection matches your components. Additionally, booting without errors, seeing default BIOS options, and confirming the system’s stability in your OS all indicate a successful reset.
Can Incorrect Time Zone Settings Cause BIOS Clock Resets?
Absolutely, incorrect time zone settings can feel like a giant monkey wrench throwing chaos into your system’s clock! When your OS’s time zone is wrong, it can override BIOS settings on reboot, causing the clock to appear reset or incorrect. This isn’t a hardware fault—just a misconfiguration. Double-check your time zone in the OS, set it correctly, and restart to see if your BIOS clock stays steady.
What Are the Risks of Opening My Laptop to Replace the CMOS Battery?
Opening your laptop to replace the CMOS battery carries risks like damaging delicate components or causing short circuits. You might bend or break tabs, leading to costly repairs. Static electricity can harm internal parts, and improper handling can damage the motherboard. Plus, if you don’t disconnect power and remove the battery properly, you risk electrical shock or further hardware failure. Always follow safety precautions and consult your device’s manual before attempting the replacement.
Conclusion
If your clock keeps resetting, don’t ignore the tiny cause behind it. Replacing the CMOS battery is often straightforward and can save you time and money. Are you ready to fix the issue yourself and keep your system running smoothly? Remember, addressing small problems early can prevent bigger headaches later. With a little troubleshooting, you can often resolve this tiny but annoying glitch on your own.