When your daytime footage looks washed out and overexposed, using exposure compensation is an easy fix. Simply decrease the exposure setting by dialling in negative EV (usually -0.7 to -2) to prevent highlight loss and boost contrast. This quick adjustment helps retain detail, color, and vibrancy in bright scenes. Mastering this technique allows you to capture more balanced footage, and if you want to learn more tips to perfect your shots, keep exploring these strategies.
Key Takeaways
- Exposure compensation allows you to quickly adjust brightness, reducing overexposure and preventing washed-out footage during shooting.
- Use negative exposure compensation in bright daylight to preserve highlight detail and maintain natural colors.
- Applying exposure compensation helps correct overexposed scenes without changing camera settings or metering modes.
- Review footage immediately after adjustment to ensure proper exposure and avoid loss of highlight or shadow detail.
- Combining exposure compensation with proper metering modes ensures consistent, well-balanced footage in changing lighting conditions.
Understanding Overexposure and Its Impact on Day Footage

Overexposure happens when your camera sensor receives too much light, causing bright areas to lose detail and turn into pure white highlights. In daytime scenes, intense sunlight can push highlights beyond your camera’s dynamic range, making skies and reflective surfaces appear featureless and white. This results in clipped highlights, where no detail remains, and reduces the overall contrast of your footage. The histogram shifts rightward, showing clipped peaks on the right side, indicating irreversible data loss. Colors in overexposed areas tend to desaturate, giving a washed-out look, especially in bright skies and skin tones. This loss of detail and color accuracy diminishes the realism of your shot, making post-production corrections difficult or impossible. Overexposure compromises both the visual quality and the information captured by your camera. Additionally, overexposure can lead to increased noise in the darker areas of the image, further degrading image quality and making it harder to achieve a balanced, professional look. Understanding your camera’s dynamic range allows you to better manage exposure and prevent washed-out footage. Properly managing exposure settings is crucial for maintaining detail across the entire image, especially in high-contrast scenes. Knowing how to utilize exposure compensation effectively is a quick way to correct overexposure issues during shooting. Being aware of your camera’s sensor capabilities helps you anticipate and avoid overexposure problems before they happen. Being familiar with your camera’s exposure controls enables more precise adjustments tailored to your shooting environment.
How to Recognize Washed-Out Video in Your Shots

You can often tell your footage is washed out when colors look dull and less vibrant than they should be. The overall image appears faded, with reduced saturation and flat contrast. Highlights may lose detail and seem overly bright or blown out, especially in bright outdoor scenes. During playback, your video might look too bright or overexposed, even if the original scene was well-lit. This issue is common with HDR recordings, especially from iPhones, and becomes noticeable on non-HDR devices or software that don’t support HDR properly. To confirm, compare the footage across multiple players, check file metadata for HDR tags, or view on the original device. Recognizing these signs early helps you decide whether exposure adjustments or software tweaks are needed. HDR videos can appear more vivid when properly processed and supported, which is often not the case with videos filmed in HDR on devices or platforms lacking support. Being aware of color saturation issues can help prevent and correct these problems before sharing your videos. Additionally, understanding exposure compensation can assist in adjusting your camera settings to achieve a more balanced and vibrant image during shooting. Furthermore, awareness of connected technology features can help you better manage exposure settings in real-time, especially with modern cameras that integrate smart controls. Knowing how to use camera settings effectively allows for better control over exposure and helps avoid washed-out footage from the outset.
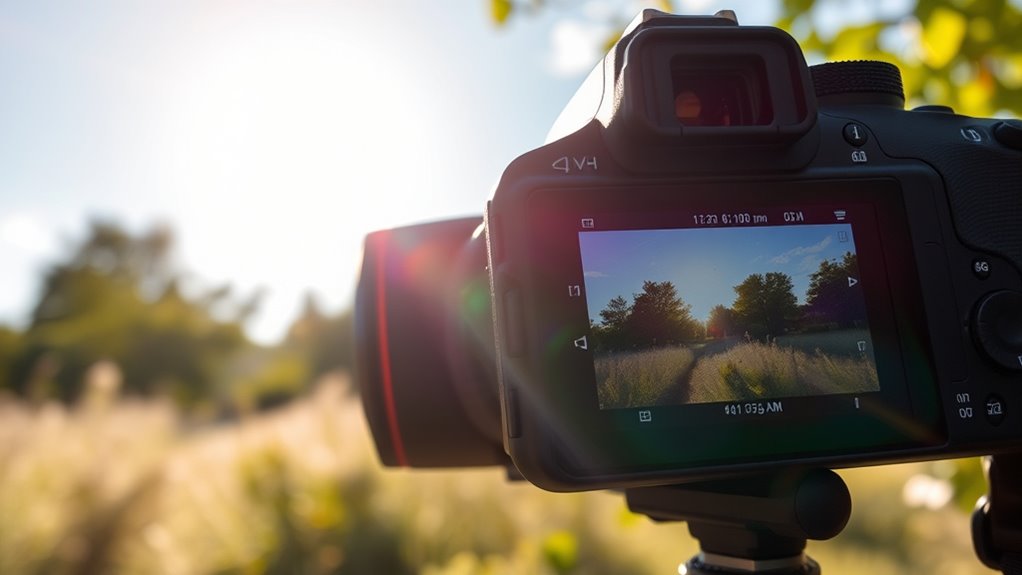
Quick On-Set Adjustments to Prevent Washout

To prevent washout during filming, it’s crucial to make quick on-set exposure adjustments, especially in challenging lighting conditions. First, check your meter reading on the LCD or viewfinder. Then, hold the +/- button and rotate the dial or use arrow keys to dial in the right EV. For bright scenes, reduce exposure by -0.7 to -1 EV to protect highlights. In high-contrast situations, like snowy or beach scenes, adjust between -1 to -2 EV. Use the following to visualize your options:
| Scene Type | Recommended EV Adjustment | Purpose |
|---|---|---|
| Bright sunlight | -0.7 to -1 EV | Prevent highlight washout |
| Backlit subjects | +1 EV | Balance shadows and highlights |
| Snowy/beach scenes | -1 to -2 EV | Maintain color accuracy |
Review footage immediately and reset to zero after. Understanding how exposure affects image quality] can help you make more precise adjustments and achieve the desired visual effect.
Post-Production Techniques to Recover Details and Color

Post-production offers powerful tools to recover details and correct colors lost during shooting. RAW files contain extra exposure information, making it easier to retrieve highlights and shadows. You can use programs like Lightroom or Photoshop to adjust exposure, highlight recovery, and shadow lifting without degrading image quality. Uncompressed RAW provides more flexibility for highlight and shadow recovery, while intentional slight underexposure helps preserve whites. Modern digital sensors and processing software significantly enhance your ability to manipulate exposure and color after capture, allowing for more precise adjustments. Use highlight sliders to reduce clipped highlights and regain detail. Lift shadows carefully to restore underexposed areas. Adjust white balance and curves to correct color and contrast. Applying exposure compensation techniques during post-production can further improve your footage, especially when initial exposure was not ideal. Additionally, understanding dynamic range can help you better manage the contrast between light and dark areas in your images. Recognizing the importance of net worth in assessing equipment investments can influence your post-production workflow choices.
Best Practices to Maintain Proper Exposure and Color Balance
| Metering Strategy | Best Use Case |
|---|---|
| Evaluative | Balanced scenes, where overall exposure needs to be accurately captured. Evaluative metering helps achieve natural results across varied lighting conditions. A good understanding of paint viscosity and proper dilution can also influence the overall exposure and finish quality. Additionally, recognizing how water-based mediums behave during application can aid in achieving the desired visual effects. |
| Spot/Partial | High contrast/backlit subjects, allowing precise exposure adjustments. |
| Bright scenes | +1.5 to +3 EV for snow/sand, ensuring these bright surfaces are correctly exposed. |
| No midtones | Use gray or compensate accordingly to prevent images from appearing flat or overly contrasted. |
| All strategies benefit from understanding how exposure compensation can quickly correct exposure issues in various lighting conditions. Understanding the capabilities of your camera’s metering modes helps you choose the best strategy for each situation. Mastering metering modes also allows you to adapt quickly to changing scenes, which is especially useful in dynamic vintage environments.
Frequently Asked Questions
Can Exposure Compensation Fix All Overexposure Issues in Daylight Footage?
Exposure compensation can’t correct all overexposure issues in daylight footage. While it helps prevent blown highlights by adjusting exposure settings, it won’t recover detail once highlights are clipped or fix problems caused by scene dynamic range limits. For best results, combine exposure compensation with techniques like using ND filters, manual settings, or bracketing. Always monitor histograms and highlight warnings to ensure your footage stays within sensor capabilities.
How Do I Know if My Camera’s Metering Is Causing Washout?
You’ll know your metering causes washout if your footage has blown-out highlights, dull colors, or a washed-out look. Check your histogram for clipped whites or loss of detail in bright areas. Review your shots on a calibrated monitor to spot overexposed sections or flat shadows. If you notice inconsistent exposure in high-contrast scenes, your metering might be off. Adjust your settings or switch modes to get better control.
Is It Better to Shoot Flat/Log Profiles or Standard Profiles in Bright Sunlight?
Shooting flat or log profiles in bright sunlight gives you more dynamic range and grading flexibility, but it’s trickier to expose correctly. You’ll want to use tools like zebras, histograms, or false color to avoid clipping highlights and underexposing shadows. Standard profiles are easier to expose on the fly, with in-camera contrast and less post-production work, but they sacrifice some highlight detail and grading potential.
What Are the Risks of Underexposing Footage for Exposure Compensation?
If you underexpose your footage for exposure compensation, you risk losing shadow detail, which becomes a solid black patch, making objects hard to see. You’ll also amplify noise, leading to grainy images that are tough to clean up. Plus, underexposure flattens contrast, resulting in dull images with little depth. Post-production becomes more challenging, often requiring heavy grading and denoising, which can soften details and limit your editing options.
Can Post-Production Recovery Fully Restore Clipped Highlights in Overexposed Footage?
Post-production can’t fully restore clipped highlights in overexposed footage, especially true highlights where sensor data hits maximum. While you can recover some near-clipped areas using RAW workflows or highlight recovery tools, true clipping—like specular reflections—are often lost forever. The success depends on the extent of clipping and the channels affected. Expect partial recovery, but complete restoration of all highlight details isn’t guaranteed.
Conclusion
By mastering exposure compensation, you can prevent washed-out daytime footage and keep your colors vibrant. Did you know that improper exposure can reduce image detail by up to 50%? Adjusting your settings on the fly guarantees your videos stay sharp and true to life, saving you time in post-production. Keep practicing these quick fixes, and you’ll consistently capture bright, balanced shots that stand out—no more washed-out footage needed.