
Rear window defroster lines can cause ghost images, halos, and obstructions in your camera footage, especially when bright objects or high-contrast scenes are involved. They may also trigger focus issues and flickering due to reflections and electromagnetic interference, which disrupts image clarity. Damaged or dirty lines increase hotspots and damage the glass, further affecting your camera’s performance. To learn how to minimize these issues, explore the detailed tips and strategies ahead.
Key Takeaways
- Defroster lines create halos and ghost images, causing visual artifacts around bright objects in camera footage.
- Thick or elevated lines lead to Moiré patterns and optical distortions, reducing scene clarity.
- Reflections from defroster lines can confuse autofocus systems, causing focus hunting and jitter.
- EMI from energized grids disrupts camera signals, leading to flickering, static, or focus issues.
- Proper mounting, shielding, and grounding help minimize interference and improve camera image quality.
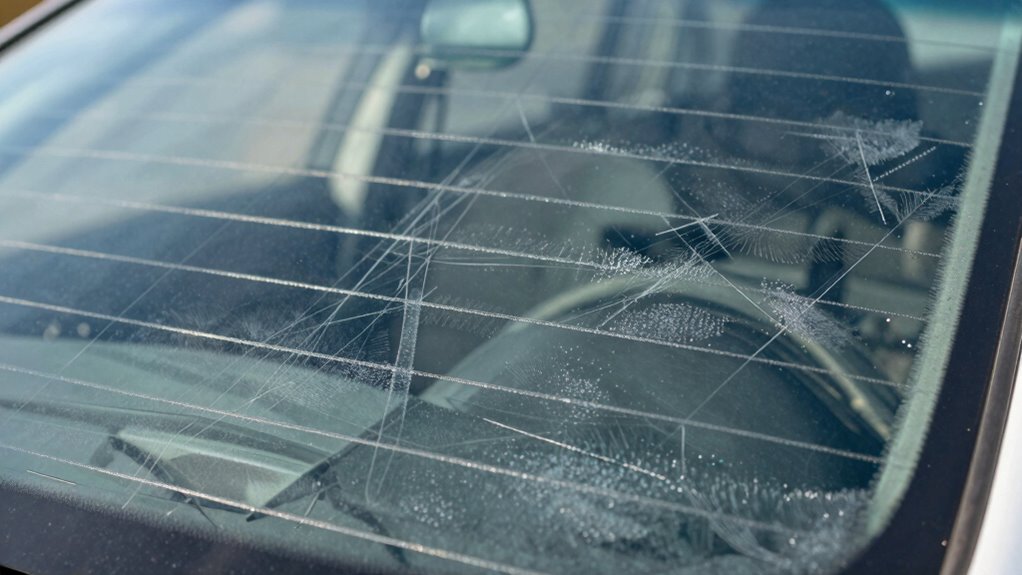
How Defroster Lines Appear in Your Dashcam Footage
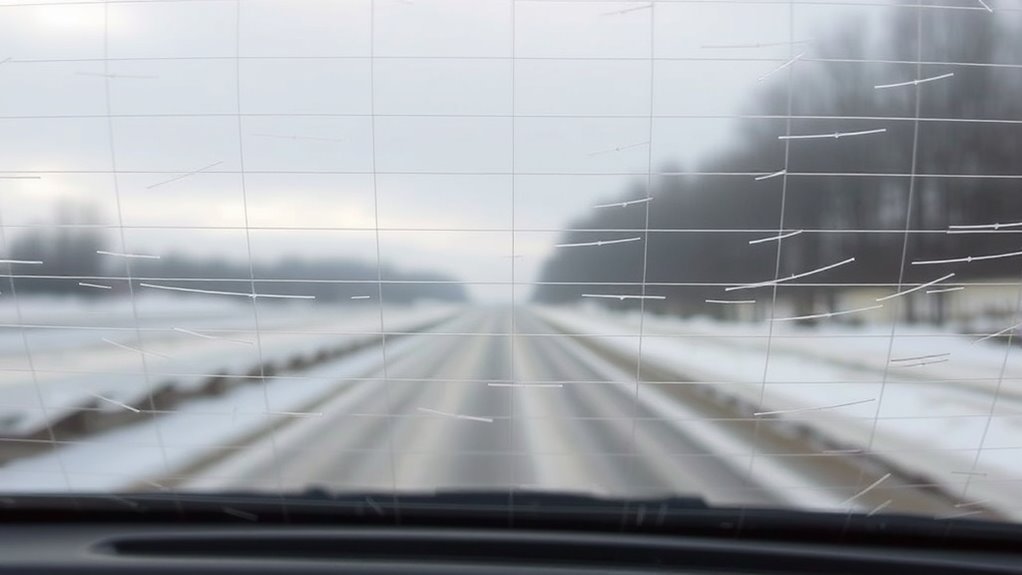
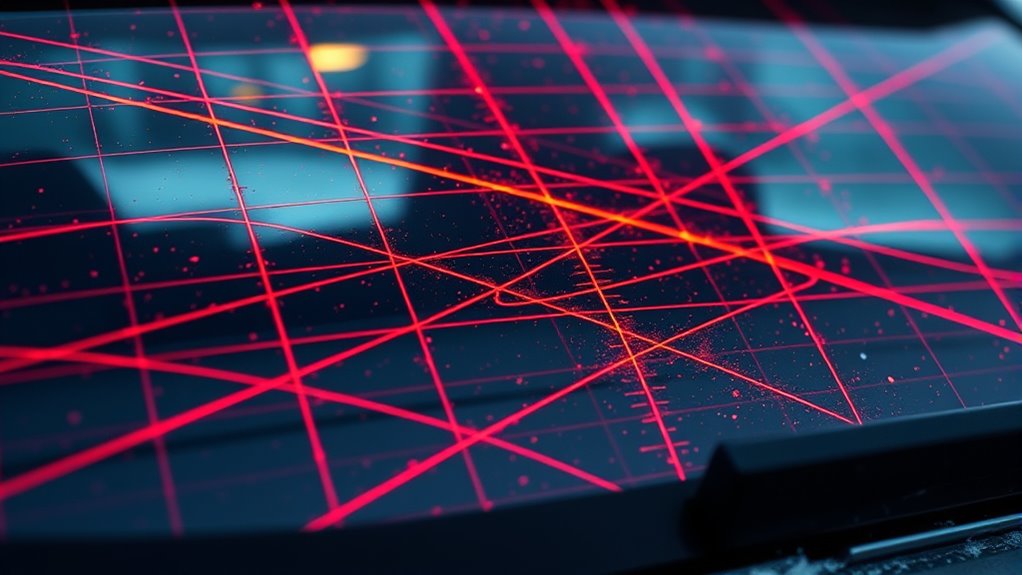
When your dashcam records footage through a rear window with defroster lines, you’ll notice visual artifacts caused by optical distortion and scattering. These lines act as tiny raised or embedded conductive strips that bend and scatter incoming light, creating halos and ghost images, especially around bright objects. At night or in high-contrast scenes, these effects become more pronounced, as the camera’s sensor emphasizes bright points against dark backgrounds. Thicker or more elevated lines produce stronger distortions, resulting in larger halos. Additionally, layered window tint or film can worsen scattering and halo effects. The fine spacing of defroster lines can also interact with your camera’s pixel grid, generating Moiré patterns or interference bands. These artifacts can diminish image clarity and distract from critical details in your footage. Moreover, understanding the optical properties of infrared light helps explain why these issues are more noticeable in night vision or low-light conditions.
The Impact of Defroster Lines on Camera Autofocus
Defroster lines can cause reflection effects that confuse your camera’s autofocus system, leading to focus errors. These high-contrast lines disrupt the camera’s ability to correctly identify subjects, increasing the risk of blurry shots. Plus, their placement within the camera’s field of view makes it harder for autofocus to reliably lock onto your intended target. Additionally, the presence of visual artifacts from defroster lines can interfere with image clarity and overall photo quality. Understanding how contrast ratios influence image rendering can help in adjusting camera settings to mitigate some of these issues. Recognizing free floating elements like defroster lines can also assist in developing better techniques for capturing sharp images in such environments. Paying attention to lighting conditions can further help in reducing the impact of these lines during photography. Being aware of sensor sensitivity settings can also improve autofocus performance when dealing with challenging reflections.
Line Reflection Effects
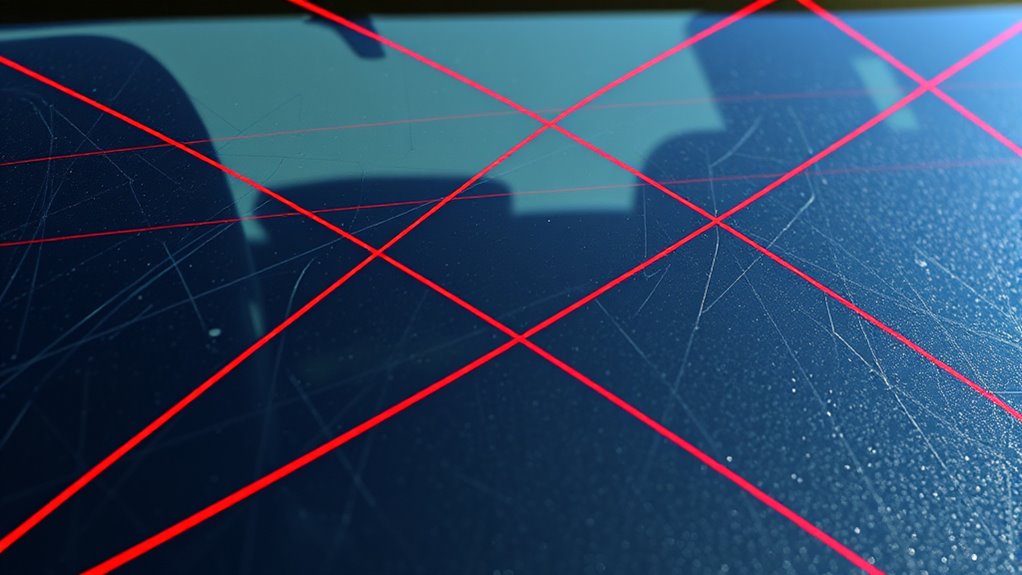
Line reflection effects can notably interfere with your camera’s autofocus system by creating high-contrast, specular highlights that attract the focus sensors away from your main subject. When light reflects off defroster lines at shallow angles, it produces bright, mirror-like spots aligned with the line orientation. These reflections are intensified when your camera views the glass at grazing angles, making lines more prominent. Metallic traces reflect polarized light differently from ambient scene lighting, creating contrast that can confuse autofocus. Bright hotspots may saturate your sensor, causing local exposure biases and increasing noise in shadowed areas. Moving reflections, especially during vehicle motion, can lead to unstable focus points, resulting in hunting, jitter, and blurred images. These effects make it harder for your camera to lock onto the intended subject accurately. Proper mounting techniques and camera settings can help mitigate some of these issues by reducing the impact of reflections on autofocus performance. Additionally, using polarizing filters can help minimize reflected glare and improve autofocus reliability in these situations.
Autofocus Disruption Risks
Electrical noise generated by energized defroster grids can interfere with your camera’s autofocus system, causing it to misread signals and hunt for focus. Conductive grids introduce electromagnetic interference (EMI) that creates transient noise spikes, corrupting autofocus sensor readouts. Uneven current flow from partial breaks or high-resistance spots generates localized electromagnetic fields, increasing the chance of intermittent autofocus errors, especially on contrast- or phase-detection sensors. High-voltage switching transients in defroster circuits can couple into your camera wiring, resulting in jittery autofocus signals. Poor grounding isolates this electrical disturbance, causing focus drift or hunting. Additionally, aftermarket repairs or DIY fixes may create unintended current paths, amplifying EMI emissions and raising the risk of autofocus disruptions during defroster operation.
Camera Field of View
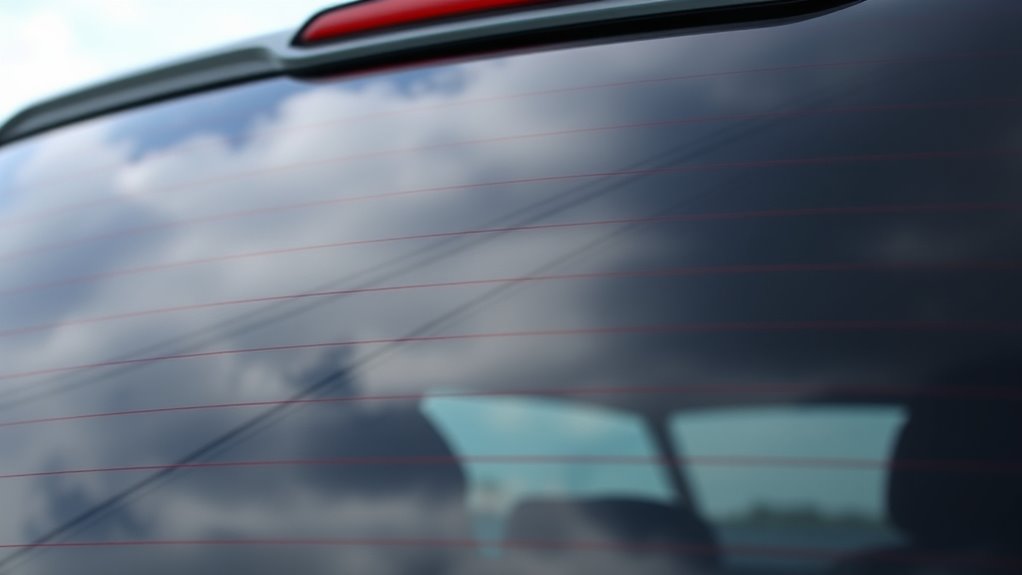
Rear-window defroster lines can considerably impact your camera’s field of view by physically blocking parts of the scene. These lines often cross the centerline, obscuring license plates or pedestrian heads, reducing the number of usable pixels for critical targets. Their thickness, typically 0.3–1.0 mm, projects onto several pixels at common focal lengths, causing strip-shaped detail loss along affected image rows. Multiple parallel lines create repeating occlusion bands, increasing the chance that objects intersect at least one line. The severity depends on your camera’s resolution; lower-res sensors lose more detail per line than higher-res ones. Mounting angle and glass slant can also compress or expand apparent line spacing, shifting which scene areas are impacted and further narrowing your effective field of view. Sensor resolution plays a crucial role in determining how much detail is lost due to these obstructions.
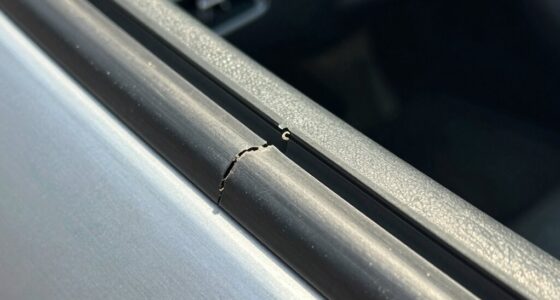
Common Causes of Damage to Rear Window Defroster Lines
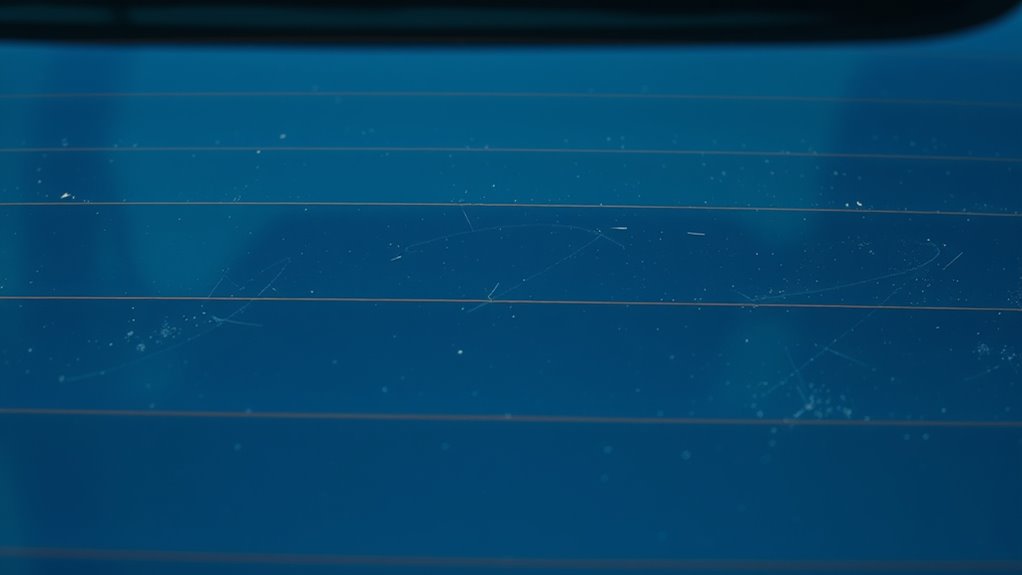
Damage to your rear window defroster lines often happens through improper cleaning or installation. Using abrasive tools or harsh chemicals can scratch or degrade the lines, while incorrect tint application can cause permanent damage. Static stickers can be used to attach a dashcam to the rear window without interfering with the defroster wires if applied correctly. Understanding these common issues helps you prevent costly repairs and maintain your defroster’s effectiveness.
Abrasive Cleaning Tools
Using abrasive cleaning tools or harsh chemicals can unintentionally cause serious harm to your rear window defroster lines. These tools scratch the thin conductive strips during cleaning, creating breaks that disrupt electrical flow. Even small scratches can halt the entire grid’s function and are often visible through infrared imaging. Contact with abrasive surfaces, like rough cloths or scrub brushes, can lead to cracks and broken lines, stopping snow and ice removal. Damage from abrasives causes increased resistance, which generates excessive heat and risks melting nearby materials, including window films. To prevent this, avoid abrasive tools and harsh chemicals when cleaning your rear window. Instead, use gentle methods and verify the integrity of the lines afterward, ensuring your defroster works properly without risking costly repairs.
Improper Tint Application
Improper tint application is a common cause of damage to rear window defroster lines, often resulting from incorrect adhesive choices or faulty installation techniques. Using solvent-based adhesives can chemically attack the conductive paint, causing delamination or loss of conductivity. Pressure-sensitive adhesives that cure slowly can seep into tiny cracks, increasing resistance and creating hotspots when energized. High-temperature adhesives that outgas can leave residues on grid elements, degrading electrical contact and clarity. Aggressive adhesives may bond too strongly, making repairs difficult or impossible, often requiring full glass replacement. Additionally, films not tested for automotive defrosters can interact unpredictably with grid materials, increasing failure risks. Poor application practices, such as improper alignment or excessive force, can also damage delicate defroster lines during tinting. Selecting appropriate tint films that are tested for compatibility with defroster grids significantly reduces the risk of damage. Using proper installation techniques and ensuring well-sourced coverage of these issues helps prevent inadvertent damage and maintains the functionality of the defroster system. To further protect the defroster lines, it’s essential to understand the manufacturers’ guidelines, as following these can prevent many common errors. Moreover, understanding connectivity and the importance of proper installation methods can greatly extend the lifespan of your rear window defroster.
How Hotspots From Damaged Lines Can Affect Your Camera
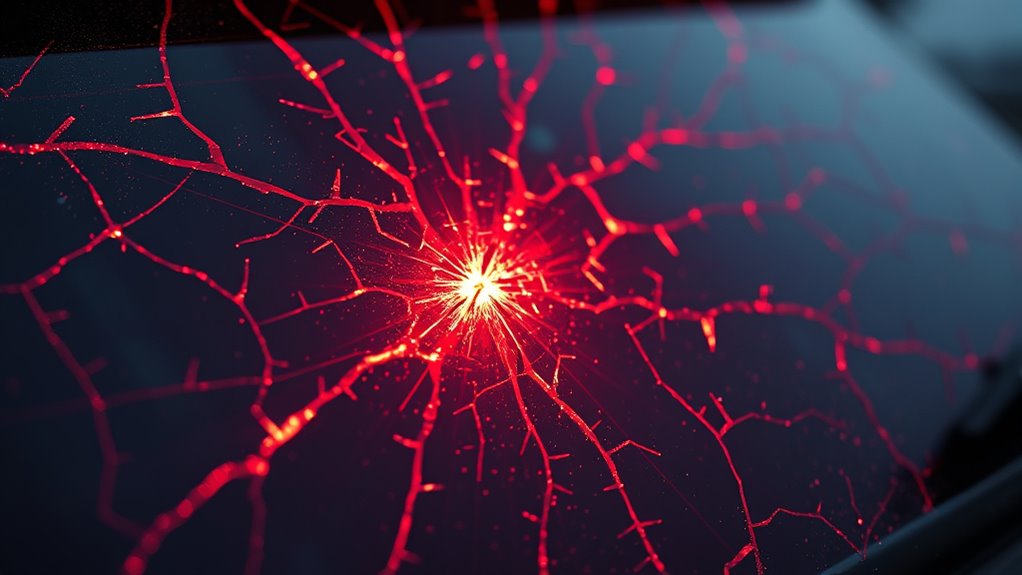
Have you ever noticed flickering or unusual spots in your camera footage when inspecting your rear window? These issues often stem from hotspots caused by damaged defroster lines. Cracked or broken traces concentrate current, creating localized overheating that distorts light transmission and causes bright or dark bands. Short circuits between adjacent lines can produce sudden high currents, raising temperatures rapidly. Corrosion or poor connections lead to uneven heating, intensifying hotspots. These hotspots change the glass’s emissivity and induce thermal lensing, causing focus shifts and blurring. They can also cause physical damage like cracking or bubbling, reducing transparency and creating glare or smearing. Thermal effects from hotspots can alter the glass’s properties over time, leading to long-term damage and further complicating repairs. Additionally, thermal expansion caused by uneven heating can exacerbate existing cracks or create new ones, accelerating deterioration. Persistent hotspots may generate hot pixels or distortions, complicating your camera’s performance and making it harder to get clear, reliable footage. Infrared cameras can detect these hotspots effectively due to their high thermal sensitivity, allowing for early diagnosis and repair. Moreover, preventive maintenance can help identify and address issues before they lead to serious damage. Regular inspections with thermal imaging can detect early signs of hotspots, preventing costly repairs later.
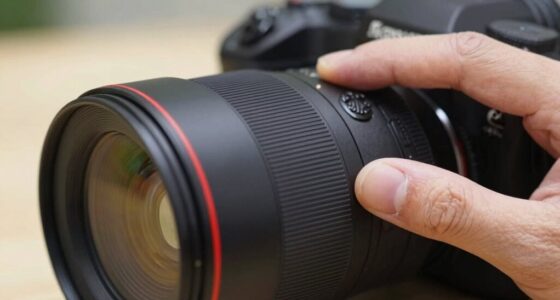
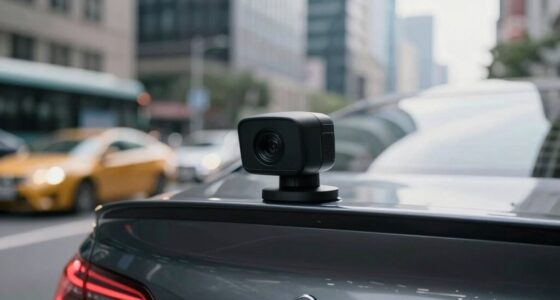
Tips for Mounting Your Dashcam to Avoid Defroster Lines

To prevent hotspots and camera damage caused by defroster lines, careful mounting placement is key. Position your dashcam high on the rear glass, centered within an unobstructed vertical band to minimize crossing defroster traces. Keep the mount several centimeters away from visible defroster lines to avoid damaging the heating elements. For front or dual setups, place the camera behind the rearview mirror to simplify cable routing and avoid wires on hatchbacks and SUVs. Inside the windshield wiper sweep area and away from tinted dot matrices helps keep the lens clear. If space is limited, angle the camera slightly downward to maintain an unobstructed view. Always test the adhesive and ensure it doesn’t contact the defroster wires to prevent damage during removal. Mount in a location where the defroster lines are least dense, ensuring your camera remains functional and undamaged over time.
Detecting Electrical Interference Caused by Defroster Lines
Defroster lines can introduce electrical interference into your vehicle’s camera systems by acting as unintended antennas that pick up and radiate broadband noise. To detect this interference, first monitor your camera’s image quality for flickering, banding, or blackouts, especially when defroster is active. Use a radio receiver or spectrum analyzer to scan for increased RF noise or spurs near the camera’s operating frequencies during defroster operation. Check for irregular ground currents or voltage ripples on your vehicle’s wiring with a multimeter or oscilloscope. If you notice noise spikes coinciding with defroster activation, it indicates coupling. Proper diagnosis is essential because electrical issues related to the defroster circuit can significantly impair camera performance and may require professional repair. Additionally, understanding how electrical interference affects vehicle systems can help in implementing effective mitigation strategies. Addressing issues like grounding problems and ensuring proper shielding can reduce the risk of interference and improve system reliability. Recognizing potential electromagnetic interference sources is crucial for maintaining optimal camera function and safety. Being aware of electrical noise sources can also aid in troubleshooting and preventing future issues.
The Relationship Between Tint Films and Defroster Line Visibility
Electrical interference from defroster lines can be amplified or obscured by the window tint applied over the rear window. Thin or improperly installed tint can cause reflections that make the lines more visible in your rear camera footage, affecting visibility and image clarity. Tinted films often create tenting over the lines, which can increase glare and reflections, making the lines more noticeable. If the tint is scratched or damaged during installation, it can further reveal the lines or cause resistance buildup, leading to hotspots and potential overheating. Additionally, reflective or darker tint films can intensify the visibility of defroster lines and antennas, especially when viewed through cameras. Choosing the right window tint film and ensuring proper installation can help mitigate these issues. To minimize these issues, choose high-quality, properly applied tint that matches the vehicle’s specifications. Proper installation and choosing the right tint film can significantly reduce electrical interference and improve camera clarity.
Preventing Camera Disruptions by Maintaining Your Rear Window Defroster
Maintaining your rear window defroster is essential for preventing camera disruptions caused by electrical interference. Regularly inspect the grid lines for cracks, corrosion, or loose connections, repairing damaged sections with conductive paint or professional re-silvering. Ensure all ground connections—at the battery, body, defroster, antenna, and radio—are clean and tight to reduce resistance and prevent noise coupling. Replace faulty relays, timers, or switching components that may generate voltage spikes. Keep antenna amplifiers properly grounded and isolated from high-current defroster wiring to minimize interference. Re-route or shield wiring using grounded foil or braided shields to block electromagnetic noise. Proper grounding of antenna modules and wiring helps maintain a stable signal, preventing static, loss of signal, or camera disruptions caused by electrical interference from the defroster system. Additionally, following electromagnetic interference mitigation techniques like proper shielding can help prevent electromagnetic interference in sensitive electronic setups.
Frequently Asked Questions
Can Defroster Line Damage Cause Permanent Damage to My Dashcam?
Yes, defroster line damage can cause permanent damage to your dashcam. If the lines overheat or short circuit, they can melt or warp nearby components, including your camera’s housing or adhesive mounts. Repeated exposure to hotspots can crack glass or deform parts, making repairs difficult or impossible. To prevent this, avoid mounting your dashcam over damaged lines and address any defroster issues promptly to protect your device from irreversible harm.
Do All Rear Window Defroster Lines Interfere With Camera Autofocus?
Not all rear window defroster lines interfere with your camera autofocus, but many can cause issues. The thin conductive strips may disrupt the camera’s focusing mechanism, especially if mounted directly behind or near the lines. You might notice focusing difficulties or blurry footage. To minimize this, position your dashcam away from the lines or adjust its angle. Testing different placements helps identify the best spot with minimal autofocus interference.
How Can I Tell if Defroster Lines Are Affecting My Camera’s Video Quality?
You can tell if defroster lines are affecting your camera’s video quality by checking for visible horizontal lines in your footage, especially when the rear window is active. Look for areas where static stickers overlap with the lines or reflections from tint film. Also, notice if there’s increased focus difficulty or image blurring when the defroster is on. Testing with the defroster off helps confirm if these lines are the cause.
Are There Specific Dashcam Models Resistant to Defroster Line Interference?
You’ll want to look for dashcams designed for flush or adhesive mounting, like Thinkware rear modules, which sit close to the glass and cut down on lines in your footage. Models with small sensor-to-lens gaps and high dynamic range also do better, along with those featuring software correction tools. Choosing EMI-hardened units with ferrite-suppressed leads helps prevent electrical noise, making your recordings clearer and free from unwanted artifacts.
Does Rear Window Tinting Increase the Risk of Camera Disruption From Defroster Lines?
Yes, rear window tinting can increase the risk of camera disruption from defroster lines. When tint is improperly applied or damaged, it can cause reflections, glare, and visual distortions that make wires more prominent in your camera footage. Additionally, tinting might trap moisture or cause scratches, worsening electrical interference. To minimize issues, choose high-quality tint, ensure proper installation, and regularly inspect for damage that could affect your camera’s visibility.
Conclusion
While defroster lines might seem like minor nuisances, they can considerably mess with your camera’s clarity and performance. Don’t worry—by taking simple steps like proper mounting and maintenance, you can keep your dashcam footage clear and undistorted. Even if your rear window has tint or damaged lines, these tips help you avoid interference. So, investing a little effort now ensures your camera captures sharp, reliable footage when you need it most.