
Your footage looks useless mainly because of poor rear camera placement. If the angle, height, or position isn’t right, it can cause blind spots, distort views, or block essential details. Vibrations, road bumps, and improper mounting materials only make things worse, leading to shaky or blurry videos. Fixing these issues by optimizing your camera’s placement, angle, and stability can considerably improve clarity. Keep going, and you’ll discover how proper setup can make a real difference.
Key Takeaways
- Improper mounting angles can distort footage and create blind spots, reducing rear visibility.
- Mounting too high or low affects the field of view and causes distance perception issues.
- Vibrations and road conditions can cause instability, blurring or shaking footage despite stabilization tech.
- Incorrect placement near bumpers or obstructions blocks the camera’s line of sight, impairing image clarity.
- Using unsuitable mounting materials or surfaces leads to instability, misalignment, and degraded video quality.
The Impact of Mounting Angles on Video Clarity
The angle at which you mount your rear camera directly affects the clarity of the footage it captures. Proper mounting angles ensure that the camera is aligned to record the desired area without distortion or blind spots. If your camera is tilted too high or low, it can obscure important details or create a skewed perspective. Adjusting the camera height also plays a crucial role; mounting it too high might cut off vital parts of your view, while too low could limit visibility. You want a mounting angle that offers a clear, level view of the road behind you. Experiment with small adjustments to find the optimal position; this helps prevent blurry or unclear footage, giving you reliable evidence when you need it most. Additionally, understanding the navigation and mapping principles can help you choose the best placement to avoid obstructions and ensure consistent footage quality. Paying attention to camera calibration can further enhance image sharpness and color accuracy, making your footage more reliable. Regularly checking and adjusting your camera’s orientation and positioning can also help maintain optimal footage quality over time.
How Vibration and Shaking Affect Footage Quality
Vibration and shaking can considerably reduce your footage quality, especially if your sensor is highly sensitive to movement. Rough road conditions and uneven surfaces often cause more shake, making images blurry or unstable. While stabilization technology helps, it has its limits and can’t eliminate all vibrations, so your camera placement matters. Incorporating nanotechnology in camera design can enhance vibration damping and improve stability in challenging conditions. Additionally, understanding cryptid mysteries and their elusive nature can inspire innovative ways to develop more resilient stabilization techniques that mimic the mysterious adaptability of these creatures. Exploring the principles behind advanced materials can further lead to breakthroughs in vibration control for camera systems. Recognizing how material science influences vibration absorption can drive the development of new, more effective stabilization solutions. Moreover, ongoing research into vibration absorption materials provides promising avenues for future stabilization innovations.
Sensor Sensitivity to Shake
Vibrations and shaking can considerably impact the quality of footage captured by a rear camera, causing blurriness and instability that diminish overall clarity. Your sensor’s sensitivity to shake depends heavily on proper sensor calibration; if it’s off, even minor vibrations can degrade image quality. Additionally, higher camera resolution makes your footage more prone to showing shake artifacts. To reduce these issues, consider these factors:
- Sensor calibration ensures the camera accurately interprets movement, minimizing shakiness effects.
- Opt for stabilized sensors designed to compensate for vibrations, maintaining sharper images.
- Check your camera’s resolution; higher resolutions demand more stable mounts to prevent shake from becoming noticeable.
- Proper mounting and ventilation considerations can also help reduce vibrations transmitted to the camera, improving footage stability.
Proper calibration and stabilization are essential to keep footage clear, regardless of road conditions.
Impact of Road Conditions
Road conditions directly influence the stability of your footage, with rough or uneven surfaces causing increased shaking and vibrations. A bumpy road surface jostles your vehicle and camera, making your footage appear shaky and unclear. Weather conditions also play a role; rain, snow, or ice can reduce traction, leading to more movement and vibrations while driving. Potholes, gravel, and uneven pavement amplify the instability, especially at higher speeds. These factors cause your rear camera to capture jittery footage, making it difficult to analyze or share. Understanding how road surface and weather conditions impact stability helps you anticipate issues and take steps to minimize shake. Proper placement, combined with awareness of road conditions, can drastically improve your footage quality. Additionally, using appropriate mounting equipment can help absorb some vibrations and enhance footage clarity despite challenging conditions.
Stabilization Technology Limits
Stabilization technology plays a crucial role in enhancing footage quality, but it has its limits when it comes to handling intense vibrations and shaking. When vibrations are severe, even advanced image stabilization can’t fully compensate, resulting in blurry or jittery footage. Proper sensor calibration is essential for ideal stabilization, but it can’t fix extreme movements. Here are key limitations:
- Excessive vibrations can overwhelm stabilization algorithms, causing residual shake.
- Rapid or unpredictable movements reduce the effectiveness of sensor calibration and image stabilization.
- Mechanical limits in stabilization hardware prevent complete compensation, especially during rough conditions.
- Understanding the plant properties of stabilization components helps in recognizing how they perform under stress.
- Recognizing these stabilization limits allows users to better anticipate footage quality in challenging environments.
- The design of stabilization systems influences their ability to adapt to various vibration intensities and types.
- Knowing the material properties of stabilization hardware can aid in selecting the best equipment for demanding conditions.
- Proper maintenance and calibration of stabilization components can help optimize their performance within these technical constraints.
Ultimately, while stabilization technology improves footage, it can’t eliminate all shake. Recognizing these limits helps you understand why certain footage still looks shaky despite advanced features.
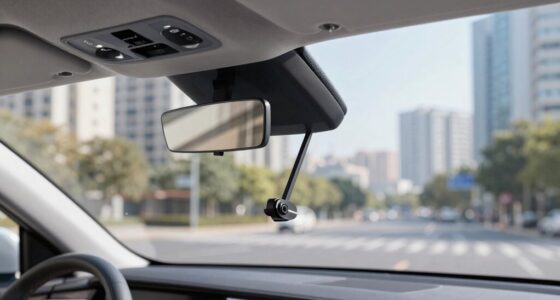
The Significance of Camera Height and Positioning

The height and position of your rear camera play a crucial role in capturing clear, accurate images. Your chosen camera height influences the field of view and how well you can see obstacles or hazards behind your vehicle. Mounting position determines the angle and coverage area, affecting image clarity and usefulness. If the camera is too low, it may miss critical objects or distort distances. Too high, and you might lose detail or get a skewed perspective. Properly selecting the right camera height and placement ensures you get an extensive view without blind spots. Adjusting the mounting position to optimize coverage helps prevent footage from looking useless and enhances overall safety. Remember, small changes in height and position make a significant difference in footage quality. Additionally, understanding camera specifications can help you choose the best setup for your needs. Being aware of cloud service vulnerabilities underscores the importance of reliable camera hardware and backup systems to prevent data loss. Ensuring your camera is set up with proper calibration can further improve image accuracy and reliability in various conditions.
Common Mistakes in Rear Camera Placement

Poor height alignment can make your camera less effective, while obstructed view angles limit visibility and safety. Incorrect mounting techniques can also cause instability or damage over time. To avoid these mistakes, pay close attention to proper placement and secure installation. Additionally, understanding the importance of proper positioning can significantly enhance footage quality and safety. Ensuring correct camera alignment is vital for optimal performance and durability over time.
Poor Height Alignment
When installing a rear camera, placing it at the wrong height can substantially impair your ability to see clearly behind your vehicle. If the camera is too high or too low, it distorts your view and makes judging distances difficult. To avoid this, focus on proper camera height for ideal visibility. Here are common issues to watch for:
- Mounting the camera too high can obscure lower obstacles, reducing situational awareness.
- Mounting it too low might limit the field of view, missing important objects behind you.
- Poor mounting stability causes vibrations, making footage blurry and hard to interpret.
- Considering the camera placement, utilizing adjustable mounts can help achieve optimal positioning for better visibility and stability.
Ensuring the correct camera height and secure mounting stability will give you a clear, steady view, dramatically improving your safety and confidence when reversing.
Obstructed View Angles
Obstructed view angles often occur when you place the camera where objects or structures block its line of sight, reducing overall visibility behind your vehicle. The wrong camera angle can increase obstruction risks, making it hard to see pedestrians, other vehicles, or obstacles. Positioning the camera too close to bumpers, license plates, or mounted accessories often creates blind spots. These obstructions compromise your safety and make parking or reversing more difficult. To avoid this, choose a mounting spot that provides a clear, unobstructed view directly behind your vehicle. Ensure the camera angle captures enough of the rear surroundings without interference from nearby objects. Proper placement minimizes obstruction risks and guarantees a more accurate, reliable view, giving you the confidence to reverse safely.
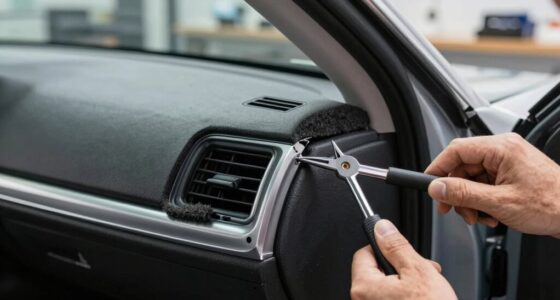
Incorrect Mounting Techniques
One common mistake in rear camera placement is mounting the camera at an improper height, which can lead to distorted or limited views. Using the wrong mounting accessories often results in unstable or poorly aligned cameras. To avoid this, consider these tips:
- Ensure your camera orientation is correct, pointing directly backward for a clear, level view.
- Use appropriate mounting accessories that securely hold the camera in place and allow easy adjustments.
- Avoid mounting the camera too high or too low, as this can distort depth perception and hinder your ability to see obstacles clearly.
- Proper mounting techniques help you maintain an ideal camera angle and ensure clearer footage and safer driving or parking. Always double-check your camera’s position and stability before finalizing the setup.
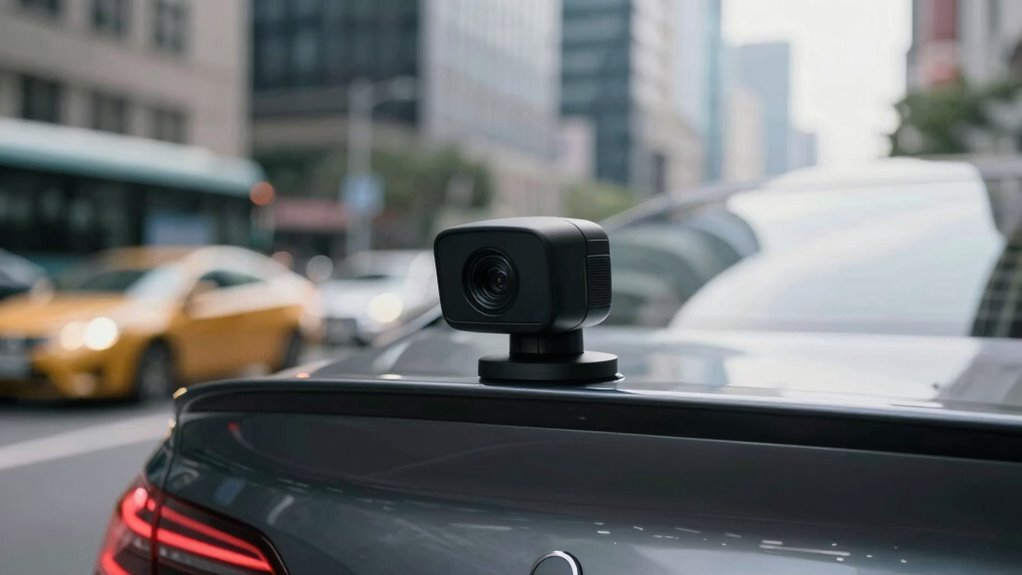
Choosing the Right Mounting Surface and Location
Selecting the appropriate mounting surface and position is crucial to guarantee your rear camera delivers a clear, stable view. The mounting surface should be sturdy and free of vibrations that could blur footage. The stability of the surface is essential; avoid surfaces prone to movement or excessive vibration, like loose panels or flexible materials. The placement height matters too; mount the camera too high, and it’ll miss important details; too low, and it might capture unwanted objects or debris. Aim for a height that offers a thorough view of the area behind your vehicle or setup, typically around eye level or slightly above. Ensure the surface is clean and flat to secure the camera firmly. Proper mounting techniques and using vibration dampening mounts can further enhance stability and image quality over time. Additionally, choosing a surface free of vibrations from nearby machinery or traffic will help maintain steady footage.
The Role of Lighting and Obstructions in Footage Quality
Proper camera placement guarantees you get a clear view, but lighting conditions and obstructions can still impact footage quality. Poor lighting often results in grainy or dark footage, making details hard to see. Obstructions impact visibility by blocking the camera’s line of sight, causing blind spots or blurry images. To improve footage quality, consider these factors:
- Ensure the area is well-lit, preferably with natural light or bright, even artificial lighting.
- Clear the camera’s view of any obstructions that could block important details or create shadows.
- Regularly check for new obstructions, like dirt, debris, or moving objects, that might affect the footage.
- Use smart gear and technology to monitor and adjust camera placement dynamically, ensuring optimal visibility in changing conditions.
Tips for Securing Your Rear Camera for Stable Shots
To achieve stable footage from your rear camera, securing it firmly in place is essential. A loose camera lens causes shaky footage, making editing more difficult and reducing overall quality. Use mounts or brackets designed for your vehicle or device, ensuring they hold the camera tightly without vibrations. Double-check the mounting points regularly, especially after rough drives. If your camera has adjustable settings, tighten any screws or locking mechanisms to prevent movement. Stable placement minimizes the need for extensive footage editing, saving you time. Keep in mind that a secure camera not only improves footage quality but also prolongs the device’s lifespan. Properly secured cameras produce clearer, more professional-looking results, making your footage more useful and easier to review or share.
Adjusting Placement for Optimal Field of View
Adjusting the placement of your rear camera is crucial for capturing the best possible view. Proper positioning ensures minimal lens distortion and improves color accuracy, making footage clearer and more realistic. To optimize your field of view, consider these steps:
Proper camera placement enhances clarity, color accuracy, and minimizes distortion for the best viewing experience.
- Elevate the Camera: Position it higher to reduce distortion and avoid obstructions.
- Align Horizontally: Ensure the lens is level for accurate framing and consistent color reproduction.
- Test and Adjust: Record test footage from different angles, checking for lens distortion and color accuracy, then refine placement accordingly.
Frequently Asked Questions
How Does Camera Lens Quality Influence Footage Clarity?
Your footage clarity heavily depends on camera lens quality, especially factors like lens coating and sensor resolution. A high-quality lens coating reduces glare and reflections, ensuring sharper images, while a higher sensor resolution captures more detail. When you choose a lens with superior coating and pair it with a high-resolution sensor, your footage becomes clearer and more vibrant, making your videos look professional and crisp.
What Are the Best Practices for Concealing Rear Cameras?
Your footage can look as useless as a broken compass if you don’t master concealment techniques. To hide rear cameras effectively, choose discreet camera placement that blends with your surroundings. Use natural covers like foliage or architectural features, and consider camouflaged housings. Proper camera placement ensures you’re not obvious, while concealment techniques keep your equipment hidden, maintaining a clean look and reducing the risk of tampering or theft.
Can Weather Conditions Degrade Rear Camera Footage Over Time?
Weather effects like rain, snow, and fog can definitely degrade your rear camera footage over time. These conditions cause lens degradation, leading to blurry or obscured images. If you don’t regularly clean and protect your camera, dirt and moisture build-up worsen the quality. Investing in weatherproof housings and using lens covers helps shield your camera from harsh weather effects, ensuring clearer footage and longer-lasting performance.
How Often Should Rear Camera Mounts Be Inspected for Stability?
You should inspect your rear camera mounts at least every three to six months. Studies show that over 40% of footage issues stem from unstable mounts. Regular mount inspection guarantees mount stability, preventing vibrations or falls that can ruin footage quality. By checking the mounts frequently, you catch potential problems early, maintaining clear, useful footage and avoiding costly repairs or replacements down the line.
What Are Innovative Mounting Solutions for Unconventional Vehicle Designs?
For unconventional vehicle designs, you can explore innovative mounting solutions like using adjustable camera angle mounts that accommodate unique shapes. Apply vehicle wrapping techniques to create sleek, custom housings that blend seamlessly with the vehicle’s aesthetics. These wraps also help protect mounts from environmental elements. Regularly adjust the camera angles to optimize footage, ensuring your setup offers the best perspective, even on complex or unconventional vehicle structures.
Conclusion
Just like a master painter carefully chooses their canvas, your rear camera’s placement determines your footage’s clarity. If you ignore angles, vibrations, or obstructions, your footage may resemble a blurry masterpiece—more chaos than clarity. Remember, the right positioning transforms your camera into a silent guardian, capturing every detail with precision. So, take control, adjust your setup, and turn your rear camera into the sharp-eyed sentinel it was meant to be—because clear footage is just a tweak away.