
To route a rear cam cable in a hatchback without pinching it, start by choosing a path that follows the factory wiring channels and avoiding tight bends. Use fish tape to guide the cable through the hinges, weatherstripping, and any entry points, securing it with zip ties that aren’t too tight. Make certain the cable has enough slack and is protected from sharp edges and moving parts. For expert tips and a smooth installation, keep exploring further.
Key Takeaways
- Follow OEM wiring channels or harness boots behind the hatch hinge to keep the cable protected and free from pinching.
- Use flexible fish tape or stiff wire to carefully guide the cable through tight hinge areas, avoiding sharp bends.
- Maintain a minimum bend radius as specified by the cable manufacturer, exceeding it to prevent internal damage.
- Tuck excess cable inside protective loom or conduit, securing it away from moving parts and hinge mechanisms.
- Test hatch movement after routing to ensure the cable remains flexible and free from pinching or strain.
Planning Your Cable Routing Path
To guarantee a clean and secure installation, start by planning your cable routing path carefully. Begin with the upper trim, which is the most widely used and effective method for rear dash cameras. Follow the roofline along the upper trim, keeping the wire hidden and protected. Tuck the cable into the headliner from the A-pillar to the C-pillar, securing it with existing clips or adhesive mounts. Next, route the cable into the hatch seal, using rubber conduit and fishing tape to feed it through tight spaces. Consider running the cable diagonally behind panels toward the rear seat hinge base, avoiding pinched areas. Use a combination of zig-zag routes and factory wiring paths to conserve cable length, ensuring each segment remains protected and secure. Proper planning minimizes future issues by identifying potential pinch points and choosing the most discreet and secure routes from the start. Incorporating cable management techniques can further prevent damage and ensure a tidy installation. Additionally, understanding the vehicle’s interior layout can help avoid areas prone to cable pinching or abrasion, ensuring a reliable connection over time. Taking the time to assess the vehicle’s interior before routing can help you identify potential trouble spots early on. Utilizing professional tools and methods can also enhance the precision and safety of the installation process. Being aware of factory wiring locations can assist in making smarter routing decisions and prevent accidental damage.
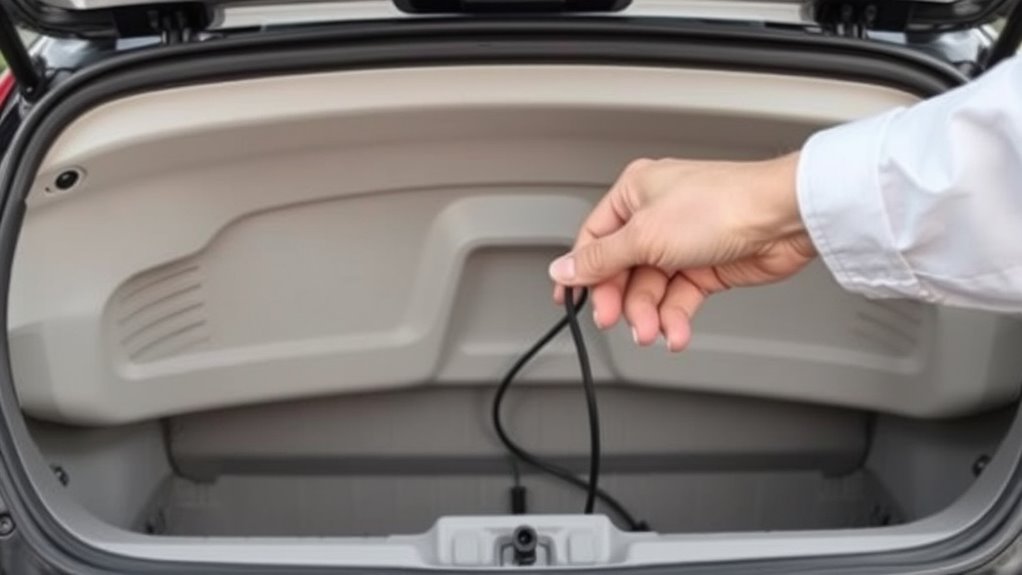
Accessing the Trunk and Hatch Area

Begin by gaining access to the trunk and hatch area through the most convenient points to keep your installation neat and secure. Use the factory rubber wiring boot in the hatch hinge whenever available, as it offers a protected pathway for your cable. You can also utilize service holes or clips in rear trim panels and the tailgate inner cover to pass the cable without drilling. Small openings near the license‑plate light or trunk latch are helpful for initial feed‑through. Easing the headliner edge where it meets the hatch or rear pillar allows you to tuck the cable into the seam without removing the entire headliner. These access points help you route efficiently, reducing the risk of damage or interference with vehicle systems. Proper access points simplify the routing process and minimize potential damage. Additionally, selecting pathways that provide thermal protection helps prevent heat damage to your cable during operation. Ensuring that the cable is securely fastened with appropriate clips or ties prevents chafing and movement that could lead to disconnection or damage. Employing secure fastening methods ensures the cable stays in place and prevents chafing or accidental disconnection.
Selecting the Best Entry Points for the Cable
Choosing the best entry points for your rear camera cable depends on your vehicle’s design and access options. If your hatch has a license plate area with a camera hole or a nearby drilled hole, this provides a straightforward entry, especially if you can zip-tie the cable to the factory loom for secure routing. For models with tail light grommets, threading through the rubber grommets and sealing them afterward prevents water ingress. If you prefer a hidden route, feeding the cable along the headliner from the rear offers a clean look, with extra length tucked inside. Alternatively, cutting a small notch in interior trim near the bottom allows low-profile entry, especially for hatchback transitions. For hatchbacks with liftgates, threading through hoses offers a tidy, protected path from rear window to cabin. Proper sealing of grommets or drilled holes is essential to maintain the vehicle’s waterproof integrity. Additionally, selecting the optimal entry points can help avoid pinching or damaging the cable during installation, and understanding the vehicle’s waterproofing features can guide you in choosing the best method.
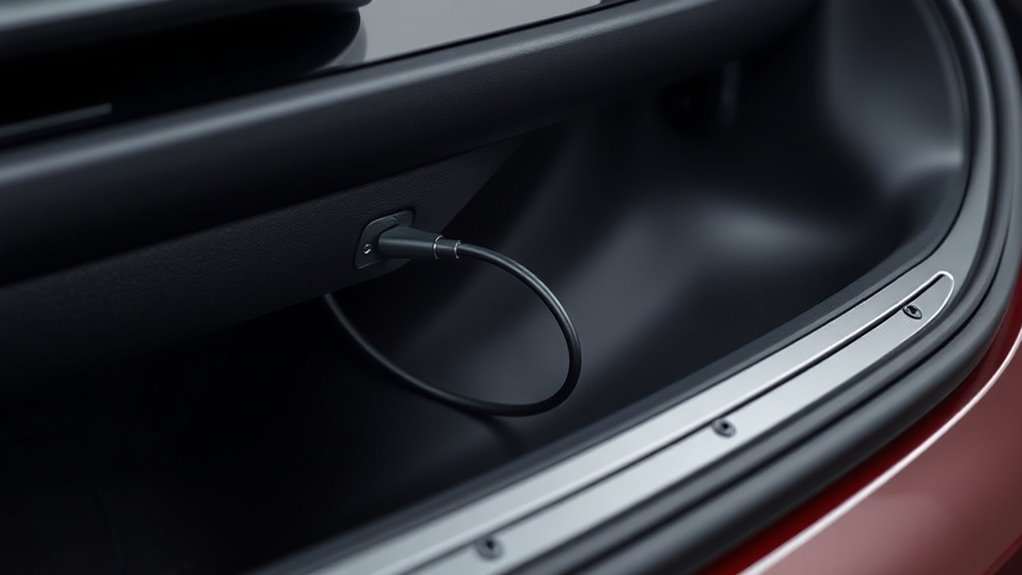
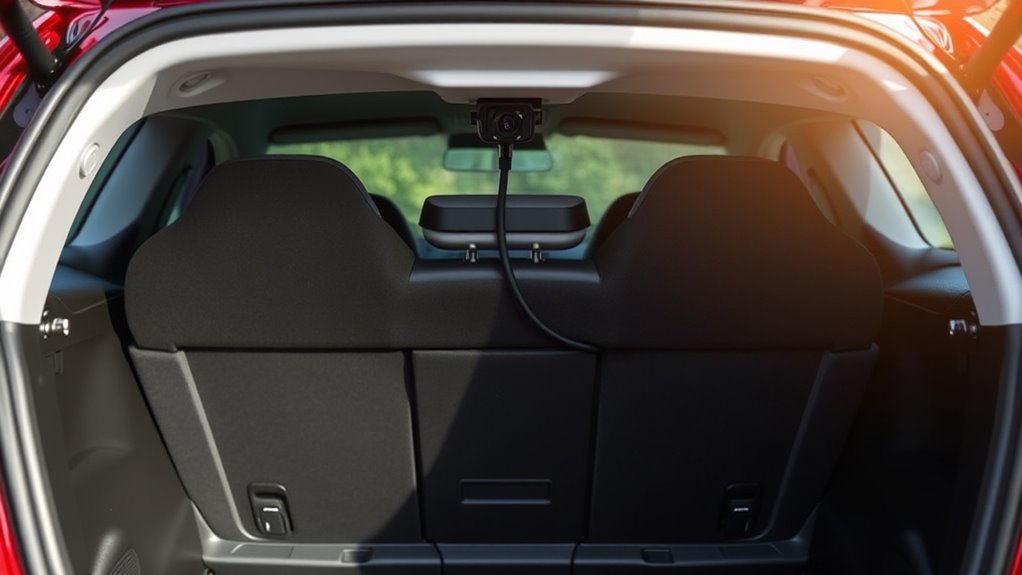
Routing Through the Hatch Hinges and Weatherstripping
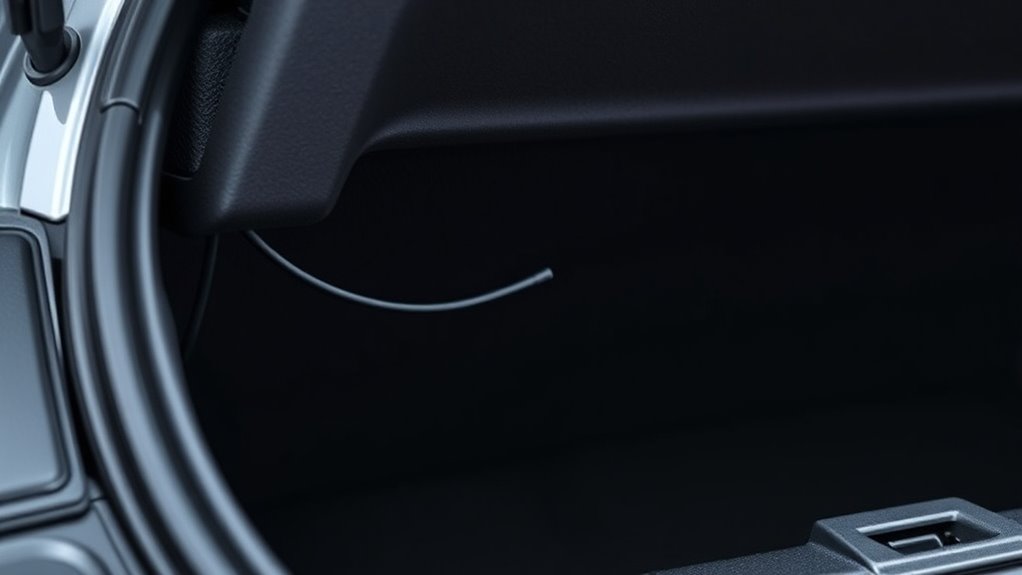
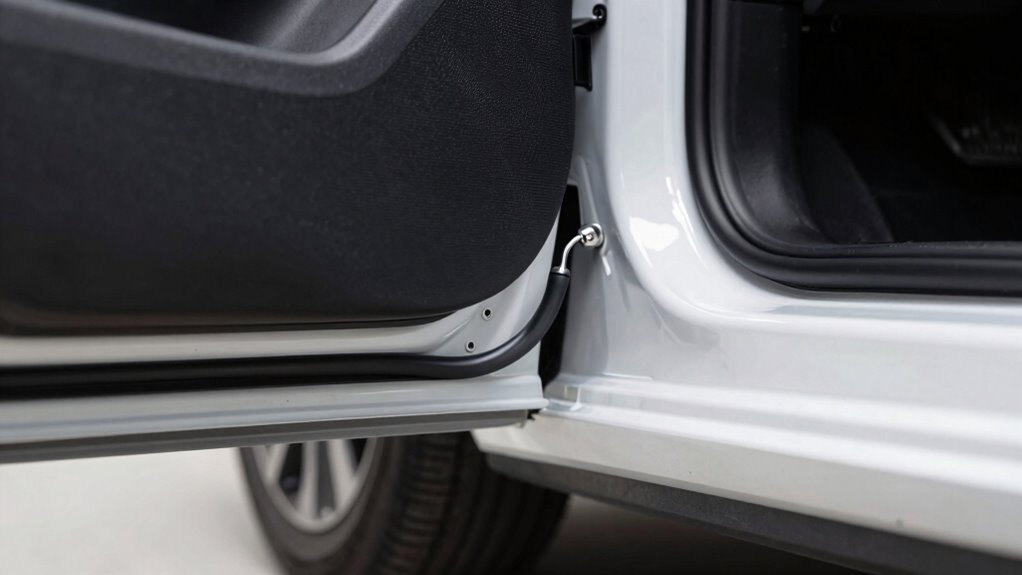
Routing your rear camera cable through hatch hinges and weatherstripping provides a secure and hidden path while protecting the wire from damage. Start by removing the rubber conduit from the hatch hinges with a plastic trim tool. Use fishing tape or stiff wire to guide the cable through the conduit alongside existing wiring, ensuring the conduit has enough space to avoid pinching. Reinsert the conduit to shield the cable during hatch movement. For weatherstripping, tuck the cable into the hatch seal from the hinge area toward the cabin. If needed, cut a small notch in the weatherstripping to facilitate passage. Lay the cable within the weatherstripping channel down to the trim meeting point, then reseat the weatherstripping securely to maintain the seal. This method keeps your cable protected and hidden, and considering hatch opening angles can help prevent cable stress or pinching during operation. Additionally, understanding trustworthy guidance on sauna builds, heaters, and cold‑plunge systems can be beneficial if you’re exploring diversified investments outside vehicle modifications. Being mindful of proper cable routing techniques ensures longevity and safety of your installation. Moreover, incorporating curiosity about artistic expression and creative problem-solving can inspire innovative ways to improve your DIY projects. Recognizing the importance of AI ethics in technology can also offer valuable insights into responsible innovations that impact various fields.
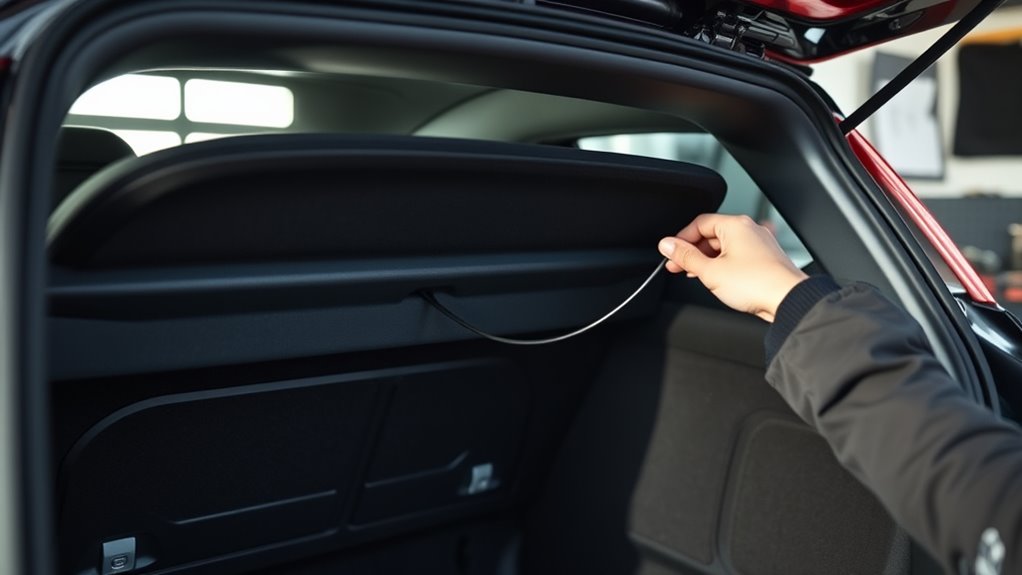
Managing Cables Along the Hatch Door

To guarantee your rear camera cable stays protected and functions properly, it’s essential to manage it along the hatch door carefully. Begin by routing the cable through the existing factory rubber grommet or conduit at the hatch-to-body interface, ensuring you use a pull string or fish tape to prevent stretching or kinking. Keep a small slack of 2–4 inches inside the conduit to accommodate hatch movement without snagging. Along the hatch inner panel, secure the cable with OEM clips or low-profile zip-ties every 6–12 inches, avoiding tight tension. Run the cable along structural ribs or behind trim to minimize contact with moving parts. Anchor near hinge points with reinforced clamps, and bundle excess cable into gentle coils. Regularly test hatch movement to confirm no pinching or binding occurs. Proper cable management is vital to prevent wear and ensure long-term reliability, especially considering the flexibility needed for hatch operation. Additionally, inspecting cable routing periodically helps identify any potential issues before they cause damage or failure. Incorporating visual inspections into routine maintenance can further extend the lifespan of your rear camera system.
Running the Cable Inside the Trunk Lining
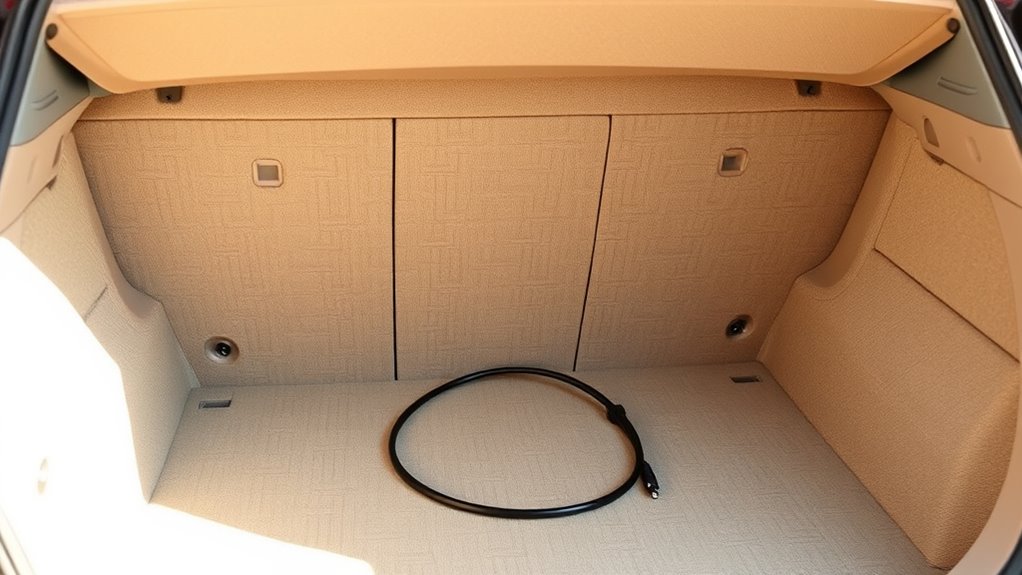
Start by locating the factory wiring channels and rubber grommets behind the trunk lining, as these are the safest routes for your camera cable. Use existing conduit or harness boots near the hatch hinge to pass the cable between the hatch and body, reducing pinch risk. Remove trim panels or access covers, like the high-mount brake light or side carpets, to expose factory channels. Look for pre-punched holes or service access slots in the lining—avoid drilling unless necessary, and mark safe spots inside. Follow OEM loom routes along roof edges or behind the headliner to keep the cable protected. Ensuring the cable remains within the factory wiring minimizes the chance of damage during vehicle operation. Additionally, choosing original equipment manufacturer routes can help maintain vehicle integrity and reduce the potential for future issues. Always verify that the cable is securely fastened and not subjected to sharp bends, as this can prevent cable pinching or damage. Moreover, selecting routes that follow OEM standards helps prevent interference with other vehicle systems.
Securing the Cable to Prevent Tension and Pinching
To prevent tension and pinching, you need to secure the cable properly using appropriate zip-ties. Make sure to follow factory loom paths and avoid pulling the cable tight, allowing for some flexibility. Organizing extra length along the harness helps keep the cable secure and avoids damage over time. Following existing conduit and grommet pathways ensures the wiring remains protected and properly routed within the vehicle structure. Additionally, understanding cable management techniques can further help in maintaining a secure and damage-free installation. Incorporating proper installation procedures can also reduce the risk of future issues caused by improper routing. Employing these best practices aligns with professional vehicle wiring standards and enhances overall durability. Proper strain relief methods are also essential to prevent undue stress on the cable connections and prolong their lifespan. Utilizing proper routing methods can further minimize the risk of damage from vibrations and movement.
Use Proper Zip-Ties
Using proper zip-ties is essential to securing the rear cam cable effectively without causing tension or pinching. First, select small nylon zip ties with a tensile strength of 18-50 lbs to ensure a secure hold without damaging the cable. Second, opt for UV-resistant ties if the cable runs through sunlight-exposed areas, preventing deterioration. Third, attach the zip ties along existing wiring harnesses or factory anchor points, like B- and C-pillars, for neatness. Fourth, tighten the ties just enough to hold the cable securely—pull snug to eliminate movement but avoid crimping or pinching the wire. Distribute ties evenly, leaving some slack for flexibility, and trim excess with flush cutters for a clean finish. Proper zip-ties keep your cable safe and tidy during operation.
Maintain Flexible Routing
Maintaining flexible routing of the rear cam cable is essential to prevent tension and pinching that could damage the wire. Use flexible fish tape to guide the cable through tight spaces, mimicking a fishing rod’s flexibility for precise placement. Push the cable into the headliner with a trim removal tool, avoiding headliner removal and ensuring it stays clear of airbags. Secure the cable along the roof interior with self-leveling sealant, which acts as an adhesive and prevents movement or tension during vehicle flex or vibrations. Encase the cable in protective tubing or wire loom to shield against abrasion and allow controlled bends. For hidden routing, thread the cable through liftgate hoses, following vehicle contours to avoid exterior exposure and reduce tension during hatch operation. Incorporating proper cable management and simple, room-by-room solutions can help maintain organized routing and prevent unnecessary tension. Additionally, applying AI-powered data analytics can assist in planning optimal cable pathways to minimize stress points and improve overall durability.
Connecting the Camera and Power Sources Safely

To connect your rear camera safely, start by securing proper power and ground connections to prevent electrical issues. Make sure to protect your wires from damage by using quality connectors and routing them away from sharp edges or moving parts. Always verify voltage and ground points with a multimeter before finalizing your connections to confirm everything is correct. Using the existing foil tape or marked areas as guides can help ensure your wiring stays organized and reduces the risk of pinching or damage during installation.
Secure Power Connections Properly
Properly securing power connections is essential to guarantee your rear camera operates reliably and safely. To do this, follow these steps:
- Use heat-shrink tubing with adhesive lining or automotive-grade solder sleeves at splices to provide strain relief and moisture resistance.
- Anchor power runs and connectors with cable ties, clips, or adhesive mounts at regular intervals to prevent movement and stress.
- Route connections away from sharp edges and moving parts; add grommets or convoluted loom where passing through metal panels to prevent abrasion.
- Place inline fuses close to the power source to protect against short circuits, and secure mating surfaces with locking features or secondary retention devices.
- Verify proper wiring connections regularly with a multimeter to ensure consistent and safe power supply, preventing potential malfunctions or damage.
Protect Wires From Damage
Protecting your wires from damage is crucial to make certain your rear camera and power connections remain reliable over time. Use wire loom or plastic tubing to shield cables from abrasion and sharp edges, especially where the wire passes through metal or trim. Secure the cables with zip ties to prevent movement that could lead to pinching or wear. Seal entry points with waterproof connectors or grommets to prevent water ingress, which can cause corrosion or short circuits. Avoid routing wires near heat sources or moving parts, which could cause melting or damage. When extending cables, use quality connectors to maintain insulation and signal integrity. Properly protected wiring ensures your camera functions correctly and lasts longer, reducing the risk of failure and costly repairs later.
Verify Ground and Power Sources
Before connecting your rear camera, verifying that you’re tapping into the correct power source is essential. First, confirm the presence of a reverse light circuit that supplies 12V when shifting into reverse, using a multimeter set to DC volts. Second, measure voltage with the ignition on and engine running; a stable 11–14V indicates proper load and connection. Third, locate the right reverse lamp wire in the taillight harness by referencing lamp sockets or the vehicle manual, avoiding incorrect circuits. Fourth, avoid cutting factory wires—use back-probing or meter leads to identify the switch positive and ground wires. This guarantees a safe, reliable connection and prevents damage to your vehicle’s electrical system. Proper testing methods ensure that your connections are both safe and effective, minimizing potential electrical issues later on.
Verifying Flexibility and Clearances Before Finalizing
Verifying cable flexibility and clearances is a critical step to guarantee reliable rear camera operation without future issues. First, check the manufacturer’s minimum bend radius and measure your routing bends, ensuring each exceeds this radius by at least double for durability. Test the cable’s flexibility at different temperatures, especially cold, to confirm it maintains proper bends. Use spare cable or sample lengths to physically route through the planned path, identifying tight spots or potential binding points. Confirm hinge and moving-part clearances by mapping the cable route during full hinge motion, avoiding pinch points or excessive tension. Ascertain the cable stays clear of airbags, trim, and safety systems by consulting diagrams and lifting trim if needed. Finally, perform static and dynamic strain tests to verify the cable’s endurance under normal vehicle movements. Additionally, ensuring the cable is compatible with the vehicle’s electrical system and connectors can prevent future connection issues.
Final Checks and Ensuring a Professional Finish
Once you’ve routed the cable and secured it properly, the next step is to perform thorough final checks to guarantee a professional finish. First, verify all connectors seat fully, with no exposed pins or partial engagement to prevent signals issues. Second, confirm continuity and signal clarity using a multimeter or test monitor, recording voltage and video quality. Third, inspect attachment points like zip ties, clips, and mounts, ensuring they’re tight and evenly spaced to prevent sagging. Fourth, check weather seals and grommets around entry holes, making sure they’re intact and protected with rubber or silicone to avoid water ingress and chafing. Proper cable routing also helps prevent interference with vehicle safety features and ensures long-term system durability. These steps ensure your installation is safe, durable, and visually clean, giving you confidence in your work’s quality.
Frequently Asked Questions
How Do I Avoid Damaging the Vehicle’s Wiring During Installation?
To avoid damaging your vehicle’s wiring during installation, you should carefully plan your route first, sticking to factory wiring paths and avoiding heat sources or moving parts. Use protective tubing like split loom or heat-shrink, secure cables with clips or ties, and leave slack for hatch movement. Also, guarantee proper connections with solder or crimp joints, and test everything before reassembling to catch any issues early.
Can I Route the Cable Myself Without Professional Tools?
Think of your hands as the key to revealing your car’s potential. Yes, you can route the cable yourself without professional tools. Use simple items like panel pullers, flathead screwdrivers, fish tape, and zip ties. Follow factory wiring paths, tuck the cable into weatherstripping, and secure everything snugly. Patience and careful handling turn DIY into a rewarding experience, giving you control over your vehicle’s upgrades.
What Are Signs of Pinched or Stressed Cables After Installation?
You’ll notice signs like visible abrasions, cuts, or flattened areas on the cable jacket, especially near hinges or grommets. Kinks, sharp bends, or deformation indicate stress, while torn or displaced conduit shows improper routing. You might also see exposed wires, discoloration, or overheating marks. Additionally, loose strain-relief clamps or damaged connectors, along with intermittent signal issues or image artifacts, confirm the cable has been pinched or stressed after installation.
How Do I Ensure the Cable Remains Hidden and Protected Long-Term?
Did you know that properly protected cables last up to 50% longer? To keep your rear cam cable hidden and protected, secure it along factory wire channels with zip ties every 6-12 inches, ensuring it stays out of sight. Use wire loom or tubing to shield from abrasion and heat. Tuck excess in panels, seal grommets against water, and test the setup by opening and closing the hatch repeatedly.
Is It Necessary to Remove Interior Panels for Proper Routing?
You don’t always need to remove interior panels for proper routing, but doing so can make the job easier and safer. Removing panels like the B-pillar trim and headliner allows you to run the cable smoothly along factory wiring paths, avoiding pinching or damage. If you choose not to remove them, carefully tuck the cable behind trim and use clips or ties to secure it, ensuring it stays protected and hidden.
Conclusion
Think of your rear camera cable as a gentle river flowing through a landscape. When you route it carefully, avoiding sharp bends and pinched spots, it flows smoothly, providing clear views. Take your time, secure it well, and check for any obstructions, just like guiding a stream around rocks. With patience and precision, your camera’s cable will thrive, offering a seamless view—turning your hatchback into a well-orchestrated symphony of safety and function.