
To tell if a 12V outlet is always on or switched, first set your multimeter to DC volts and test the outlet with the ignition off; if you see around 12V, it’s likely always on. Turn the ignition to the ON or ACC position and check again—if voltage appears or increases, it’s a switched outlet. For quick confirmation, follow these steps closely, and you’ll quickly understand the outlet’s power source—keep reading to learn more.
Key Takeaways
- Use a multimeter set to DC volts to check voltage at the outlet with ignition off; 12V+ indicates always-on, lower voltage suggests switched.
- Turn the ignition on and off to observe if the outlet voltage remains constant (always-on) or only appears when ignition is on (switched).
- Test the outlet at different ignition positions; consistent voltage indicates always-on, while voltage only when ignition is on points to a switched outlet.
- Verify wiring labels or markings; always-on outlets typically have constant power, while switched ones connect through ignition or accessory circuits.
- Confirm by toggling a nearby switch or turning ignition on/off; if power appears/disappears accordingly, it’s a switched outlet, otherwise always-on.
Understanding the Difference Between Always-On and Switched Outlets

Understanding the difference between always-on and switched 12V outlets is essential for proper vehicle accessory use. Always-on outlets get constant battery positive (12V B+), providing power even when the engine is off. Switched outlets, on the other hand, are connected through the ignition or accessory circuits, so they only supply power when the key is in ON or ACC positions. Manufacturers often designate some outlets as switched and others as constant for convenience, with wiring and fuse ratings varying by vehicle and location. You can identify the type by testing with a multimeter—always-on outlets show 12V regardless of ignition, while switched outlets only show voltage when the ignition is on. Proper understanding helps prevent battery drain and ensures safe accessory use. Additionally, modifying the wiring to make an outlet switched can help prevent unintended battery drain during vehicle inactivity. Knowing how electrical systems function in your vehicle can also aid in troubleshooting and customizing your setup effectively. Familiarity with circuit diagrams can further assist in correctly identifying and modifying outlet wiring to suit your needs. Being aware of power consumption and how it affects your vehicle’s battery life can also help in planning your accessory setup more efficiently.
Preparing Your Tools and Safety Measures
Before you start testing, it’s essential to gather the right tools and follow safety precautions. Make sure your equipment is rated for your system voltage and properly calibrated to guarantee accurate readings. Always prioritize safety by using appropriate PPE and verifying the circuit is de-energized before making contact. Compliance with electrical safety standards ensures that your testing process minimizes risk and adheres to regulatory requirements.
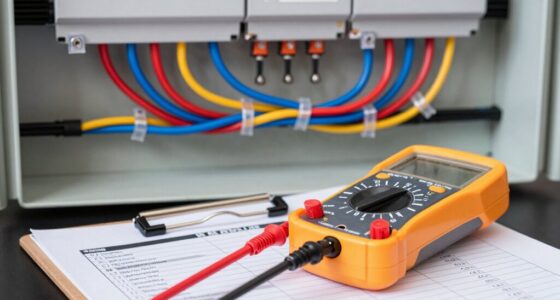
Essential Testing Equipment
To guarantee safe and accurate testing of your 12V outlets, you need to gather the right tools and follow essential safety measures. A digital multimeter is vital for measuring voltage, current, resistance, and continuity, with True RMS models ensuring precision on complex loads. For quick power checks, a test light or non-contact voltage detector provides safe, instant confirmation of live circuits. Fuse and relay testers, like Fuse Buddy or Loadpro, help verify fuses and relays without complicated calculations. Clamp meters and current probes allow you to measure current non-invasively, especially in high-current scenarios. Additionally, basic tools like wire strippers, jumper wires, a flashlight, and an inspection mirror support access and troubleshooting. Properly functioning testing equipment can prevent electrical damage and ensure accurate diagnostics, which is essential for safe and effective vehicle repairs. Using the proper equipment ensures your testing is both safe and efficient, avoiding damage and misdiagnosis. Moreover, understanding the differences between always-on and switched outlets can help you troubleshoot more effectively and prevent potential electrical issues. Being aware of electrical system configurations can further enhance your diagnostic process and safety practices.
Safety Precautions to Follow
Ensuring your safety during 12V outlet testing starts with properly preparing your tools and following essential safety measures. First, switch off the circuit breaker controlling the outlet, then verify power is gone with a non-contact voltage tester. Never reset the breaker until testing is complete, and label it to prevent accidental reactivation. Wear insulated gloves rated for household voltage and safety goggles to protect your eyes. Stand on a dry, non-conductive surface, and consider rubber gloves if unsure. Use insulated probes or clips, avoiding metal tools that could cause shorts. Always inspect tools for damage and confirm multimeter settings before use. Remember, if you notice flickering or burning smells, stop immediately and call a professional. Being familiar with electric safety practices helps prevent accidents during testing.
Identifying the Outlet Type in Your Vehicle

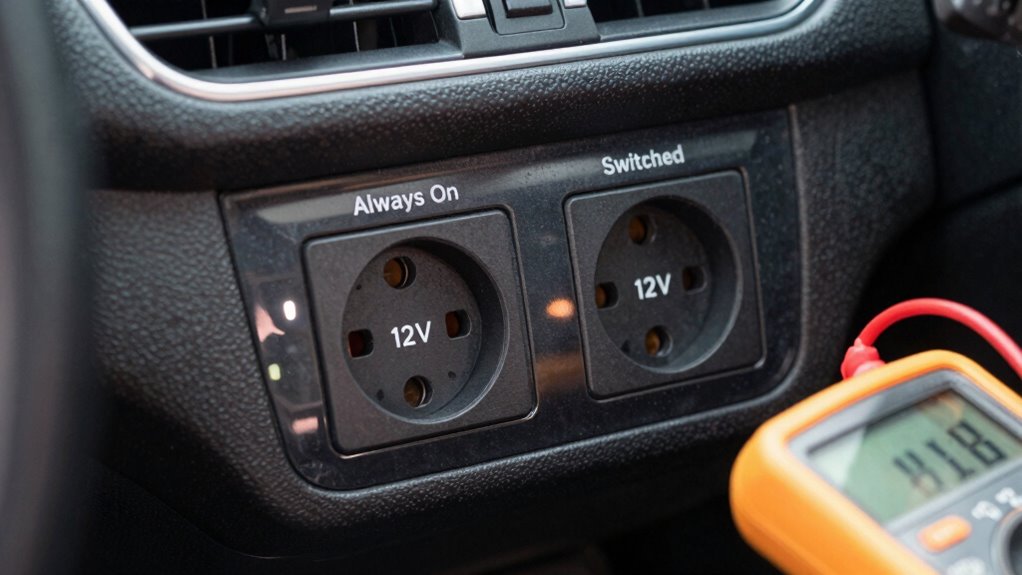
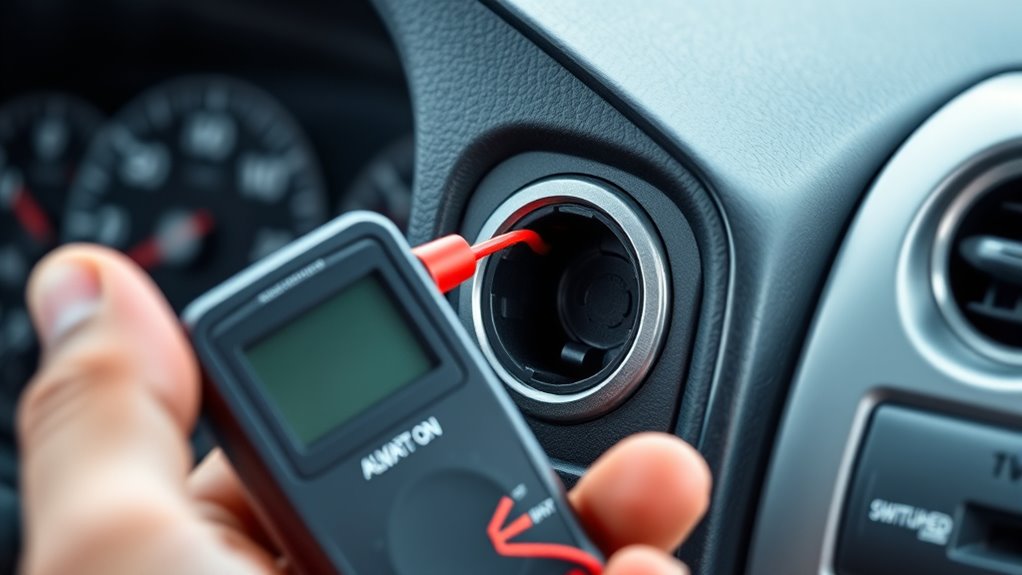
Identifying whether your vehicle’s 12V outlet is always-on or switched is essential for proper device use and safety. Start by visually inspecting the outlet’s shape and location. Most standard 12V sockets resemble a cigarette lighter with a round design, featuring a center positive pin and outer ground contacts. Check if the outlet is near the dashboard or center console—these often indicate switched power, while rear or cargo areas typically have always-on sockets. Note any labels, markings, or color coding; grey generally signifies 12V power, while red indicates 24V. Look for physical cues like a fixed or spring-loaded center pin, which confirms positive feed. Recognizing the outlet’s position, shape, and markings helps determine whether it’s always active or controlled by the ignition switch. Additionally, understanding the power source configuration can help you identify if the outlet remains powered when the vehicle is off.
Testing the Always-On Outlet in 60 Seconds
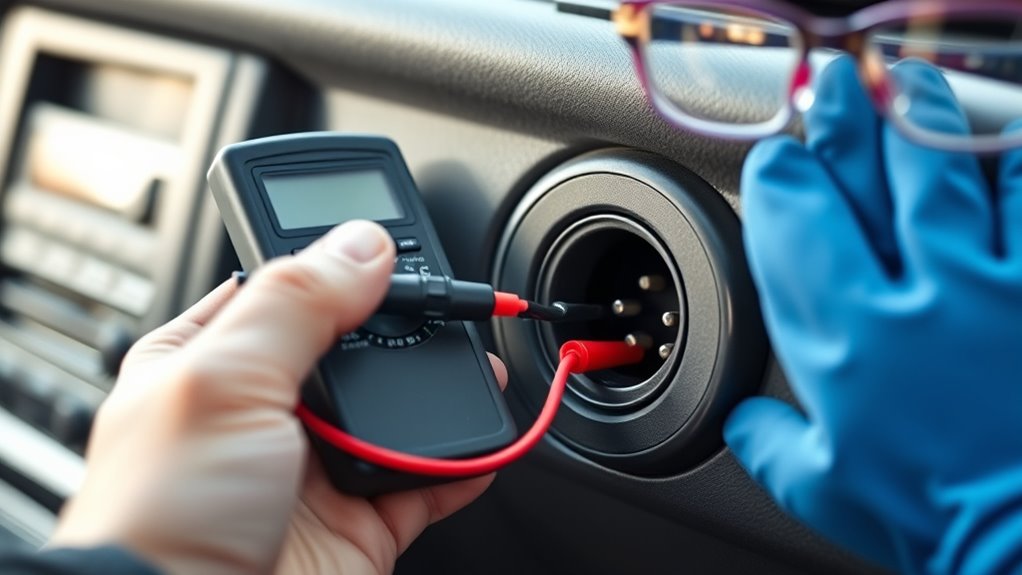
Testing the always-on 12V outlet quickly is straightforward if you have the right tools and follow a few simple steps. First, set your multimeter to DC volts above 20V. Insert the black probe into the negative terminal and the red into the positive center of the outlet. With the ignition off, check the voltage; a reading between 12-14V confirms the outlet is always on. Turn the ignition on and verify that the voltage stays steady, indicating constant power. For extra confirmation, use a non-contact voltage tester near the outlet to detect any presence of voltage. If you see 12-14V with the ignition off and consistent voltage with it on, your outlet is always on. If voltage drops to zero when off, it’s switched.
Checking the Switched Outlet Quickly and Effectively

To check a switched outlet quickly, start by toggling the nearby switch and observing if either receptacle half loses or gains power. Use a multimeter to verify voltage changes between hot and neutral, confirming the switch’s control. Combining these methods guarantees you identify the switched outlet accurately and efficiently.
Ignition State Verification
Verifying whether a 12V outlet is switched or always-on can be done quickly by observing vehicle behavior and using simple visual cues. Start by turning the ignition to the ACC position; if the outlet powers on without starting the engine, it’s likely tied to the accessory circuit. Next, move the key to the Run position; if the outlet remains active, it’s probably switched. Conversely, if the outlet stays powered even with the key off, it’s wired to constant battery feed. You can also check dashboard indicators—ACC and Run lamps turning on suggest the outlet is switched. Additionally, observe device memory resets or power loss during engine cranking. These visual cues help you quickly identify the outlet’s ignition state without tools. To confirm your findings, you can also use a multimeter to measure voltage at the outlet in different ignition positions, which provides an accurate electrical verification of whether the circuit is switched or always-on.
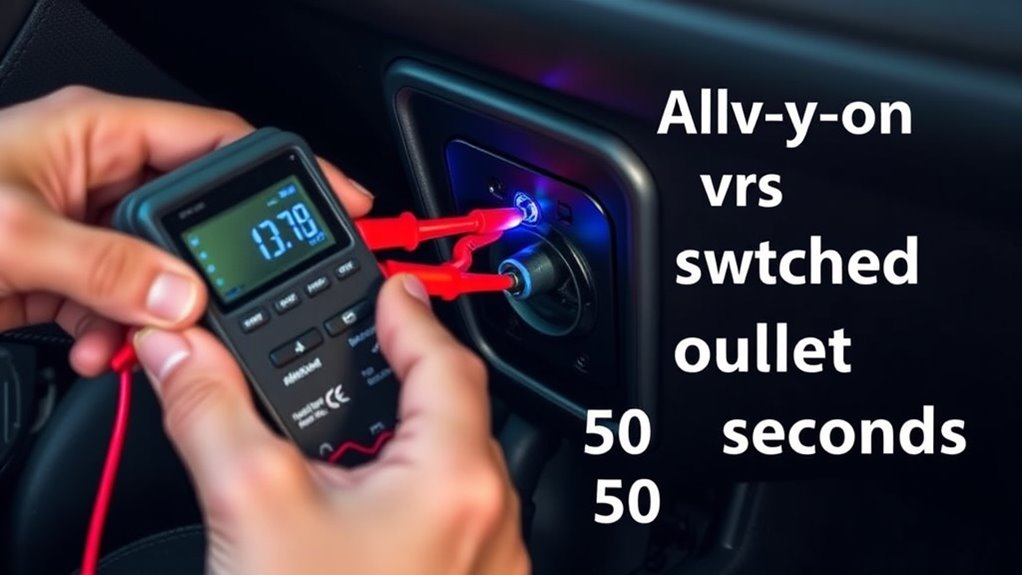
Multimeter Voltage Check
Using a multimeter to check if a 12V outlet is switched or always-on is quick and straightforward when you know the proper setup. First, set your multimeter to AC voltage mode, indicated by the wavy line symbol. Choose a range above the expected voltage, like 200V for 120V outlets. Insert the black probe into the COM port and the red probe into V/Ω. Hold the probes firmly, avoiding contact with metal parts, and verify that the fuses are intact. To test, insert the red probe into the hot slot and the black into the neutral. A reading of 110-120V means the outlet is live. To confirm if it’s switched, turn the switch off; if voltage drops to 0V, it’s switched. Turn it on; if voltage appears, it’s a switched outlet. Additionally, understanding the electrical circuit can help interpret the readings more accurately.
Interpreting Your Multimeter Readings
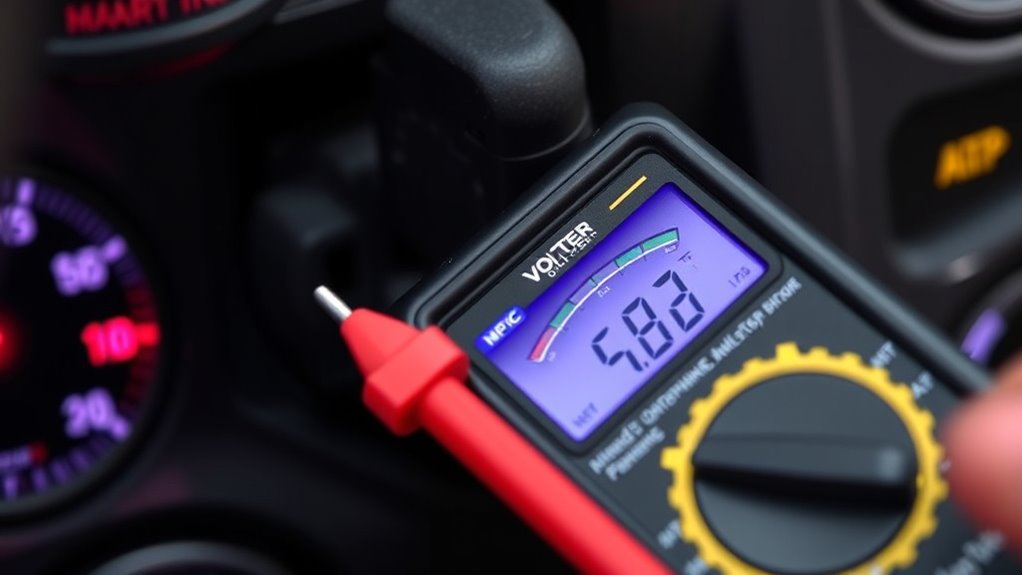
Interpreting your multimeter readings accurately is essential for diagnosing your 12V outlet’s behavior. When checking voltage, a healthy battery reads about 12.6–12.8 V at rest, while running engines show 13.8–14.6 V, indicating proper charging. A steady 12.0 V suggests a discharged battery or potential issues. Fluctuating voltage or noise points to PWM switching or grounding problems. If your meter shows “OL” or over-range, switch to a higher setting. For continuity, a steady beep and near-zero ohms mean a good connection; no beep and “OL” indicate an open circuit. Resistance in the kilo- or megaohm range typically signals high-impedance paths, not power feeds. When measuring current, near-zero mA confirms no draw when off; higher readings suggest parasitic power. Proper interpretation of multimeter readings is crucial for accurate diagnostics, as incorrect readings can lead to misdiagnosis of electrical issues. Understanding voltage ranges also helps in interpreting your readings correctly. Use these interpretations to diagnose your outlet effectively.
Tips for Accurate and Safe Testing
To guarantee accurate and safe testing of your 12V outlet, always follow proper safety precautions before making any measurements. Wear insulated gloves rated for the system voltage and safety goggles to protect your eyes from sparks or debris. Keep one hand behind your back or in your pocket when working live to minimize current flow through your chest. Confirm the circuit is de-energized with a non-contact voltage tester before touching conductors or removing faceplates. Use insulated probes or clips instead of metal jewelry or conductive tools to prevent short circuits. Inspect the outlet for damage, discoloration, or loose fittings before testing. Follow a quick workflow: verify no voltage, check wiring faults with a tester, and measure voltages with a multimeter while observing single-hand rule. Additionally, understanding pool electrical safety is crucial when working on outlets near water features or pools. Properly identifying whether the outlet is always on or switched can help prevent accidental shocks and ensure your electrical setup is safe and reliable. Always consult your local electrical codes and standards to ensure compliance during testing and installation processes.
Frequently Asked Questions
Can I Convert an Always-On Outlet to Switched Without Rewiring?
Yes, you can convert an always-on outlet to switched without rewiring if your setup has separate hot wires for always-on and switched power. Use the breaking tab method to disconnect the hot connection, then connect the switched wire to the brass screw of the outlet. Make sure the circuit is off and tested before working, and verify your wiring matches the requirements. If unsure, consult a professional for safety and proper installation.
What Are the Signs of a Faulty Relay in Switched Outlets?
You’ll notice a faulty relay in switched outlets if you see repeated clicking, buzzing, or rattling sounds when the device is on. Tactile warmth or heat around the relay indicates poor contact or overcurrent. Use a multimeter to check for no voltage at the control pin or high resistance across contacts. Intermittent operation, flickering devices, or unexplained circuit trips also suggest relay issues. If you see these signs, the relay probably needs replacing.
Is It Safe to Test Outlets With the Vehicle Running?
Think of testing outlets with the vehicle running as walking a tightrope—you need caution and focus. Yes, it’s safe if you follow proper procedures: use insulated tools, wear safety gear, and avoid contact with live terminals. Keep the engine running only when necessary, monitor voltage levels, and never bypass safety protocols. This way, you guarantee accurate testing without risking electrical shock or damaging your vehicle’s system.
How Often Should I Check My Vehicle’s Outlets for Proper Function?
You should check your vehicle’s outlets every 3 months to make certain they’re functioning properly. If you use accessories frequently or have an older vehicle, consider inspecting monthly or quarterly. Before long trips or heavy accessory use, perform a quick check. Look for physical damage, test voltage with a multimeter, and verify fuse condition. Regular inspections help prevent failures, keep your accessories safe, and maintain your vehicle’s electrical system in top shape.
Can a Multimeter Damage My Vehicle’s Electrical System During Testing?
Yes, a multimeter can damage your vehicle’s electrical system if you’re not careful. To avoid this, always set your multimeter to the correct mode and range before testing. Never connect the probes across components in current mode unless properly configured, and avoid shorting terminals or grounding probes accidentally. Follow safety precautions, such as disconnecting the battery when necessary, to prevent sparks, shorts, or damaging sensitive electronics.
Conclusion
By mastering these quick tests, you’ll gain insight into your vehicle’s hidden rhythms, ensuring everything runs smoothly. Remember, a little patience and careful observation reveal more than meets the eye. Trust your instincts, and don’t rush the process—sometimes, the smallest details whisper the most important truths. With just a moment of attention, you’ll keep your journey steady and your confidence intact, guiding you through the quiet signals that keep your vehicle humming along.