

If your rear camera flickers, it could be caused by loose or damaged cables, insufficient or unstable power, or incorrect settings. Check all connections for secure seating and look for frayed or broken wires. Power fluctuations and poor grounding can also cause instability. Lighting conditions and camera settings, like frame rate or format mismatches, can contribute too. Understanding these factors will help you troubleshoot effectively—keep exploring to uncover more solutions.
Key Takeaways
- Check for loose, damaged, or improperly seated cables and connectors to ensure stable video transmission.
- Verify power supply voltage and grounding to prevent flickering caused by inadequate or fluctuating power.
- Inspect for electrical interference or power drops, especially over long cable runs, which can cause image flicker.
- Adjust camera settings such as resolution, frame rate, and flicker reduction to match lighting conditions and prevent banding.
- Regularly maintain and clean cables, connectors, and camera components to minimize environmental and mechanical causes of flicker.
Common Signs of Rear Camera Flicker

You’ll notice rear camera flicker when your footage shows inconsistent brightness or visible flickering lines, especially under certain lighting conditions. You might see rapid, flickering changes in video quality during recording or photos, particularly indoors with artificial lights like LEDs or fluorescents. If the camera switches between lenses unexpectedly, causing sudden jumps or blurry images, it’s a sign of auto macro switching. You may also observe flickering or banding lines caused by mismatched frame rates between lights and your camera shutter—more common in low-light environments. On Android head units, flickering or pixelation can appear due to incorrect video format settings, like NTSC or PAL mismatches. Alternatively, flickering horizontal lines during video often result from shutter speed conflicts, especially under artificial lighting. Adjusting camera settings or locking lens modes can help mitigate some of these flickering issues. Additionally, understanding lighting conditions and how they interact with camera hardware can further reduce flicker problems. Ensuring video format compatibility also plays a crucial role in preventing flicker artifacts caused by mismatched standards. Moreover, power supply stability can influence the consistency of camera operation and reduce flickering caused by electrical interference. A properly shielded power source can further help minimize electrical disturbances that contribute to flicker issues. Ensuring cable quality and connections are secure and free of damage can also significantly impact flicker issues related to electrical disturbances.
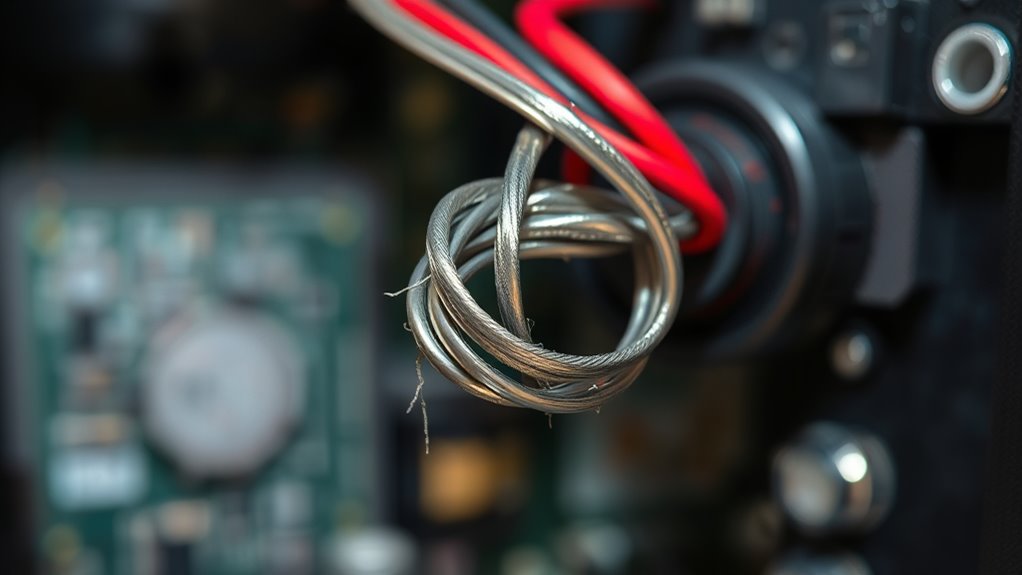
Identifying Faulty Cable Connections
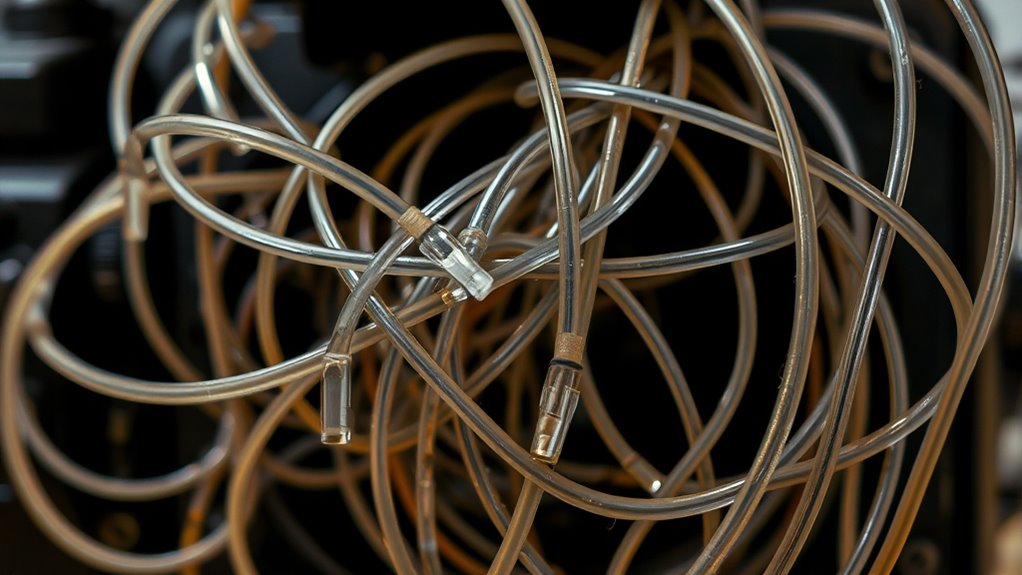
Many issues with rear camera flicker stem from faulty cable connections. Start by visually inspecting all cables for cuts, frays, kinks, tears, or pinched sections along their entire length. Check end connectors like BNC, RJ45, or CCTV power plugs for damage, corrosion, or looseness. Look for cracks in the sheathing, especially in humid or water-exposed areas. Make certain power wiring doesn’t cause shorts by avoiding excess wiring touching. Tighten all connectors between the camera, DVR/NVR, and monitor, making sure they’re secure. Test cable continuity using a tester, and verify that connectors are properly seated. Replace damaged cables with high-quality, compatible types—coax for analog, Cat5/6 for digital systems. Proper installation and secure connections are essential to prevent flickering caused by faulty cables. Additionally, ensuring proper grounding and shielding can help reduce interference that leads to flickering. Confirming the connection integrity is crucial as it directly impacts signal stability and camera performance. Ensuring that the cables are designed for high-quality video transmission can further reduce flickering issues. Also, selecting cables with appropriate shielding techniques can significantly improve signal stability and minimize flickering occurrences.
How Power Fluctuations Impact Camera Performance

Power fluctuations can cause your camera to flicker or lose focus unexpectedly. When voltage drops or contact issues occur, they disrupt the camera’s stable operation, leading to poor image quality. Changes in load can also make performance unpredictable, so understanding these factors helps you maintain consistent camera performance. Additionally, the influence of artistic complexities on camera behavior can sometimes be overlooked, but they play a role in the overall stability of imaging equipment. Recognizing voltage differences across regions can help you choose the appropriate equipment and solutions to minimize these issues. Being aware of power quality variations is essential for troubleshooting and ensuring reliable camera operation. Environmental factors such as electrical interference can further impact performance and should be considered when diagnosing flickering problems. Proper grounding and shielding can significantly reduce the impact of electrical interference on camera stability, especially in areas with inconsistent power supply conditions.
Voltage Drops Cause Flicker
Voltage drops along long cable runs can directly cause flickering in your camera’s image. When cables are too long or use undersized conductors, resistance increases, leading to voltage sag (Vdrop = I × R), which lowers the power reaching the camera. During high inrush or IR LED activation, current spikes worsen voltage drops, causing fluctuations that result in flicker or intermittent image loss. Poor-quality cables or inadequate power supplies further exacerbate this issue by increasing resistance or failing to maintain stable voltage. Empirical evidence shows that after rebooting, the image remains steady until voltage sags under load, causing flicker. To prevent this, shorten cable runs, upgrade to larger conductors, or add local power sources and voltage regulators. Testing voltage at the camera end confirms effective mitigation. Additionally, selecting high-quality cables and ensuring proper installation can greatly reduce resistance and voltage fluctuations, improving overall camera performance. Proper power management is essential to maintain consistent camera operation and prevent flicker issues. Regularly inspecting connections and using voltage stabilizers can also help maintain stable power delivery. Ensuring the use of appropriate cable types and understanding the impact of resistance on voltage stability can make a significant difference in camera reliability.
Poor Contact Disrupts Power
Poor contact at your camera’s power connectors can cause immediate and noticeable fluctuations in image quality. Corroded or oxidized contacts increase resistance, leading to intermittent current interruptions that cause flickering or frame tearing. Loose connections, such as barrel, screw-terminal, or Molex types, can open under vibration or temperature changes, producing transient power drops that result in flicker. Micro-arcing at marginal contacts creates rapid, irregular interruptions and electrical noise, which the camera’s regulator or sensor circuitry can’t fully reject, degrading stability. Bent pins or missing retention features lead to unstable supply continuity. Environmental factors like moisture, salt, or dust accelerate contact degradation. These issues cause voltage fluctuations that directly impact the camera’s ability to maintain consistent image quality, resulting in flickering or instability. Regular inspection and maintenance can help prevent these contact issues from affecting camera performance. Additionally, contact corrosion can be mitigated by applying protective coatings or using corrosion-resistant materials. Ensuring proper electrical connections and using high-quality components can significantly reduce the likelihood of flickering problems. Proper cable management practices also reduce mechanical strain on connectors, helping to maintain stable power delivery. Implementing vibration damping techniques can further reduce mechanical stress on connections, prolonging their reliability. Regular testing with multimeters or oscilloscopes can detect early signs of contact issues before they impact performance.
Load Changes Affect Stability
Sudden changes in load can cause immediate voltage drops at your camera’s power input, leading to brief periods of under-voltage that disrupt image stability. When load increases suddenly, the power supply’s transient response may not recover quickly enough, causing temporary voltage dips that can result in frame drops or image corruption. Downstream cable impedance, especially with long or thin wires, magnifies these voltage fluctuations, making modest load changes more impactful. Repeated load transients stress voltage regulators and capacitors, accelerating component wear and heightening flicker risks. Using a power supply with sufficient headroom and local regulation helps maintain stable voltage during load changes. Proper cabling, shorter runs, and added local capacitance further reduce voltage deviations, ensuring your camera stays steady even during peak demand. Implementing surge protection and grounding can also help prevent damage caused by power fluctuations and improve overall system stability.
The Role of Lighting Conditions in Image Stability

Lighting conditions play a crucial role in maintaining image stability during rear camera recording. When lights flicker, your camera may capture inconsistent exposure, resulting in flickering or banding effects. Lights with high intermittency, like metal halide lamps with magnetic ballasts, are especially problematic, as their uneven output affects the entire frame. The flicker becomes more noticeable at longer exposures, as the camera captures more of the dimming cycle. Additionally, regional differences in power frequency—50 Hz versus 60 Hz—cause LED and other artificial lights to flicker at varying rates, leading to strobing or banding in your footage. Fast shutter speeds often catch lights during their dim cycles, worsening flicker. Choosing stable, flicker-free lighting or adjusting exposure settings can help improve image stability during recordings. Being aware of your lighting environment and selecting appropriate equipment can significantly reduce flickering issues. Understanding lighting flicker and how it interacts with camera settings is key to achieving consistent video quality. To further mitigate flickering, consider using flicker-free lighting solutions designed to operate smoothly across different power standards. Additionally, employing appropriate camera settings, such as adjusting shutter speed or exposure, can help minimize flicker artifacts in your footage. Properly managing power supply and ensuring consistent voltage can also reduce flickering caused by electrical fluctuations.
Adjusting Settings for Optimal Display Clarity

To get the clearest display, you should match your camera’s resolution to your intended output, using the highest setting for detail. Make sure your frame rate settings align with your content type to prevent flickering or motion issues. Additionally, adjusting your factory display options can refine brightness, contrast, and color accuracy for ideal viewing clarity. Understanding camera resolution and frame rate compatibility is essential for optimal display performance.
Match Camera Resolution
Matching your camera resolution to your display’s capabilities is essential for achieving ideal image clarity. When these settings align, images appear sharper, with fewer artifacts or softening caused by scaling. If your display has a high pixel density, such as a 4K monitor, using a camera with a lower resolution may reduce perceived detail, while over-resolving can lead to unnecessary processing and artifacts. Properly matching resolutions ensures the captured image retains maximum detail without excessive upscaling or downscaling. Consider the scene’s scene coverage and display PPI. The table below highlights key factors influencing resolution matching:
| Factor | Impact |
|---|---|
| Camera resolution | Determines captured detail |
| Display resolution | Limits perceived sharpness |
| Downscaling | Improves sharpness with proper resampling |
| Upscaling | Can introduce artifacts if misaligned |
| Scene coverage | Affects pixel-per-foot/per-inch ratio |
Additionally, understanding your Leasing options can help you optimize your equipment setup for different scenarios. Ensuring your camera settings are compatible with your display can also minimize rear camera flicker, leading to a more consistent viewing experience.
Correct Frame Rate Settings
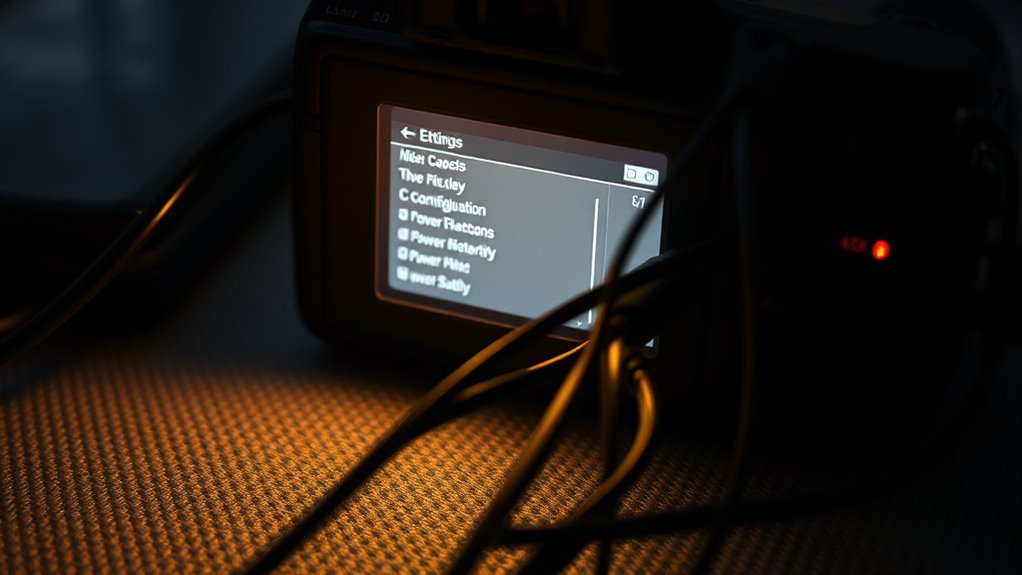
Ensuring your reverse camera displays a clear, flicker-free image depends heavily on setting the correct frame rate. If you’re using an Android car stereo, select CVBS-NTSC in the Backcar Settings to match your camera’s format. Mismatched formats like NTSC versus PAL can cause glitching, distortion, or pixelation. Access these settings via Apps > Car Settings > System Settings > Factory Settings (enter password), then choose REAR CVBS-NTSC and save your configuration. Reboot your system to finalize the change. This guarantees the camera’s output syncs properly with your display, reducing flicker. Proper frame rate matching eliminates blurry or flickering images, providing a stable, clear view during reverse. Double-check your camera’s specifications to confirm the correct format for ideal display clarity.
Adjust Factory Display Options
Adjusting factory display options is essential for achieving peak clarity and minimizing flicker in your rear camera feed. You should set your display brightness to a stable, moderate level—around 200-400 nits—and disable adaptive or auto-brightness features. This prevents rapid luminance changes that can cause flickering in recorded footage. Be aware that OLED and LCD screens behave differently: OLEDs may exhibit local dimming effects, while LCDs rely on PWM backlight dimming, which can introduce flicker. Also, choose a standard color profile like sRGB and set white balance manually to avoid color shifts. Finally, set the refresh rate to match your camera’s frame rate, and disable motion smoothing or VRR to prevent temporal artifacts. These adjustments create consistent conditions for clearer, flicker-free recordings. Proper display calibration ensures consistent lighting and color accuracy, further reducing the chances of flicker in your footage.
Recognizing Vehicle Recalls and Repair Options

Recognizing vehicle recalls related to rear camera flicker is essential for maintaining safety and compliance. Recent recalls in 2025 affected over a million vehicles, including models from Toyota, Ford, Hyundai, and others, highlighting the widespread nature of this issue. Thousands of vehicles are recalled each quarter, especially for “Back Over Prevention” systems, with nearly 19.3 million recalls so far this year. Common causes include software glitches, wiring damage, calibration errors, and hardware failures. Timely recognition and action are vital to avoid hazards.
| Impacted Models | Common Causes | Repair Options |
|---|---|---|
| Toyota/Lexus | Software defects | Software updates |
| Ford | Wiring damage | Harness replacement |
| Hyundai | Calibration issues | ECU recalibration |
| Stellantis | Hardware failures | Camera/module replacement |
Troubleshooting Power-Related Camera Issues
Start by checking that all power connections are secure and free of corrosion or damage. Keep an eye on voltage stability, especially when accessories like the AC are running, as fluctuations can cause flickering. Monitoring these aspects helps identify whether unstable power is behind your camera issues. Regularly inspecting the wiring and grounding points can prevent many power-related problems and ensure consistent camera operation.
Check Power Connections
To troubleshoot power-related issues causing rear camera flicker, begin by verifying that the camera receives proper voltage from the main power supply. Check the voltage at the camera power pin when reverse gear is engaged; it should be around 6.5–7.5 V from the head unit or about 12 V from the vehicle harness. Measure voltage under load, with the camera connected and in reverse, to detect any drops. Inspect wiring harnesses, connectors, and splices for looseness, chafing, or corrosion, and perform voltage drop tests to identify high-resistance points. Confirm the reverse-signal source switches correctly. Finally, examine grounding points for tight connections, low resistance, and absence of noise or bounce during engine or accessory operation.
- Verify voltage at camera power pin under load
- Inspect wiring for chafing, breaks, or corrosion
- Perform voltage drop tests across connectors and splices
- Confirm reverse-signal switching correctly
- Check grounding points for tightness and low resistance
Monitor Voltage Stability
Are you experiencing flickering or unstable images on your rear camera? Voltage fluctuations are a common cause. Inconsistent power delivery can make your camera reset, malfunction, or produce rolling lines, horizontal, or vertical distortions. Long transmission distances may cause voltage drops, worsening stability issues. Ground loops in the power supply can create moving lines across your display, while an underpowered camera results in flickering, weak signals, or black screens. To troubleshoot, verify that your power source stays within the proper voltage range. Check that your camera’s power indicator is lit and test the power supply’s adequacy. Use a known working adapter, and test different ports if necessary. Ensuring stable voltage prevents image flicker and maintains clear, consistent footage.
Environmental Factors Causing Visual Disturbances

Environmental conditions play a significant role in causing visual disturbances in rear cameras, often leading to flickering or blurry images. Moisture ingress from failed seals or rapid temperature changes causes condensation on the lens and inside the housing, which can lead to electrical shorts and unstable signals. Dust accumulation on the lens or external contamination can disrupt image clarity, mimicking flicker effects. Temperature extremes, like freezing and high heat, weaken housings and seals, allowing humid air to enter and cause fogging. Lighting variations, such as sudden changes from dark to bright, force the camera to adjust exposure quickly, resulting in flickering. Additionally, chemicals like road salt and UV exposure degrade components, accelerating moisture ingress and seal failure. Proper sealing and environmental protection are essential to minimize these disturbances. Regular maintenance and inspections can help identify early signs of seal damage and prevent environmental factors from affecting camera performance.
Inspecting and Replacing Faulty Cables
Inspecting and replacing faulty cables is essential for maintaining clear and stable images from your rear camera. Regular visual checks help identify fraying, tears, or kinks that signal damage needing immediate attention. Use a multimeter to test continuity and guarantee there are no breaks or loose connections. Always verify the integrity of power and data lines, especially if flickering persists. When replacing cables, carefully remove damaged sections and re-terminate following proper procedures. Be cautious during disassembly to avoid further damage.
| Damage Signs | Action |
|---|---|
| Frayed or torn cable | Replace with authentic parts |
| Kinks in push cables | Seek professional repair |
| Scratched metal ring | Check for thimble breakage |
| Obstructions on reel | Clear debris before use |
| Broken or worn connectors | Re-terminate or replace cables |
Preventive Measures to Maintain Camera Reliability

Regular preventive measures are essential to keep your camera system operating reliably and to minimize flicker issues. Consistently maintaining your equipment helps prevent common problems like image degradation, internal fogging, and power fluctuations. Regularly clean lenses with microfiber cloths and use manufacturer-recommended solutions to maintain clarity. Check sensor and mount cleanliness every few months, especially if spots appear. Use protective filters to guard against scratches and contaminants. Keep housings, domes, and enclosures free of condensation by wiping seals and employing desiccants. Seasonally replace or clean ventilation covers and sunshields to avoid heat buildup, which can cause flicker. Additionally, monitor power supplies, install surge protectors, and keep firmware updated to ensure stable operation and reduce flickering caused by electrical or software issues. Proper maintenance is critical for intrinsically safe cameras, as it helps prevent safety hazards related to electrical or thermal issues that could compromise safety in hazardous environments.
Frequently Asked Questions
Can a Faulty Cable Cause Intermittent Backup Camera Failure?
Yes, a faulty cable can cause intermittent backup camera failure. When the wiring near hinges wears or gets damaged, it can interrupt the signal, leading to flickering or black screens. Loose or corroded connectors also create inconsistent connections, resulting in unreliable video feed. To fix this, you should inspect the wiring harness, tighten connectors, and replace any damaged cables to guarantee a stable connection and consistent camera performance.
How Do I Determine if Power Fluctuations Affect My Camera?
You can determine if power fluctuations affect your camera by measuring the voltage at the camera’s power input with a multimeter, checking for drops below normal levels during flicker. Use an oscilloscope to detect transient dips or spikes. Watch for signs like warm power adapters or buzzing sounds. Correlate any voltage irregularities with flickering in your video feed. Consistent voltage drops or spikes confirm power issues impacting your camera’s performance.
Do Lighting Conditions Influence the Stability of the Backup Camera Image?
Lighting conditions definitely impact your backup camera’s stability. For example, in a dimly lit parking lot, increased reliance on high gain amplifies flicker, causing image instability. Bright reflective surfaces or flashing lights can also create sudden luminance changes, making the image flicker or jump. Nighttime environments with mixed lighting sources often lead to aliasing or banding artifacts. Adjusting your camera’s exposure settings or improving ambient lighting can help reduce these issues.
What Settings Should I Adjust to Fix Display Glitches?
You should start by disabling adaptive or auto-brightness, as these can cause flickering due to oscillating settings. Increase the minimum brightness manually if flicker occurs at low levels. Turn off HDR and high-performance color profiles temporarily since they can introduce driver glitches. Reset display settings to defaults after OS updates, and test with fixed brightness in Safe Mode to identify if third-party apps are causing issues.
Are There Recalls or Warranty Options for Camera-Related Issues?
Yes, there are warranty options and recalls for camera-related issues. If your camera flicker is due to a manufacturing defect, your device may be covered under warranty, which often requires proof of failure like logs or photos. Recalls may be issued if the problem affects safety or widespread function, leading to free repairs or replacements. Check with your manufacturer or authorized service center to confirm eligibility and initiate the process.
Conclusion
If your rear camera flickers, start by checking the cable connections and power supply. For instance, a driver noticed flickering during nighttime due to loose wiring; securing the cables fixed the issue. Regularly inspecting and maintaining your cables and settings can prevent future problems. Remember, environmental factors like lighting can also play a role. Staying proactive guarantees clear, reliable visuals, giving you peace of mind every time you back up.