
To stop glare on your SUV or hatchback rear glass, start by choosing a compatible, clean mounting surface free of debris or old adhesive. Guarantee the glass is aligned properly using guides, and consider applying anti-glare films with UV protection for extra glare reduction. Seal gaps with weatherproof sealants, and use durable, weather-resistant hardware for secure installation. Regularly inspect and maintain your rear glass for clear visibility. Continue to explore these tips to achieve ideal glare reduction and safer driving.
Key Takeaways
- Use anti-glare films with UV protection and ensure proper application to prevent bubbles and gaps.
- Align rear glass accurately using guides and markers to prevent misalignment and glare issues.
- Seal edges with weatherproof sealants or foam strips to block light entry and reduce glare.
- Select compatible, weather-resistant mounting hardware and adhesives for a secure, long-lasting fit.
- Regularly clean and inspect the rear glass to maintain clarity and prevent glare-causing debris or damage.
Choosing the Right Mounting Surface for Your Rear Glass
Selecting the appropriate mounting surface for your rear glass is essential to guarantee a secure and lasting fit. You need to consider the vehicle’s existing structure and compatibility with tinting options, as these can impact how well the glass adheres. The mounting hardware must match the surface’s material and shape to ensure stability and prevent leaks. Some surfaces may require additional prep, like cleaning or sanding, to improve adhesion. Always verify that the surface is free of rust, debris, or old adhesive residue before installation. Proper surface selection helps avoid misalignment and damage, making the process smoother. Additionally, understanding the European cloud innovation can inspire more reliable and sustainable solutions for your vehicle’s needs. By paying close attention to your vehicle’s mounting area, you’ll secure your rear glass effectively, ensuring durability and ideal visibility. Ensuring the compatibility of mounting hardware with your vehicle’s surface can further enhance the installation’s longevity.
Ensuring Proper Alignment During Installation

To make certain your rear glass is properly aligned, start by using alignment guides provided with the glass or vehicle. Double-check the glass’s position before securing it completely, making adjustments as needed. Confirming the correct placement now prevents issues later and guarantees a secure, professional fit. Additionally, ensuring the glass has a consistent contrast ratio enhances overall visibility and reduces glare during driving. Proper installation techniques help maintain the integrity of the seal and prevent water leaks or wind noise over time. Paying attention to artistic influences can also inspire more precise installation, especially when considering the design elements of your vehicle’s rear glass. Incorporating quality materials and following manufacturer instructions further ensures a durable and accurate fit that lasts. Utilizing navigation and mapping principles during installation can also aid in achieving precise positioning and alignment.
Use Alignment Guides
Using alignment guides is essential for guaranteeing the rear glass fits correctly and stays secure. They help you position the glass accurately, preventing misalignment that could affect decorative patterns or tint color options. To use guides effectively, mark the edges of the glass and vehicle frame, then align them carefully. Here’s a quick reference:
| Guide Type | Purpose | Tips |
|---|---|---|
| Vertical Guides | Keep glass centered | Use a level for precision |
| Horizontal Guides | Align top and bottom edges | Check for even gaps |
| Side Guides | Ensure side fitment | Double-check before fixing |
Following these steps guarantees a perfect fit, smooth installation, and maximum glare reduction. Proper use of alignment guides can also help prevent damage to the glass or vehicle during installation. Incorporating proper installation techniques ensures the entire process is efficient and safe. Additionally, understanding the key traits of successful quality assurance engineers can help improve your overall approach to quality control during installation processes. Recognizing the importance of precise measurements can further enhance the accuracy of your setup and ensure optimal results.
Confirm Glass Position
Before securing the rear glass, it’s essential to confirm that it’s properly aligned. Check that the rear windshield lines up with the vehicle’s body and the mounting points. Proper alignment ensures the glass sits flush and prevents gaps that could cause glare or leaks. If you’ve done glass tinting, double-check that the tint lines are even and won’t interfere with the mounting process. Use alignment guides or visual markers to verify the positioning before fastening everything in place. Making sure the placement is correct now avoids the need for adjustments later, saving time and effort. A well-aligned rear windshield enhances visibility and reduces glare, improving safety and appearance. Take your time to confirm the position thoroughly before proceeding with the final installation steps. Ensuring proper glass positioning is key to achieving a professional and safe fit. Additionally, verifying alignment accuracy can help prevent costly rework and ensure long-term durability. Paying attention to proper mounting techniques also contributes to a secure and lasting installation, especially when considering proper adhesion for a durable seal.
Using Anti-Glare Films and Coatings Effectively
Choosing the right anti-glare film is key to reducing reflections and improving visibility. Proper application techniques guarantee the film stays smooth and adheres well without bubbles or gaps. When you get these details right, your rear glass will perform better and last longer. Incorporating smart appliance features can further enhance your vehicle’s tech and user experience. Additionally, selecting films with UV protection can help safeguard your vehicle’s interior and prolong the lifespan of the glass.
Choosing the Right Film
Selecting the right anti-glare film or coating is essential for improving visibility and reducing eye strain when driving your SUV or hatchback. Look for films that offer strong UV protection to block harmful rays and keep your interior cooler. Additionally, choose a film that enhances privacy, so your belongings stay hidden and prying eyes are deterred. Consider the level of tint that suits your needs—darker films provide more privacy, while lighter options balance glare reduction with visibility. Ascertain the film is durable and scratch-resistant for long-lasting performance. By carefully selecting a film that combines UV protection and privacy enhancement, you’ll enjoy clearer views, less glare, and a more comfortable driving experience.
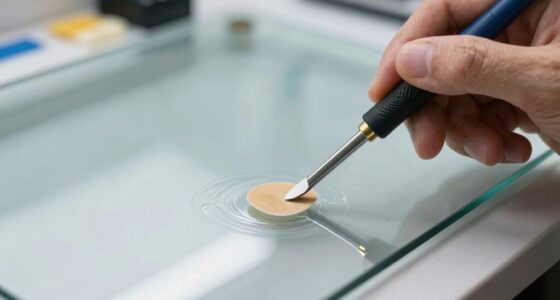
Proper Application Techniques
Applying anti-glare films and coatings correctly is essential to guarantee they perform as intended and last over time. To ascertain effective rear glass tinting and glare reduction techniques, follow these steps carefully. First, clean the glass thoroughly to remove dust and grease. Next, position the film accurately before applying, avoiding bubbles and creases. Use a squeegee to smooth out the film from the center outward. Maintain steady pressure during application. Finally, trim excess film and allow proper curing time. Remember, proper technique reduces glare and extends the life of your anti-glare coating. Proper application techniques are crucial for nanotechnology advancements to ensure durability and effectiveness. Here’s a quick overview:
| Step | Action | Tip |
|---|---|---|
| 1 | Clean the glass | Use alcohol-based cleaner |
| 2 | Position the film | Align edges precisely |
| 3 | Apply with squeegee | Work from center outward |
| 4 | Trim excess film | Use sharp blades |
| 5 | Cure and dry | Avoid moisture during drying |
Additionally, understanding the material properties of the films can help in selecting the right type for your specific needs. Incorporating proper application techniques can also enhance the overall performance and longevity of the anti-glare coatings. Moreover, paying attention to installation environment can significantly influence the success of the application process. Being aware of environmental conditions such as temperature and humidity can help optimize the application process and ensure a better bond and finish.
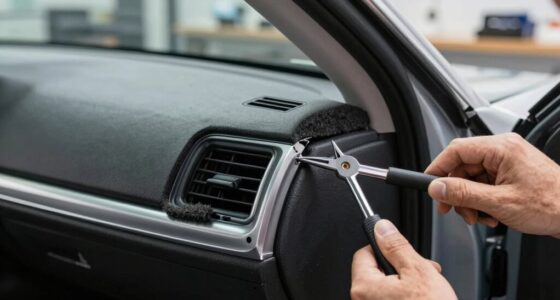
Sealing Gaps to Prevent Light Reflection and Glare

To effectively reduce light reflection and glare on your SUV or hatchback’s rear glass, sealing any gaps around the edges is essential. Gap sealing helps block stray light from entering through small openings, which can cause unwanted reflections and glare. Use weatherproof sealants or foam strips designed for automotive use to fill these gaps securely. Ensure the sealant is applied evenly and thoroughly around the entire perimeter. Proper gap sealing not only minimizes glare but also prevents dust, water, and debris from entering, maintaining a clean, clear rear glass. Taking automotive safety into account, well-sealed gaps can also improve overall vehicle security. When installing or inspecting these seals, it’s important to consider the upfitting fundamentals to ensure compatibility and effectiveness. Take your time to check for any uneven or loose areas and reapply as needed. This simple step markedly enhances glare prevention and improves your overall driving visibility. Additionally, performing regular seasonal maintenance checks can help keep the seals in top condition and prevent deterioration over time. Incorporating proper installation techniques ensures the longevity and effectiveness of the seals, providing consistent glare reduction. Being aware of hydraulic principles can also aid in understanding how to properly apply and secure sealing materials for maximum durability.
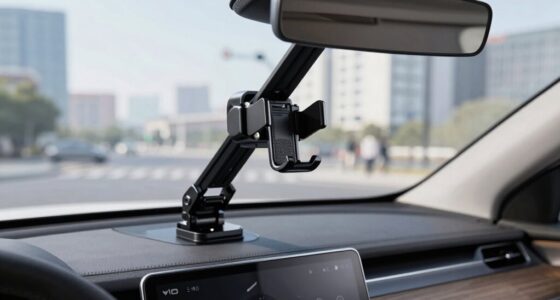
Selecting Appropriate Mounting Hardware and Adhesives
Choosing the right mounting hardware and adhesives is essential to guarantee your rear glass stays securely in place and resists environmental stresses. When selecting mounting hardware, ensure it’s compatible with your vehicle’s specifications and provides a strong, stable fit. Durable brackets, clips, or fasteners prevent loosening or rattling over time. For adhesive selection, opt for high-quality, weather-resistant adhesives designed for automotive glass. These adhesives offer strong bonding, flexibility, and resistance to temperature changes and moisture. Proper adhesive application guarantees a secure bond without damaging the glass or paint. Always follow manufacturer instructions for both hardware installation and adhesive use, and consider the weight and size of your rear glass to choose the most suitable hardware and adhesive combination for long-lasting, secure mounting. Additionally, understanding the importance of secure mounting can help prevent common issues like glare and accidental dislodging.
Regular Maintenance and Inspection for Optimal Clarity
Regular maintenance and inspection are key to maintaining clear visibility through your SUV or hatchback rear glass. Regularly check for dirt, grime, and streaks, and clean the glass with appropriate cleaning routines to prevent glare and obstructions. Weather considerations are vital; after rain, snow, or dust, inspect the glass for debris or buildup that can impair visibility.
To keep your rear glass in top shape, consider these tips:
- Clean the glass regularly using a streak-free cleaner and microfiber cloth.
- Inspect for cracks, chips, or damage after severe weather conditions.
- Remove snow, ice, or dirt promptly to prevent scratches and ensure clear sightlines.
Consistent upkeep guarantees maximum clarity and safe driving conditions.
Tips for Replacing Old or Damaged Rear Glass

When your rear glass becomes old or damaged, replacing it promptly is essential for safety and visibility. Start by choosing a replacement with color matching to ensure it blends seamlessly with your vehicle’s existing glass. Consider tinting options to enhance privacy and reduce glare, especially if your current glass has a tint. Before installation, double-check that the new glass fits perfectly and adheres securely. If you’re unsure about the process, consulting a professional can save time and prevent damage. Remember, a properly installed rear glass improves visibility and safety on the road. Don’t overlook the importance of selecting a glass that matches your vehicle’s style and features, including any tinting, to maintain the aesthetic and function of your SUV or hatchback.
Frequently Asked Questions
How Do I Choose a Compatible Rear Glass Mounting System?
To select a compatible rear glass mounting system, focus on mounting compatibility and your vehicle’s specific model. Check the selection criteria carefully, including size, shape, and attachment points, to guarantee a perfect fit. Measure your rear glass accurately, and verify that the mounting system supports your vehicle’s make and year. By prioritizing compatibility and following these criteria, you’ll ensure a secure, glare-free installation that lasts.
Can I Install the Rear Glass Mount Myself or Need Professional Help?
Imagine yourself carefully handling the rear glass, feeling confident in your DIY skills. You can install it yourself if you’re comfortable with basic tools and follow precise instructions, but professional assistance can guarantee a perfect fit and safety. If you’re unsure about the process or lack experience, it’s best to seek professional help. This way, you avoid potential damage and ensure glare reduction, keeping your drive safe and glare-free.
What Materials Best Reduce Glare on Rear Glass?
You can effectively reduce glare on your rear glass by choosing high-quality tint films that offer UV protection. These films block out harsh sunlight and harmful rays, improving visibility and comfort. Look for tint options specifically designed to cut glare while maintaining clear rear visibility. Properly applied tint films can be a simple, affordable solution to minimize glare, protect your interior, and enhance your driving experience.
How Often Should I Inspect or Replace Anti-Glare Coatings?
You should inspect your anti-glare coatings every six to twelve months. Over time, glare reduction diminishes as coatings wear or get damaged, risking compromised visibility. Regular checks help you catch signs of peeling, cracking, or fading early. Replacing or reapplying the coating guarantees maximum glare reduction and maintains its longevity. Don’t wait for glare to become a hazard—stay proactive to keep your rear glass clear and safe.
Are There Specific Safety Precautions During Rear Glass Installation?
Yes, you should take specific safety precautions during rear glass installation. Always wear safety gear like gloves and eye protection to prevent injury from glass shards. Make certain the installation environment is clean, dry, and well-lit to avoid accidents and guarantee proper adhesion. Keep the area free of debris, and handle the glass carefully to prevent cracks or breakage. Following these precautions ensures a safe, effective installation process.
Conclusion
Just as a lighthouse guides ships safely through foggy nights, your careful mounting and maintenance guarantee your rear glass stays clear and glare-free. By choosing the right surface, sealing gaps, and using quality materials, you prevent reflections that can blind your view. Regular checks keep your vision sharp, like a steady beacon in a storm. Follow these tips, and your rear window will serve you with clarity and confidence, lighting your way with unwavering focus.